
In October 2025, we released RF-DETR Segmentation, a new state-of-the-art instance segmentation model.
RF-DETR Seg (Preview) is 3x faster and more accurate than the largest YOLO11 when evaluated on the Microsoft COCO Segmentation benchmark, defining a new real-time state-of-the-art for the industry-standard benchmark in segmentation model evaluation.
YOLOv5 is usually associated with object detection and is one of the most popular networks in the world for that task. Recently, image classification was added to YOLOv5, and it keeps getting better! As of September 2022, YOLOv5 supports instance segmentation tasks.
This blog will walk through how to train YOLOv5 for instance segmentation on a custom dataset. If you're interested other tasks, we have guides for those:
Follow along with the How To Train YOLOv5 Instance Segmentation Colab Notebook
This post will walk through:
- Setting up the environment
- Prepare a custom dataset for instance segmentation
- Training YOLOv5 for instance segmentation
- Testing and validating the custom model
Video tutorial showing you how to use YOLOv5 for instance segmentation
Setting Up The Environment for YOLOv5 Segmentation
First, we need to clone the Ultralytics YOLOv5 repo and install all its dependancies.
!git clone https://github.com/ultralytics/yolov5  # clone
%cd yolov5
%pip install -qr requirements.txt  # install

import torch
import utils
display = utils.notebook_init()  # checks
Prepare a Custom Dataset for Instance Segmentation
In order to train YOLOv5 with a custom dataset, you'll need to gather a dataset, label the data, and export the data in the proper format for YOLOv5 to understand your annotated data.
Roboflow Annotate makes each of these steps easy and is the tool we will use in this tutorial.
To get started, create a free Roboflow account. We will be using this American Sign Language dataset from Roboflow Universe as our example dataset. An American Sign Language (ASL) model could be used to automatically interpret ASL.
Instance segmentation can be used in many of the same applications as object detection with the added bonus of getting a detailed polygon for each detected object, instead of just a bounding box.
This can be useful when more detail is required about each detection, like the object's area or shape. Instance segmentation can be helpful in many applications including agricultural, OCR, insurance, and others.
Feel free to follow along with the same dataset or find another dataset in Universe (a community of 66M+ open source images) to use if you don't already have your own data.
If you have your own images ready to go from another source, here's what we'll do.
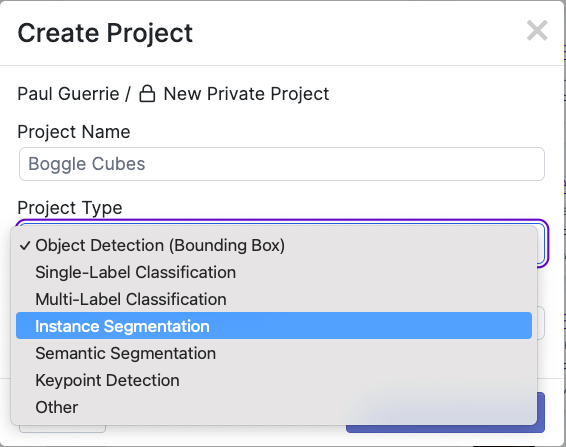
Create a new Project in Roboflow and select Instance Segmentation.
Next, add the data to your Project via API or through our web interface. If you're using a dataset from Roboflow Universe, you can download the data with the annotations already done for you which means you do not need to manually label your images.
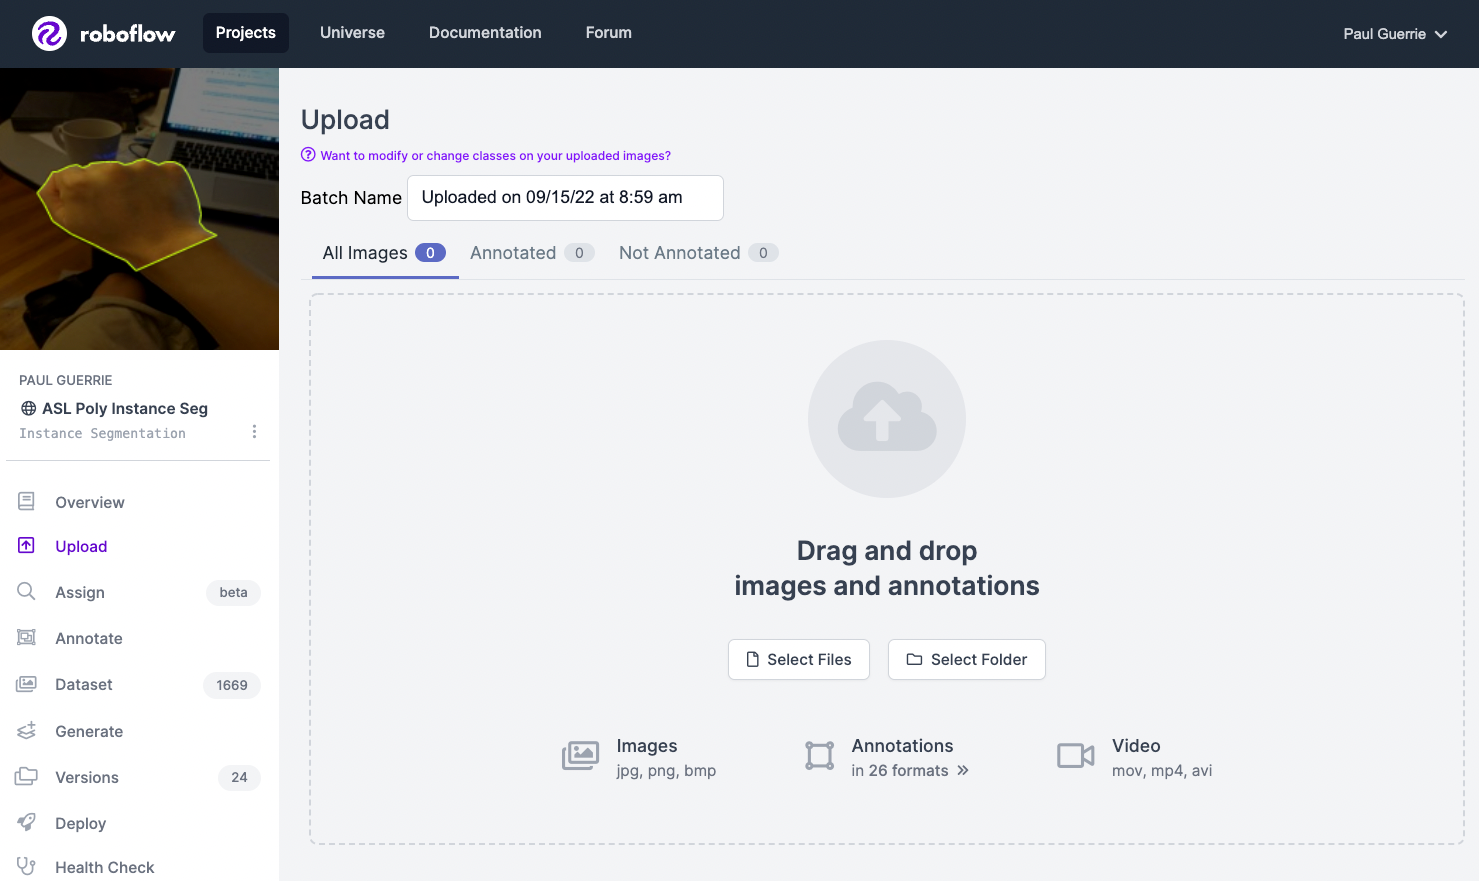
If you drag and drop a directory with a dataset in a supported format, Roboflow will automatically read the images and annotations together. If you only have images, you can label them in Roboflow Annotate. Add your images and assign them to a user in your account to label them (even if this assigning to yourself).
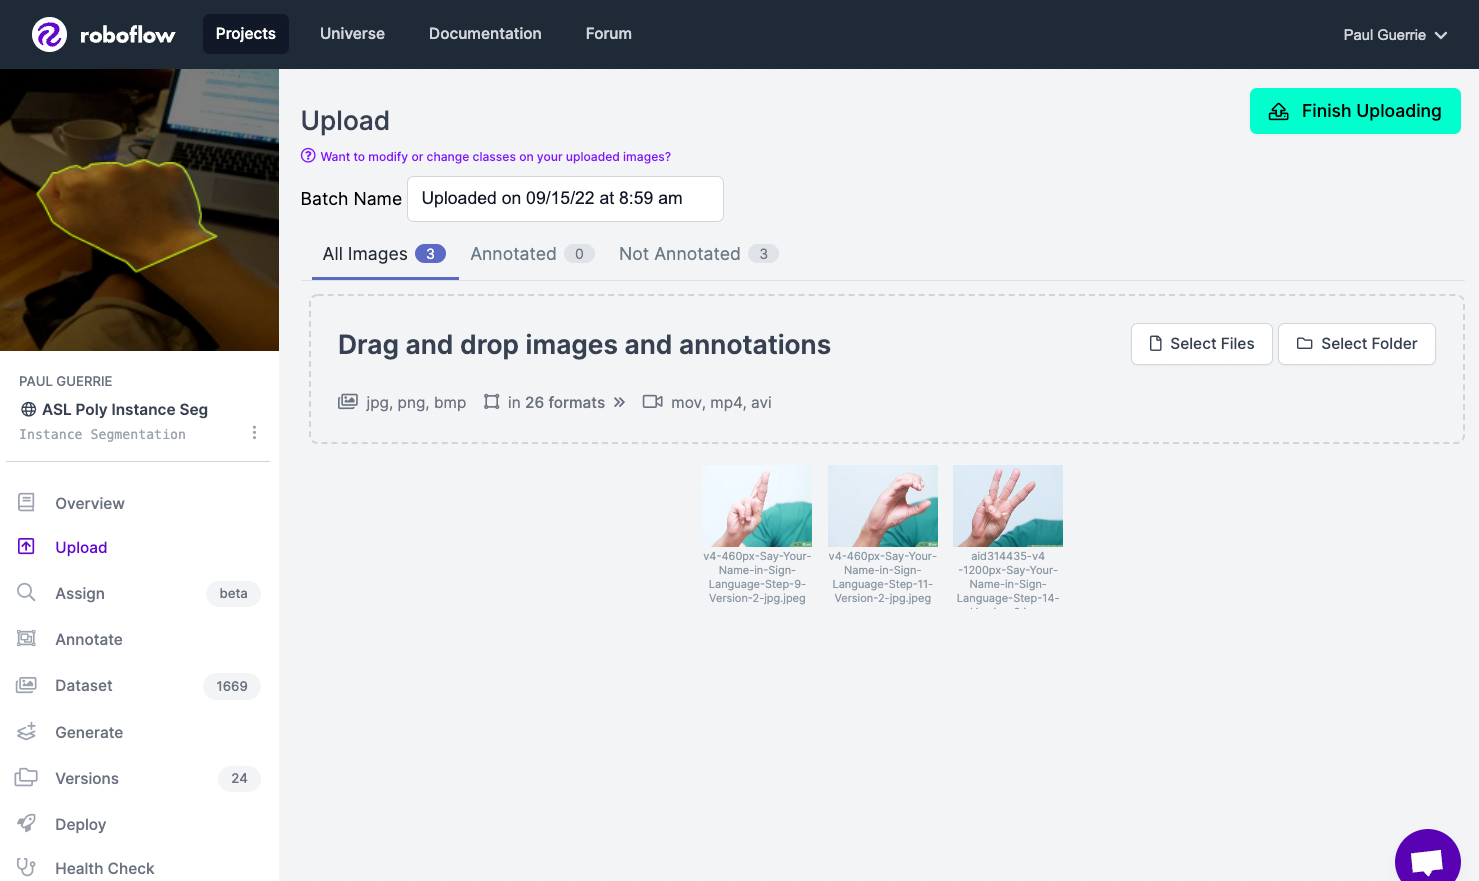
When labeling for instance segmentation jobs, it's important to use polygon annotations, since we want the model to learn the shape of each object.
After labeling the data, we can apply preprocessing and augmentation to increase the size of our dataset and account for cases that may give our model difficulty predicting the object.
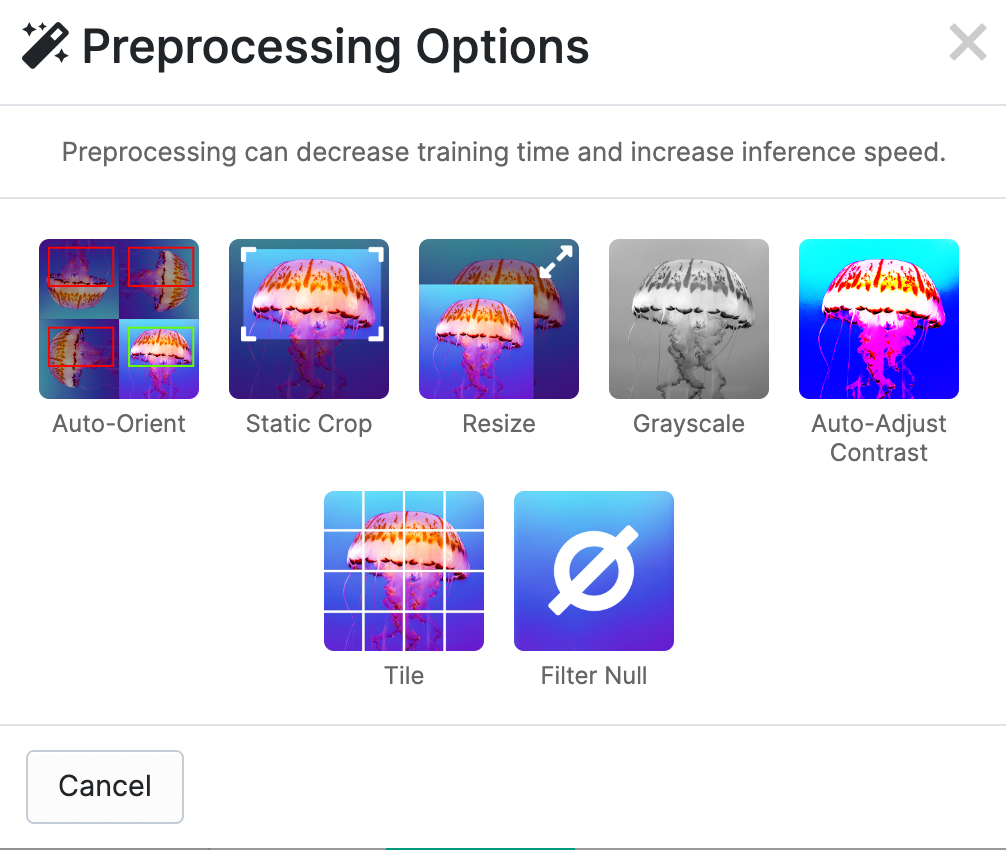
For this tutorial, let's use Auto-Orient and Resize because the photo may have been taken in portrait or landscape and we have different image sizes in our dataset.
We can apply augmentations that could be possible in real world scenarios. Flipping, rotating, and shear will help when our objects can be in multiple orientations so we will apply those. Blur, noise, and cutout can help when anything is blocking the full view of our object or if other objects might enter our images.
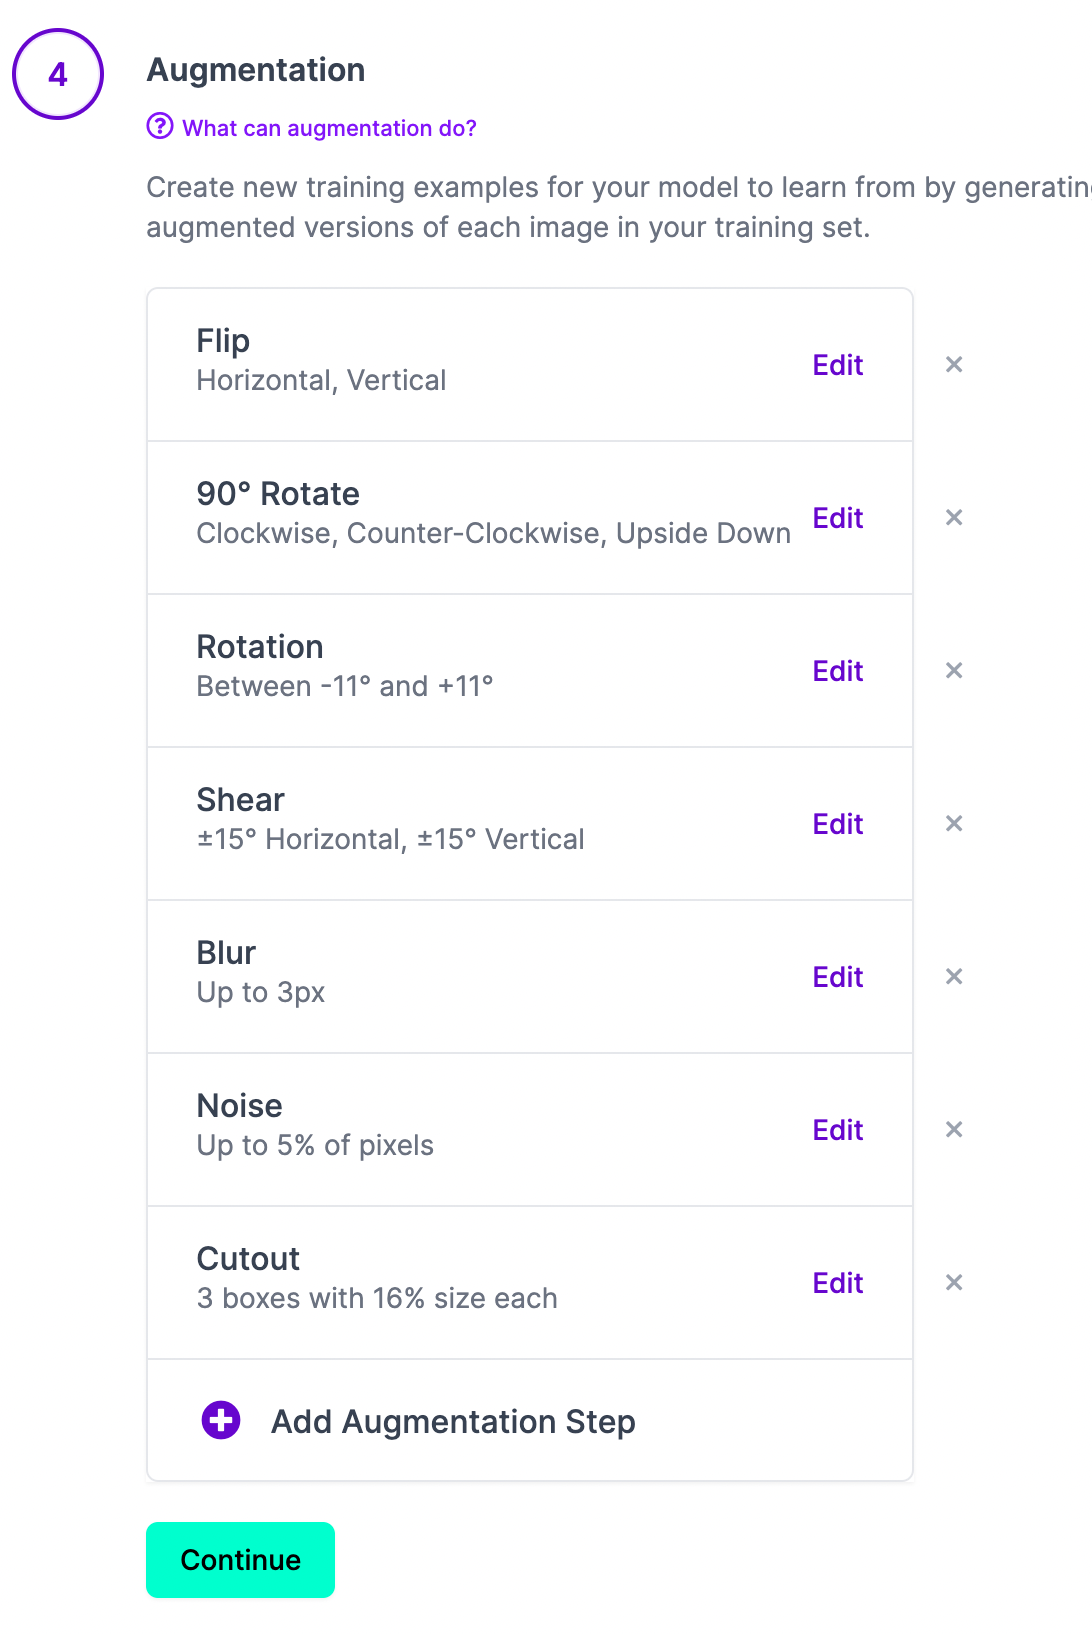
Once we've applied our preprocessing and augmentations, we can generate our dataset which is the final step in creating a dataset to train the model.
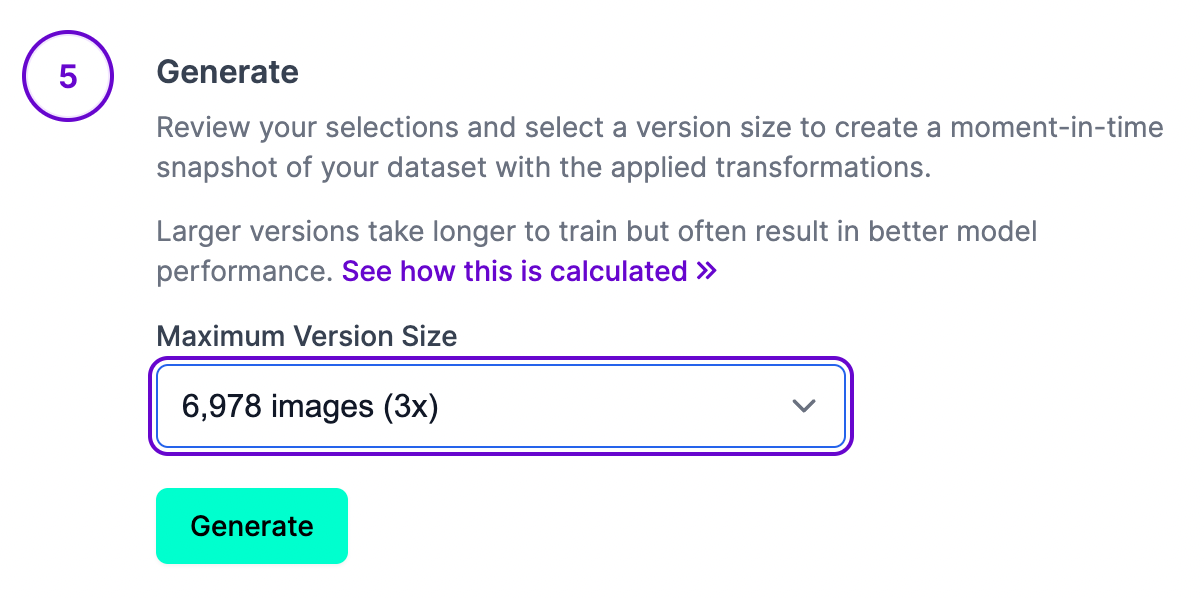
After clicking generate, our dataset will be prepared and can then be exported for training in our custom YOLOv5 instance segmentation notebook pipeline.
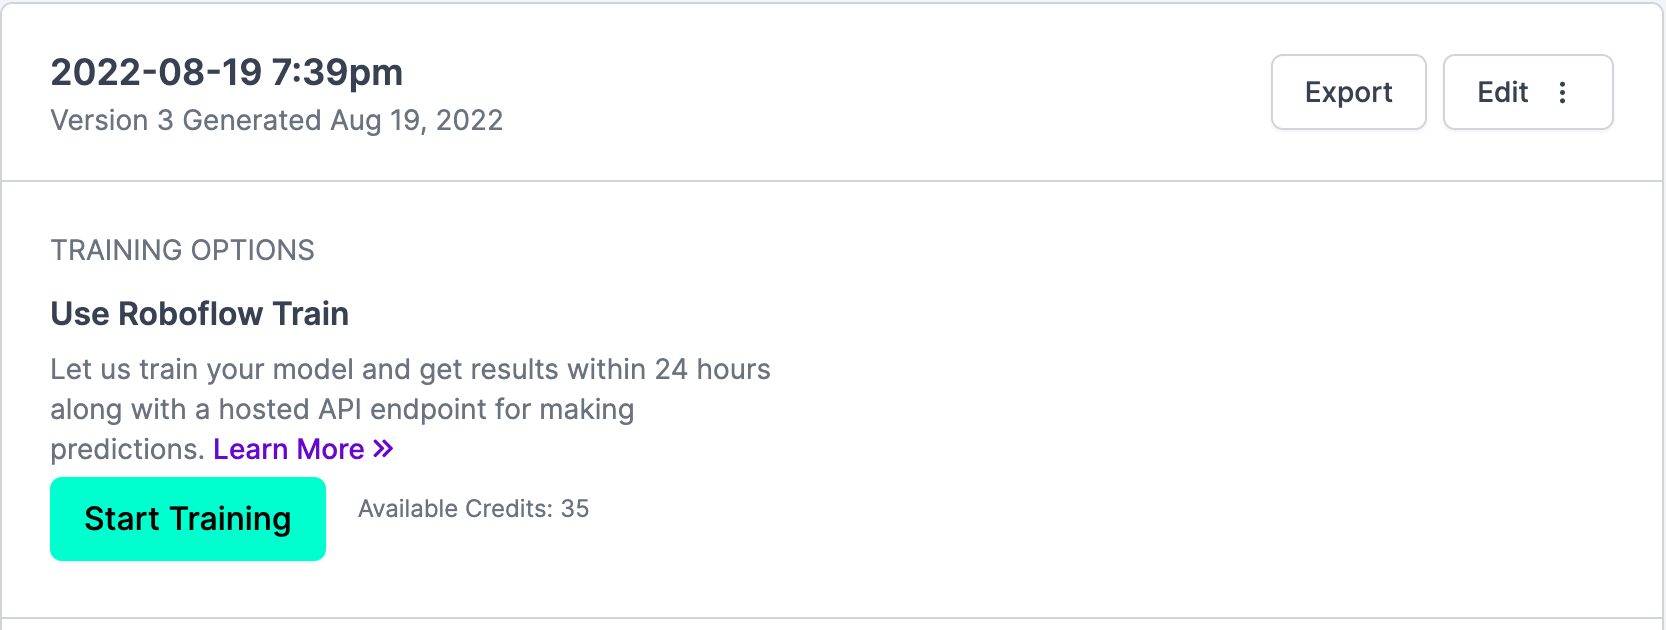
You have multiple options for exporting the dataset and for this tutorial you'll select 'show download code' which you'll use to then access this dataset in the Colab notebook.
Be sure to copy this code snippet that Roboflow generates for us.
Return to the YOLOv5 Instance Segmentation Colab Notebook and paste this generated code snippet. Be sure to paste the code snippet (which includes our Workspace, Project name, and private API key) to below %cd ../datasets/ so that the data downloads to the right place.
!pip install roboflow

%cd ../datasets/

from roboflow import Roboflow
rf = Roboflow(api_key="YOUR API KEY")
project = rf.workspace("workspace-name").project("project-name")
dataset = project.version(1).download("yolov5")
Train YOLOv5 For Instance Segmentation on a Custom Dataset
Before training on our own custom dataset, we'll need do download some pre-trained weights so we aren't starting from scratch. This will accelerate the training process and improve the quality of our results.
%cd ../yolov5
from utils.downloads import attempt_download

p5 = ['n', 's', 'm', 'l', 'x']  # P5 models
cls = [f'{x}-seg' for x in p5]  # segmentation models

for x in cls:
    attempt_download(f'weights/yolov5{x}.pt')
Then, we are ready to train! We can follow the same steps as above with some minor modifications to the input parameters.
!python segment/train.py --img 320 --batch 16 --epochs 100 --data {dataset.location}/data.yaml --weights yolov5s-seg.pt
display.Image(filename=f'runs/train-seg/exp/results.png', width=1200)
Here's the (truncated) output to expect:
Epoch    GPU_mem   box_loss   seg_loss   obj_loss   cls_loss  Instances       Size
       0/99      4.69G    0.09511     0.0684    0.01977    0.08956         30
                 Class     Images  Instances      Box(P          R      mAP50  m
                   all        334        334     0.0129      0.648     0.0367     0.0114     0.0146      0.693      0.047     0.0291

      Epoch    GPU_mem   box_loss   seg_loss   obj_loss   cls_loss  Instances       Size
       1/99      4.76G    0.05718    0.02761    0.02013    0.08223         35
                 Class     Images  Instances      Box(P          R      mAP50  m
                   all        334        334     0.0038      0.987     0.0576     0.0204    0.00377       0.98     0.0644     0.0457

      Epoch    GPU_mem   box_loss   seg_loss   obj_loss   cls_loss  Instances       Size
       2/99      4.76G    0.05415    0.02485    0.01717    0.08046         30
                 Class     Images  Instances      Box(P          R      mAP50  m
                   all        334        334     0.0283      0.403     0.0459     0.0154      0.031      0.445     0.0486     0.0302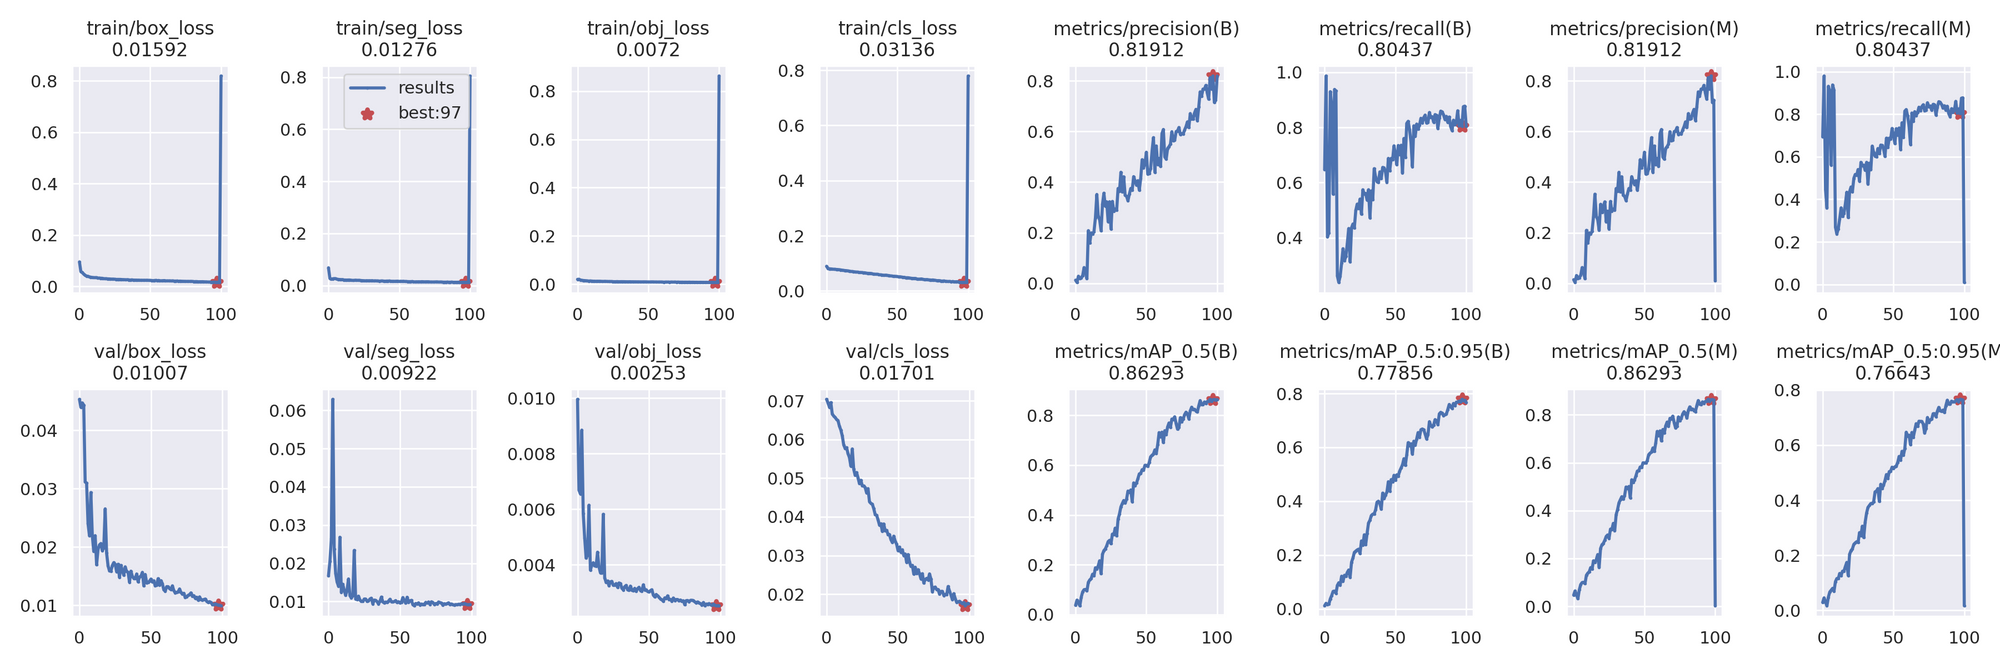
Test and Validate the Custom Model
We can test and validate with our newly trained custom model. This script reports the results of the instance segmentation training.
!python segment/val.py --weights runs/train-seg/exp/weights/best.pt --data {dataset.location}/data.yaml --img 320Next, we can try out inferring with our custom model. We'll pass an example image. In the notebook, note that we grab one of the images that comes in the test set folder that comes from the Roboflow data loader. This ensures that we're truly testing on an image our model did not see in training.
!python segment/predict.py --img 320 --weights runs/train-seg/exp/weights/best.pt --source {example_image_path}
display.Image(filename=f'runs/predict-seg/exp2/{example_image_name}', width=600)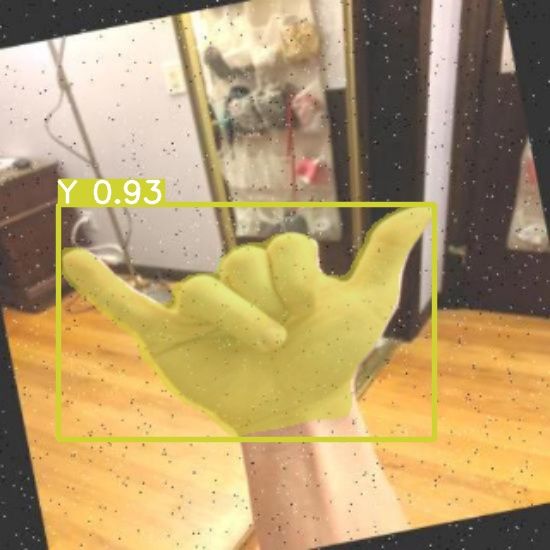
We can see the output of the model overlayed on the test image above, so it looks like our model is beginning to learn, though it can likely benefit from more data and active learning.
Improving the YOLOv5 Segmentation Model with Active Learning
Once you have trained the model, you may want to improve the results by adding additional data going through your computer vision pipeline. Use the Roboflow pip package to make the most of your trained model.
Using the pip package you can download or export images from your dataset, upload images and annotations, run inference on a trained version of your dataset, and improve your model's performance by adding more data to train the model again.
from roboflow import Roboflow
import json

# private api key found in Roboflow > YOURWORKSPACE > Roboflow API
# NOTE: this is your private key, not publishable key!
# https://docs.roboflow.com/rest-api#obtaining-your-api-key
private_api_key = "INSERT API KEY HERE"

# gain access to your workspace
rf = Roboflow(api_key=private_api_key)
workspace = rf.workspace()

# you can obtain your model path from your project URL, it is located
# after the name of the workspace within the URL - you can also find your
# model path on the Example Web App for any dataset version trained
# with Roboflow Train
# https://docs.roboflow.com/inference/hosted-api#obtaining-your-model-endpoint
model_path = "INSERT MODEL PATH HERE"
project = workspace.project(f"{model_path}")

# be sure to replace with a path to your file
# if you run this in Colab, be sure to upload the file to colab, hover over
# the file name, and select the 3 dots on the right of the file name to copy
# the file path, and paste it as the value for "imgpath"
img_path = "INSERT IMAGE PATH HERE"

# establish number of retries to use in case of upload failure
project.upload(f"{img_path}", num_retry_uploads=3)
Below you'll methods to upload images that can help select the right data to then improve the performance of your model. These are out of the box options for you, but feel free to create custom logic that makes the most sense for your domain.
By increasing the available data to train with and focusing on data your model is not handling well, you can improve model performance quickly while in production. We recommend deploying with containers to help make the process of updating your model easy to do.
from roboflow import Roboflow
# obtaining your API key: https://docs.roboflow.com/rest-api#obtaining-your-api-key
rf = Roboflow(api_key="INSERT_PRIVATE_API_KEY")
workspace = rf.workspace()


raw_data_location = "INSERT_PATH_TO_IMAGES"
raw_data_extension = ".jpg" # or ".png", ".jpeg" depending on file type

# replace * with your model version number for inference
inference_endpoint = ["INSERT_MODEL_ID", *]
upload_destination = "INSERT_MODEL_ID"
# set the conditionals values as necessary for your active learning needs
conditionals = {
    "required_objects_count" : 1,
    "required_class_count": 1,
    "target_classes": [],
    "minimum_size_requirement" : float('-inf'),
    "maximum_size_requirement" : float('inf'),
    "confidence_interval" : [10,90],
}

# filtering out images for upload by similarity is available for paid plans
# contact the Roboflow team for access: https://roboflow.com/sales
# conditionals = {
#     "required_objects_count" : 1,
#     "required_class_count": 1,
#     "target_classes": [],
#     "minimum_size_requirement" : float('-inf'),
#     "maximum_size_requirement" : float('inf'),
#     "confidence_interval" : [10,90],
#     "similarity_confidence_threshold": .3,
#     "similarity_timeout_limit": 3
# }

workspace.active_learning(raw_data_location=raw_data_location,
    raw_data_extension=raw_data_extension,
    inference_endpoint=inference_endpoint,
    upload_destination=upload_destination,
    conditionals=conditionals)
Deploy Your Model to the Edge
In addition to using the Roboflow hosted API for deployment, you can use Roboflow Inference, an open source inference solution that has powered millions of API calls in production environments. Inference works with CPU and GPU, giving you immediate access to a range of devices, from the NVIDIA Jetson to TRT-compatible devices to ARM CPU devices.
With Roboflow Inference, you can self-host and deploy your model on-device.
You can deploy applications using the Inference Docker containers or the pip package. In this guide, we are going to use the Inference Docker deployment solution. First, install Docker on your device. Then, review the Inference documentation to find the Docker container for your device.
For this guide, we'll use the GPU Docker container:
docker pull roboflow/roboflow-inference-server-gpuThis command will download the Docker container and start the inference server. This server is available at http://localhost:9001. To run inference, we can use the following Python code:
import requests

workspace_id = ""
model_id = ""
image_url = ""
confidence = 0.75
api_key = ""

infer_payload = {
    "image": {
        "type": "url",
        "value": image_url,
    },
    "confidence": confidence,
    "iou_threshold": iou_thresh,
    "api_key": api_key,
}
res = requests.post(
    f"http://localhost:9001/{workspace_id}/{model_id}",
    json=infer_object_detection_payload,
)

predictions = res.json()
Above, set your Roboflow workspace ID, model ID, and API key.
Also, set the URL of an image on which you want to run inference. This can be a local file.
To use your YOLOv5 model commercially with Inference, you will need a Roboflow Enterprise license, through which you gain a pass-through license for using YOLOv5. An enterprise license also grants you access to features like advanced device management, multi-model containers, auto-batch inference, and more.
To learn more about deploying commercial applications with Roboflow Inference, contact the Roboflow sales team.
Start Running Inference with YOLOv5 Instance Segmentation
You trained YOLOv5 for Instance Segmentation!
Don't forget to checkout the How To Train YOLOv5 Instance Segmentation Colab.
Happy segmenting!
Cite this Post
Use the following entry to cite this post in your research:
Paul Guerrie, Trevor Lynn. (Sep 21, 2022). How to Train YOLOv5 Instance Segmentation on a Custom Dataset. Roboflow Blog: https://blog.roboflow.com/train-yolov5-instance-segmentation-custom-dataset/