
Annotating your images is easy using the free, open source VGG Image Annotator.
In this post we will walk through the steps necessary to get up and running with the VGG Image Annotator so you can quickly, and efficiently label your computer vision dataset for object detection and move on to training.
Looking to Get Started with Annotating Data?
Roboflow provides easy annotation with smart auto-suggested defaults. It's no surprise users annotate faster with Roboflow.
What is the VGG Image Annotator?
VGG Image Annotator is an image and video annotation tool built by researchers at Oxford University.
The VGG Image Annotator is small and lightweight to use and can be run entirely in your web browser. You can use the VGG Image Annotator to draw bounding boxes, or polygons around objects in your images and videos to form a dataset for the supervision of your computer vision models.
The VIA tool also supports the coordination of large scale labeling projects by making it easy for individual annotators to collaborate together as a team.
If you are curious, you can see how the VGG Image Annotator stacks up against other labeling tools by checking out our other articles on how to label images in:
Start a Project in the VGG Image Annotator
To start your first project in the VGG Image Annotator, head over to the online portal for the application.
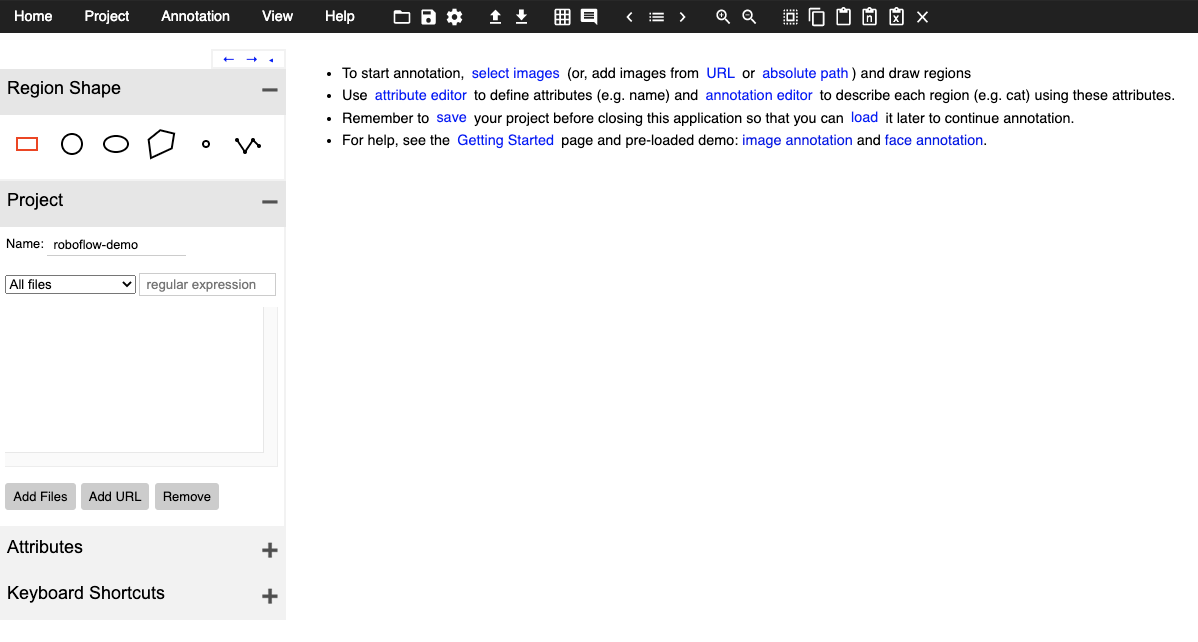
When you get into the portal, you will see a left hand side bar, where you can define the project you are working on.
Load Images Into the VGG Image Annotator
Once you have defined your project, you can load in your files for annotation. On the left, click Add Files. Select the files from your local drive for upload.
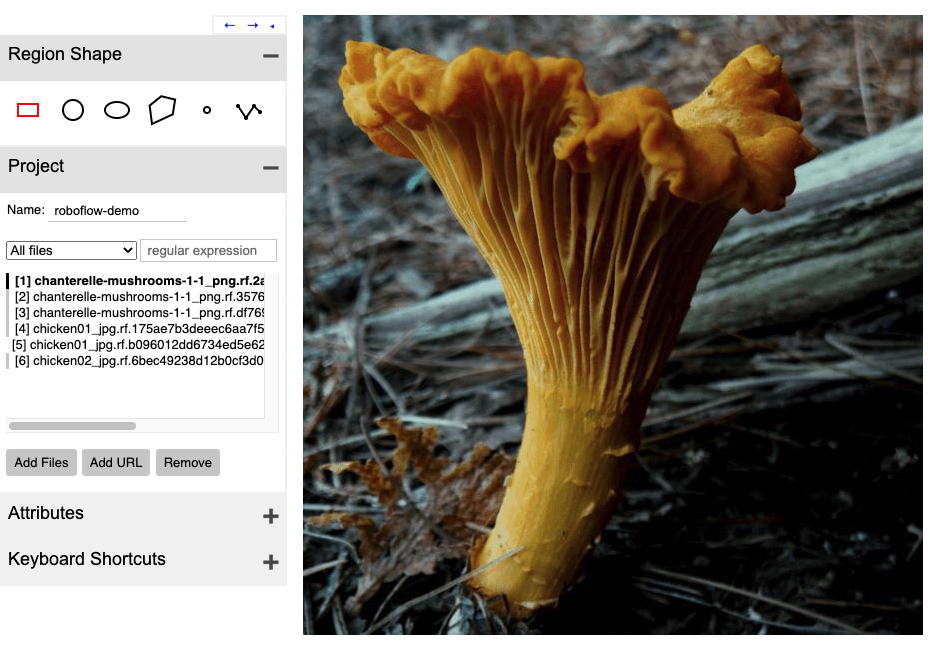
You will see your image files load in on the left hand side bar.
Labeling Images in the VGG Image Annotator
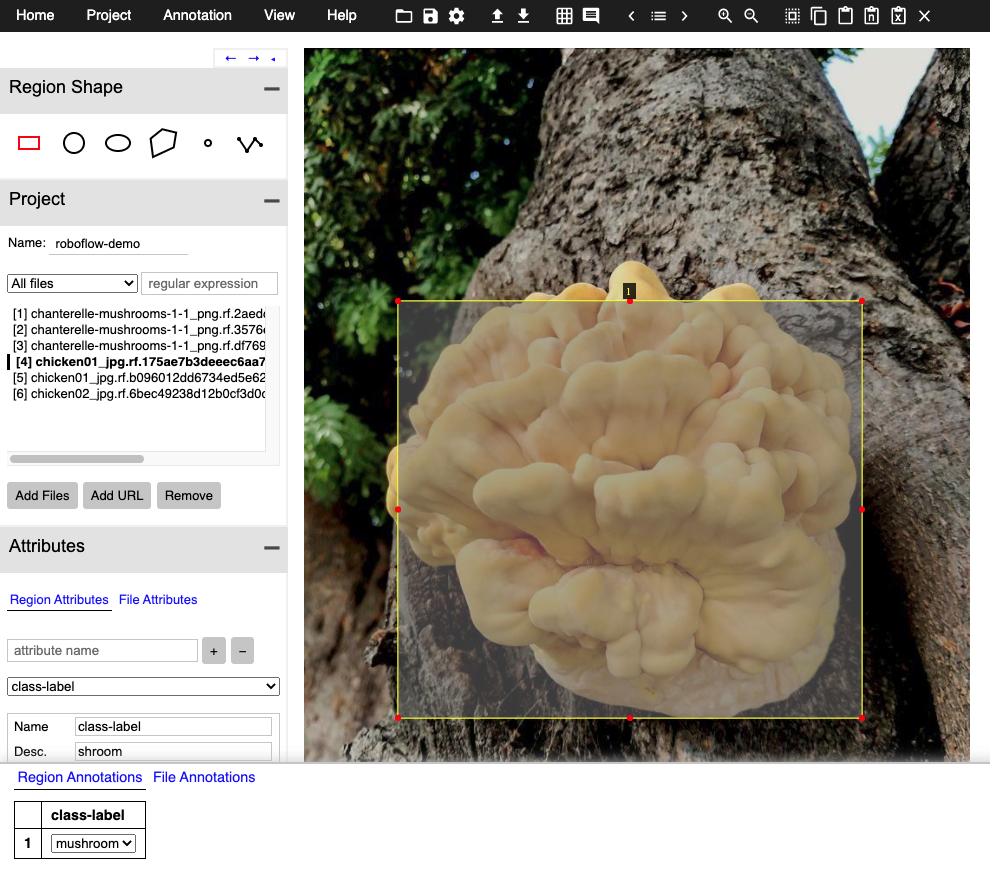
To label an image, choose the shape of annotation you would like to make on the left hand side bar.
Then simply click and draw your annotation around the object you would like to label.
Assigning Class Labels to Your Annotation
Assigning class labels in the VGG Image Annotator is a two step process. First you need to define a Region Attribute. In a one class annotation example, you might just call this Region Attribute "class-label". You can then choose what type of field to assign to that attribute. To move quickly through multiple classes, you can make it a dropdown with options for class labels.
Once you have defined a Region Attribute, then hit Space Bar to toggle the annotation pane. You will see each of your labeled objects with blank Region Attributes. Fill those in accordingly and you have successfully made your annotation.
Making Annotations in the VGG Image Annotator
Exporting Data From the VGG Image Annotator
Once you have finished labeling your dataset in the VGG Image Annotator, you will want to export it for use elsewhere.
To export, hit Annotation in the upper left and then Export Annotations as CSV.
This will download a file to your local file store.
Covert VGG Image Annotator Data to Any Destination
Roboflow makes it easy to convert your VGG Image Annotations to any format you need downstream. For a comprehensive list you can convert between any of 30+ computer vision formats.

To convert your VIA dataset, sign up, create a dataset, and simply drag and drop your data into the roboflow platform.
After upload, you will be able to Generate a dataset version and then Export in a dataset format of your choosing.
Conclusion
Congratulations! Now you know how to use the VGG Image Annotator to supercharge your labeling efforts.
As always, happy labeling.
Cite this Post
Use the following entry to cite this post in your research:
Jacob Solawetz. (Sep 25, 2020). Getting Started with VGG Image Annotator for Object Detection Tutorial. Roboflow Blog: https://blog.roboflow.com/vgg-image-annotator/