
Microsoft VoTT (Visual Object Tagging Tool) is a free, open source annotation tool for building labeled computer vision datasets locally. It still runs, but the project is archived and unmaintained since late 2021, so many teams now label in a browser-based tool like Roboflow Annotate and move straight into training.
VoTT, short for Visual Object Tagging Tool, is Microsoft's free, open source annotation app for drawing bounding boxes and labeling images for object detection.
It is a reasonable do-it-yourself option for a first dataset, though it is worth knowing up front that VoTT is no longer actively maintained, so many teams now label in a browser-based tool and move straight into training.
This guide explains what VoTT is, how labeling in it works, the best practices that carry over to any tool, and how to take a labeled dataset all the way to a trained model.
What Is VoTT?
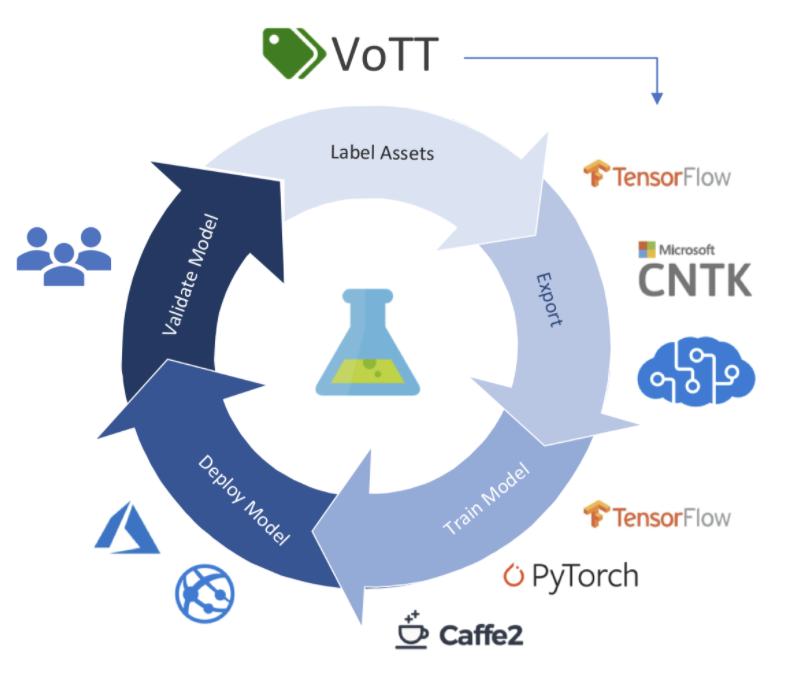
VoTT is an Electron desktop app, built in TypeScript as a React and Redux application, that Microsoft released for building object detection datasets from images and video. You point it at images on your local drive, in Azure Blob Storage, or from Bing Image Search, draw boxes with your mouse or by pressing R, assign classes with number hotkeys, and move through images with the arrow keys. When you are done, it exports your annotations to formats like Pascal VOC XML and JSON for use in downstream training.
One practical note that shapes any decision to adopt it: the VoTT project is archived. Its GitHub repository is read-only and has not been maintained since late 2021, so there are no updates, fixes, or new format support coming. The install packages still run, but you are building on a tool that has stopped moving.
How Labeling in VoTT Works
The core loop is quick once you know the shortcuts. Draw a box by clicking and dragging, or press R to start one. Assign the class with its number hotkey rather than clicking a menu. Step through the set with the arrow keys, and save your progress with Ctrl or Cmd plus S.
To get data out, open the export pane, choose a provider such as Pascal VOC, save the export settings, and export. Because each model expects a specific annotation format, you often convert those VOC files to another format afterward.
Labeling a thermal object detection dataset using Microsoft VoTT
Faster Labeling and Training in Roboflow
If you would rather not install and maintain a desktop tool, you can label in the browser and move straight into training. Roboflow Annotate runs online, and it speeds up the manual work in ways an unmaintained tool cannot: Auto Label drafts annotations across your dataset with a foundation model so you review rather than draw from scratch, and Label Assist pre-draws boxes with a model as you go.
Already have labels from VoTT? Export them as Pascal VOC and upload them to Roboflow, which reads that format and converts between many annotation formats so you are not hand-writing conversions. From a labeled dataset, generating a version and training is a short path:
Create a project and bring in your images, labeled or not. Label anything unlabeled in Roboflow Annotate, or fork a labeled dataset from Roboflow Universe. Generate a dataset version with preprocessing and augmentation, then train RF-DETR, a real-time detection transformer that fine-tunes fast and ships under a permissive Apache 2.0 license. The full walkthrough is in the guide to training a custom RF-DETR model.
Installing VoTT Software
Once you have an unlabeled corpus of images, you are ready to install the VoTT labeling software.
Download VoTT Installer
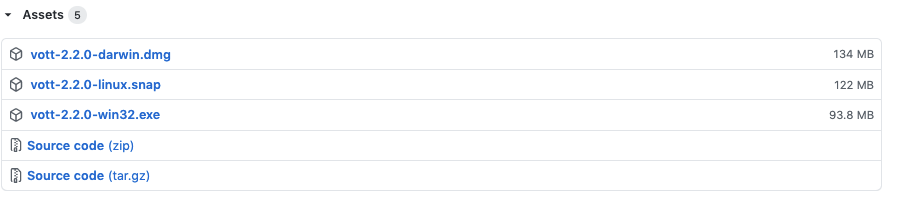
The easiest way to install VoTT locally is by using the installation packages from each release. Installation packages are listed for VoTT on Mac OSX, VoTT on linux, and VoTT on Windows.
Navigate to the Assets box, and download the file you need for your operating system.
I am building VoTT on Mac OSX. So I will drag VoTT over to my Applications folder.
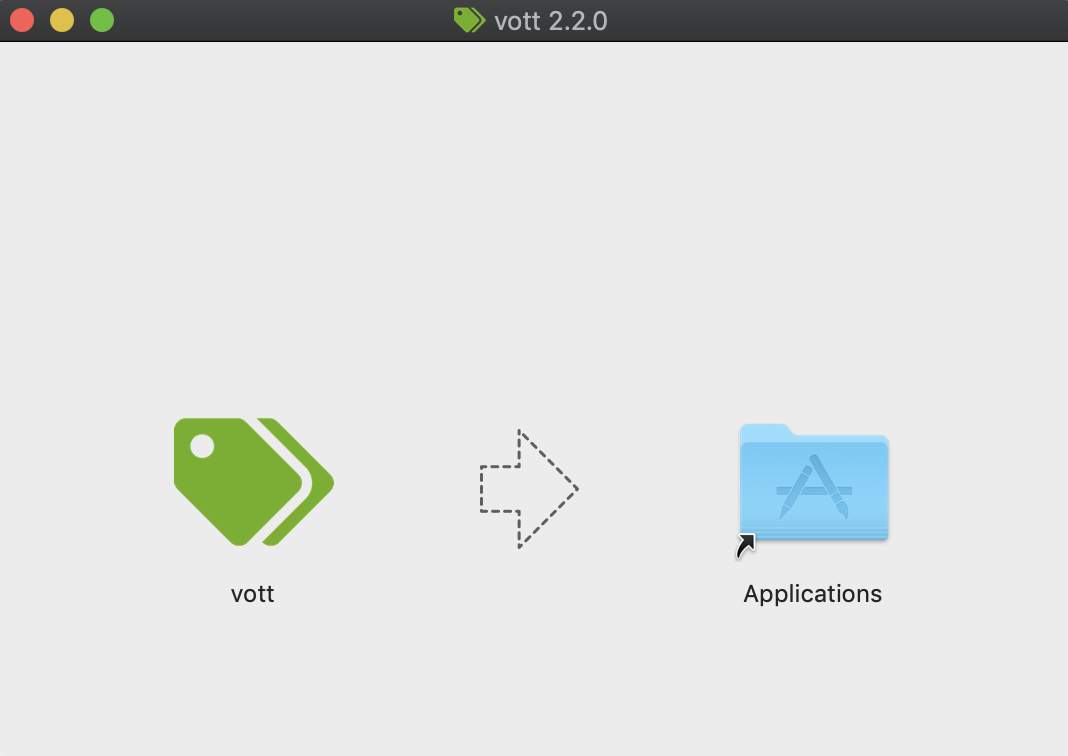
All set ✅
Optional: Compile VoTT from Source
If you want to make tweaks to VoTT, you may want to compile and run the VoTT tool from source.
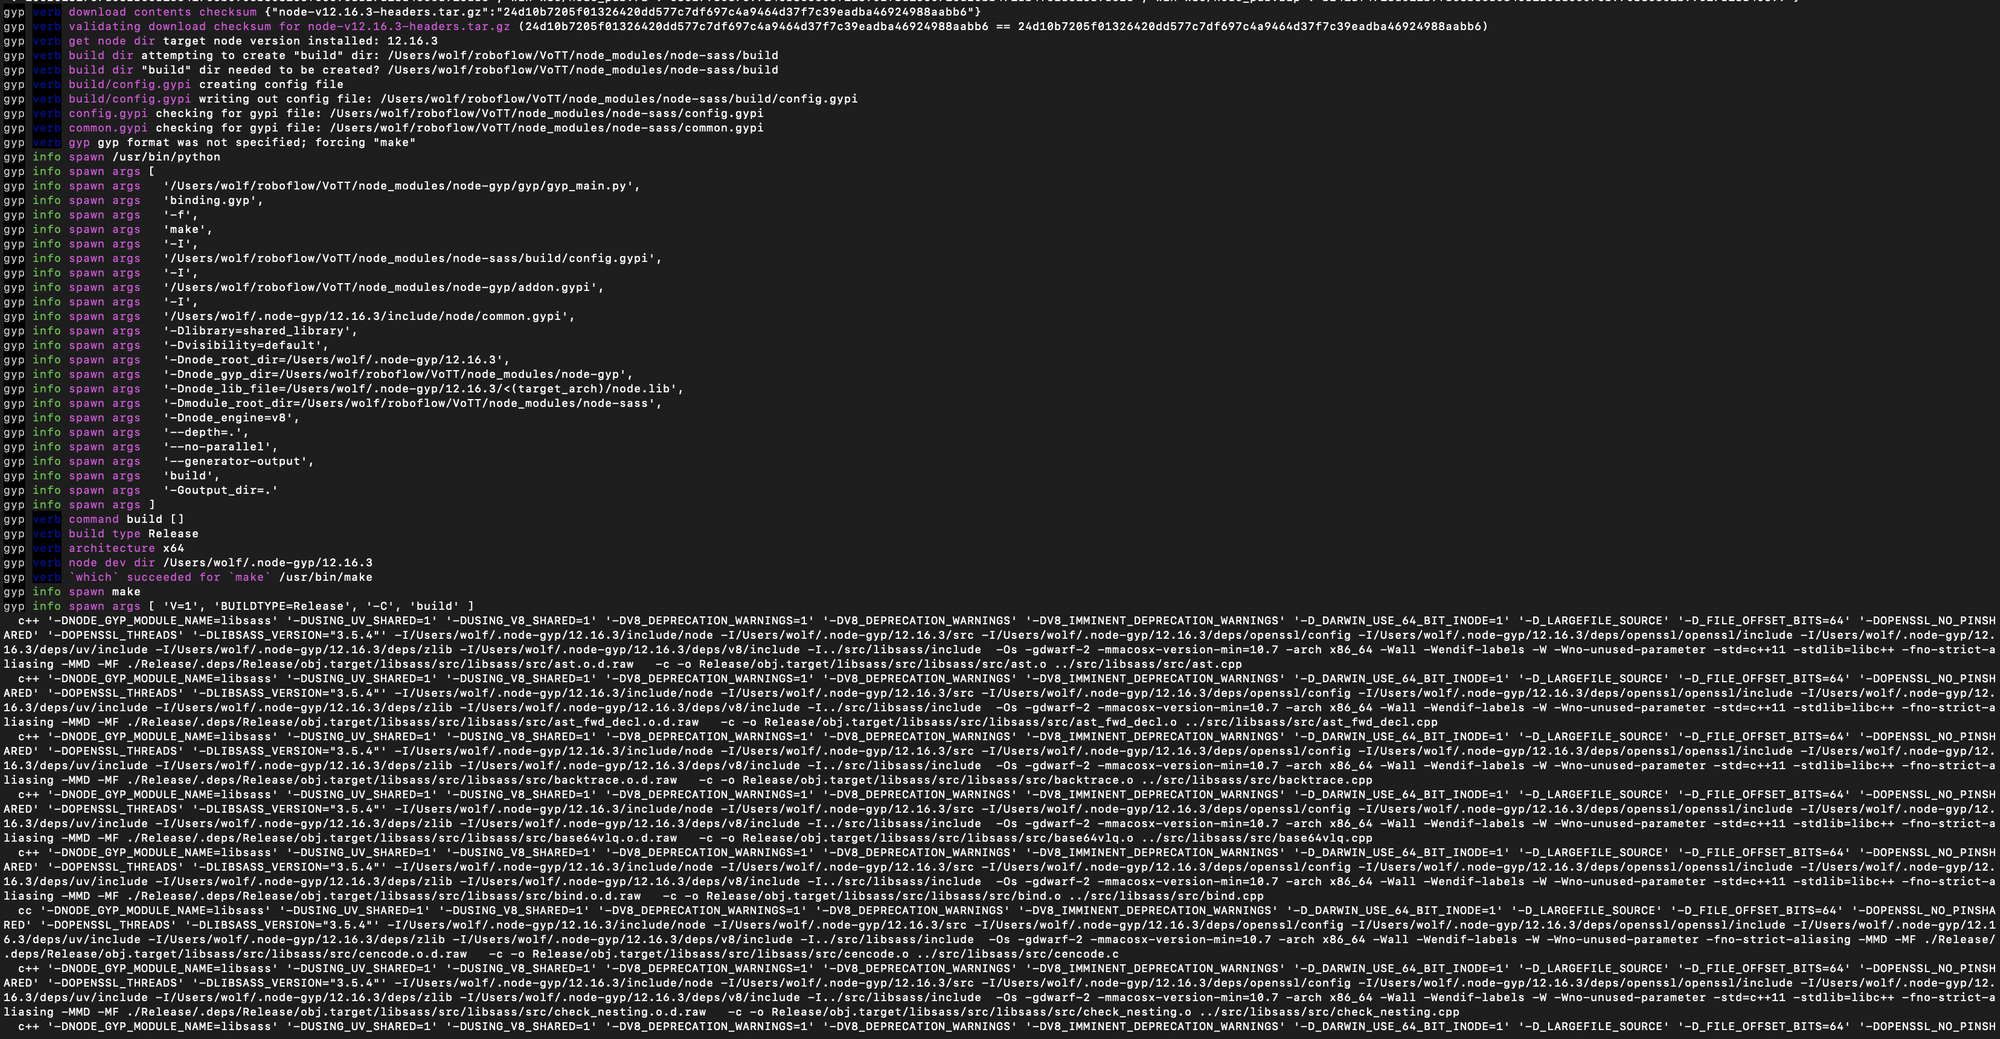
To compile VoTT from source, you first need to install NodeJS and NPM. Download and run the install file. You will know you are successful when you can run node -v and npm -v.
Then to start the VoTT tool, run the following lines of code in the directory of your choosing (VoTT will be downloaded to your local machine)
 git clone https://github.com/Microsoft/VoTT.git
 cd VoTT
 npm ci
 npm start
You will see a lot of strange printouts as npm is setting up the project.
Again, if you're just getting started, I recommend using the VoTT install packages rather than building from source.
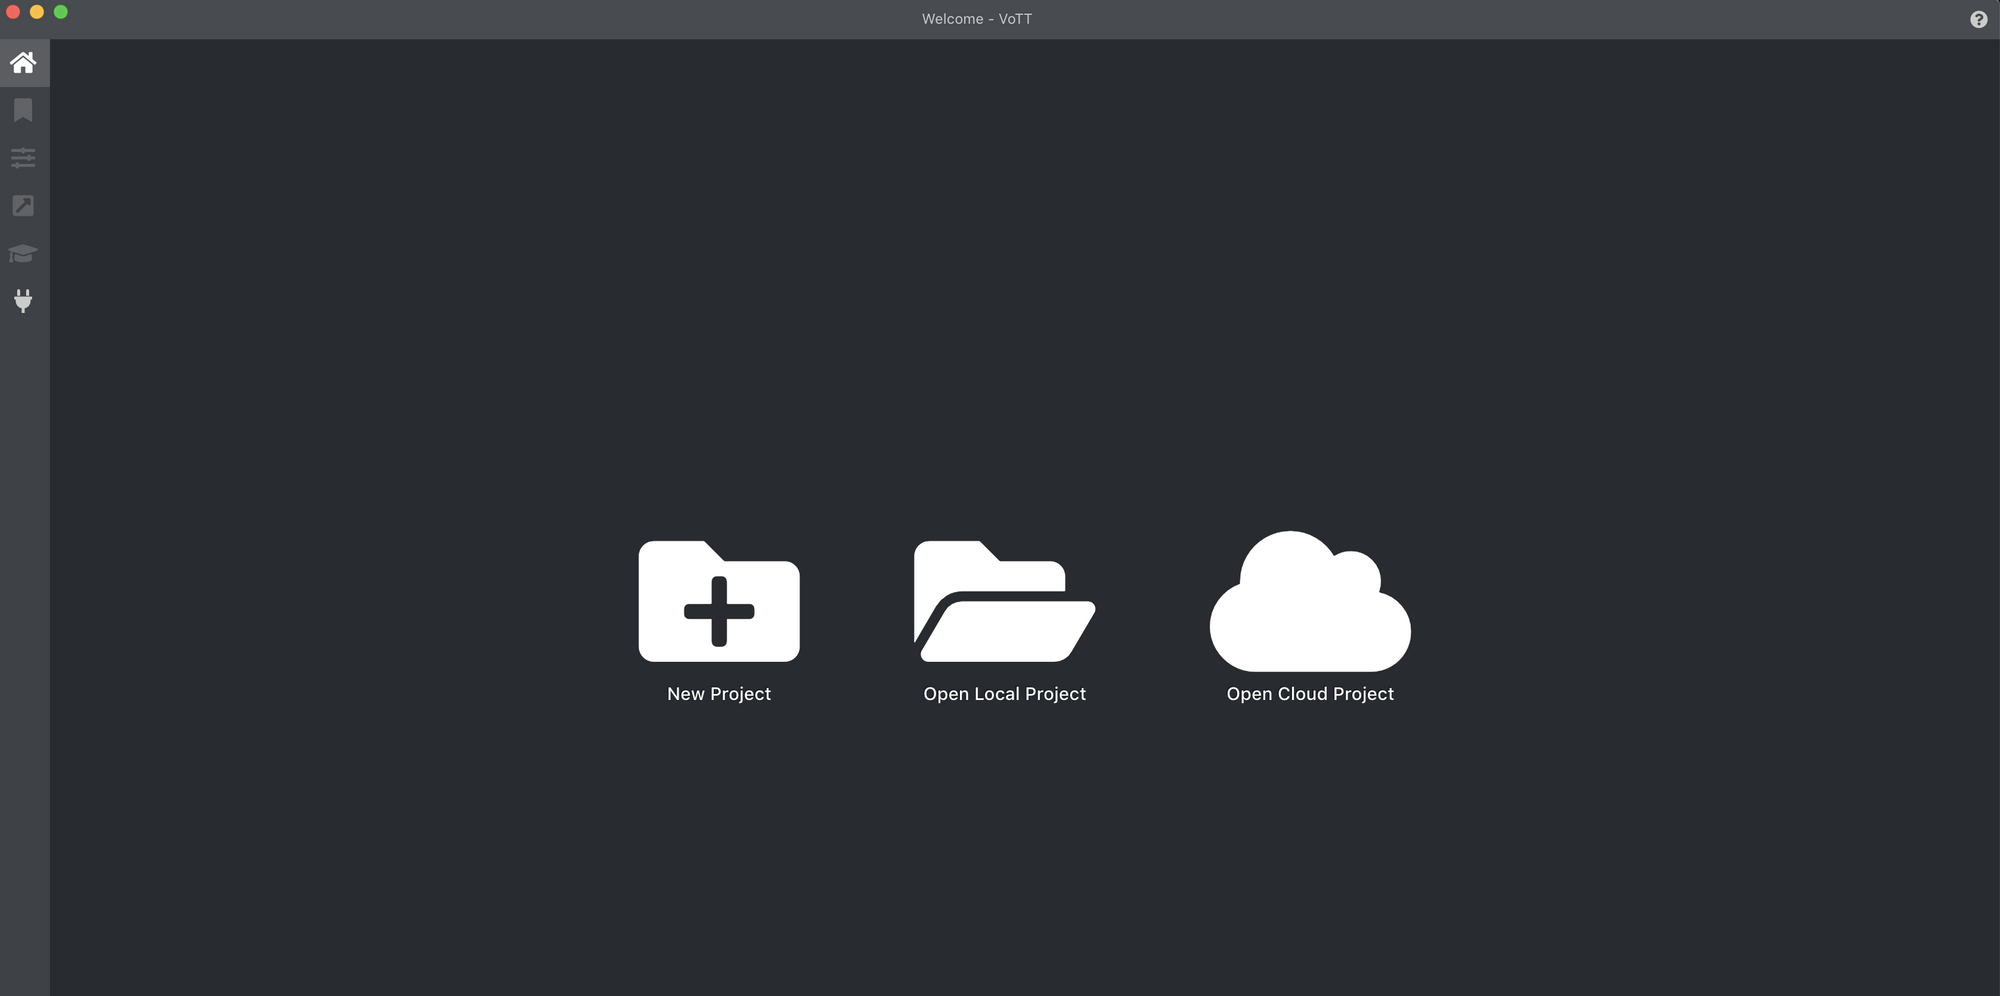
Starting an Image Annotation Project in VoTT
Once you have started VoTT in your choice location (locally installed, built from source, or cloud server), you can go ahead and start your labeling project.
Click New Project. And fill in the relevant fields:
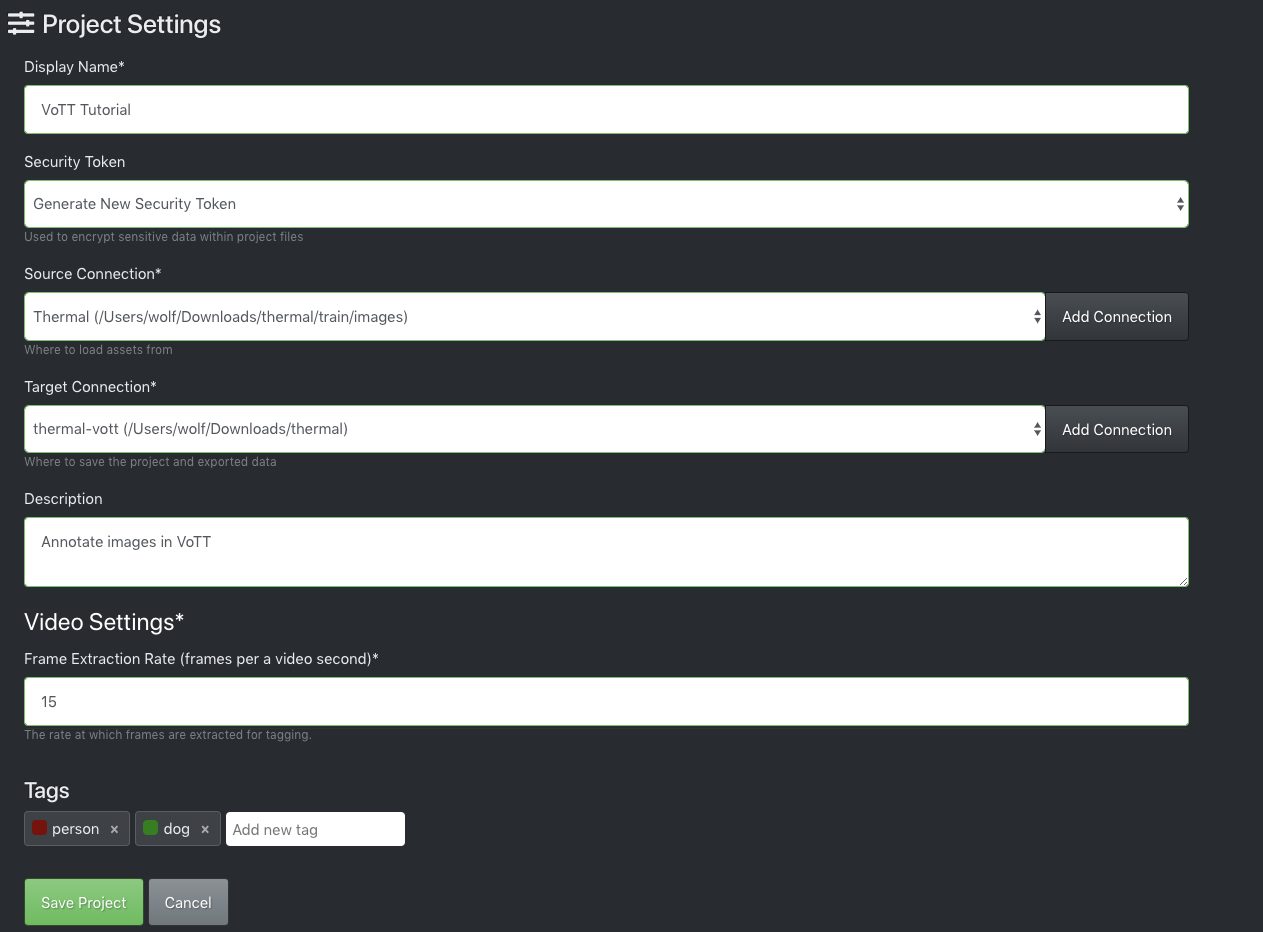
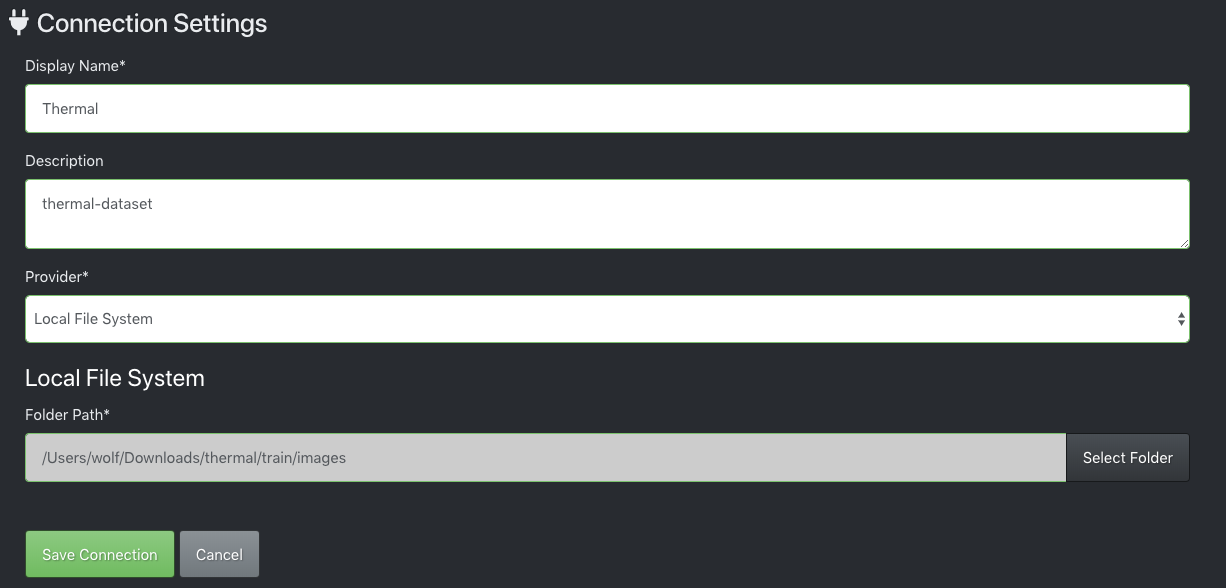
For Source Connection map to the folder on your drive that contains the raw image dataset.
Once you have kicked off your project, you will see your images in the tool, ready for labeling.

How to Use VoTT Labeling Shortcuts
In order to label a dataset quickly, you will want to leverage the shortcuts available in VoTT.
You can draw a box just by clicking and dragging. You can also start a box by typing capital R on the keyboard.
Your class labels will be hot-keyed, so you can just hit the number hotkey to automatically match the box to the correct class.
You can move through images by using the arrow keys.
Ctrl or Cmd + S saves your progress.
VoTT Labeling Best Practices
When you are labeling images in VoTT, keep these best practices in mind. Ultimately, you are thinking downstream for your modeling task. Any errant annotations or ambiguities should be resolved through your labeling process.
- Label around the entire object
- Keep bounding boxes tight to the object
- Label occluded objects by drawing a box around the whole object
- Label objects that are partially out of frame
- Beware of choosing class labels that often overlap
Exporting Data from VoTT
Once your dataset is fully labeled, you can hit Ctrl or Cmd + S to save your progress.
Navigate to the export button one the left side of the tool.
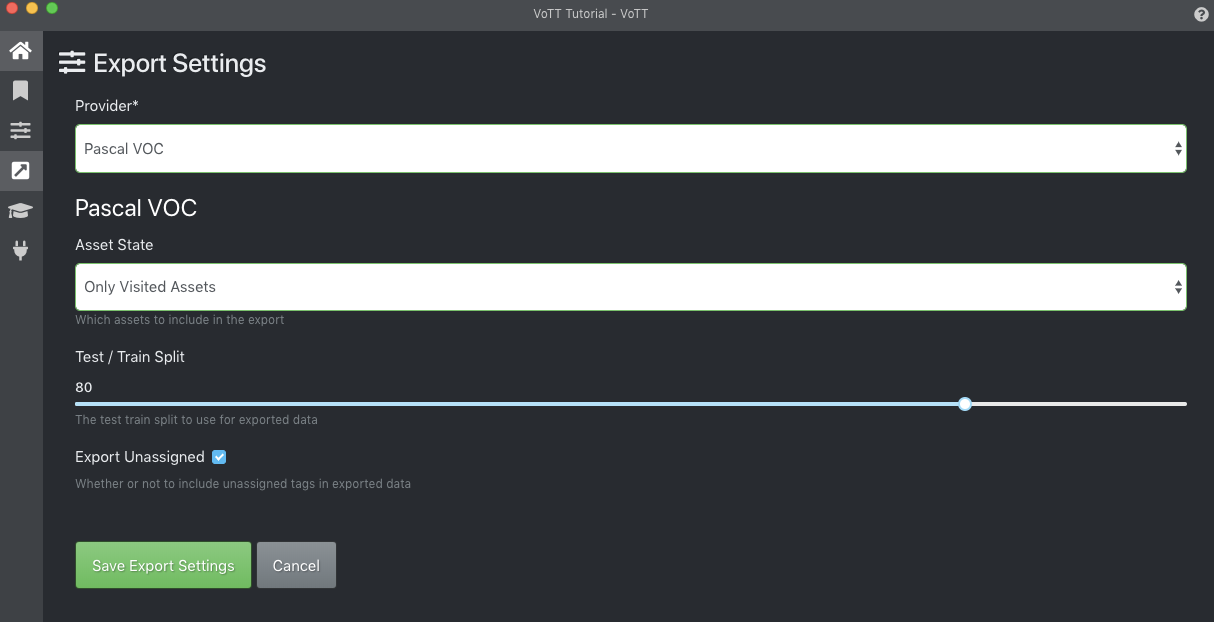
Choose the annotation format you would like to export in Provider. We recommend outputting Pascal VOC and then loading into Roboflow for dataset conversion to any annotation format. Each model uses a specific object detection annotation format so you will need to convert your VOC XML files to another format.
Then Save Export Settings.
Finally, to export your dataset, click the export button in the top pane. The dataset will export to the location you provided when you set up the dataset.
Use Your Labeled Dataset from VoTT in Roboflow
Once you have labeled your dataset in VoTT, we recommend uploading your dataset in Pascal VOC format to Roboflow.
From there, you can check the health of your computer vision dataset, manage class labels, export to any dataset format, and use state of the art computer vision models.
Depending on the model you choose to train, you may need to convert your VoTT dataset into other formats. We make it easy (and free) to convert VoTT to 15 other formats from JSON or CSV. Popular conversion are to CreateML, OpenAI CLIP, and COCO.
Is VoTT still maintained?
No. The VoTT GitHub repository is archived and read-only, with no updates since late 2021. The install packages still work, but the tool is not receiving fixes or new features, which is the main reason to consider a maintained alternative.
What format does VoTT export?
VoTT exports annotations in formats including Pascal VOC XML and JSON. Since training frameworks each expect a specific format, you typically convert those files afterward, which Roboflow can do automatically on upload.
What is a good alternative to VoTT?
For a browser-based tool that is actively maintained and connects directly to training, Roboflow Annotate handles labeling with Auto Label and Label Assist, then takes you straight into generating a dataset and training a model.
Start Labeling and Training in One Place
You can label your images and train a model on them in the same browser-based workflow, with no desktop install to maintain. Create a free Roboflow account to annotate your dataset and train your first model.
VoTT image labeling and annotation guide
Cite this Post
Use the following entry to cite this post in your research:
Erik Kokalj. (Mar 9, 2026). VoTT for Image Annotation and Labeling. Roboflow Blog: https://blog.roboflow.com/vott/