
Raw video files from security cameras, webcams, or field recordings are a practical source of computer vision training data, but turning them into labeled datasets requires a clear workflow for frame extraction, sampling rate selection, and efficient annotation. This guide covers the full process in Roboflow: extracting frames at a chosen rate, using the Repeat Previous tool to carry annotations across similar consecutive frames, auto-labeling with Roboflow Rapid via text prompts, and using Roboflow Agent to build and deploy video processing pipelines in plain English. The same annotated frames feed directly into model training and can later accelerate annotation on additional videos through Label Assist.
Oftentimes, the visual data you want to analyze comes in the form of video. It may be security camera footage, YouTube videos, or webcam recordings. We know how to use Roboflow with images, but how does it work with video?
For most computer vision models, the best way to use video is to treat it as a sequence of individual images. As shown in our tutorial on how to get predictions from your model on videos, you can split a video into frames and process each frame independently. The same approach can be used to extract training data.
In this guide, we will walk through the complete workflow for processing video in Roboflow. You will learn how to:
- Extract training frames at the optimal sampling rate directly in your browser.
- Accelerate manual annotation using time-saving tracking tools like Repeat Previous.
- Use Roboflow Rapid to auto-label frames and train a custom detection model from a short video clip in minutes using text prompts.
- Deploy Roboflow Agent to architect complex video-processing deployment pipelines using natural language.
Here is how to turn raw video files into deployed computer vision models.
How to Extract Video Frames
While you can use cryptic command-line tools like ffmpeg, the easiest way to train a computer vision model on video is with Roboflow.
Simply upload a video (here's the example I'll use) through the platform, and you will be able to select a frame sampling rate. The higher the frame rate, the more images you will extract from your video, but they are also more likely to be similar to each other.
Processing a video in Roboflow to extract frames for annotation.
Experiment to find a frame rate that strikes a good balance between providing enough training data for your model to learn from and avoiding unnecessary workload for your annotators.
How to Annotate Video Frames
Once you have extracted your frames, you can use all the features of Roboflow Annotate that you already know, including Label Assist with any models you have previously trained using Roboflow Train.
There is also one additional feature that is especially useful for video workflows: Repeat Previous.
The Repeat Previous tool copies the annotation from the last image you annotated. Since the same objects often appear across multiple video frames, this allows you to track objects over time by making small adjustments to the previous annotation instead of starting from scratch.
How to Use Roboflow Rapid for Video Annotation
Roboflow Rapid is a tool that lets you quickly build and deploy custom computer vision models using just a few images or a short video along with text prompts.
Instead of manually annotating hundreds of images or video frames, you can simply enter prompts like “truck,” “helmet,” or “person,” and Rapid will automatically find and label those objects for you.
The process for using Rapid with videos is:
- Upload a short video
- Select a 10-second segment from the video
- Enter text prompts describing the objects you want to detect
- Rapid automatically labels the data
- A custom object detection model is trained automatically
The short video below demonstrates the process of building an object detection model with Rapid.
We start with a video of cars, and by the end of the process, we have a detection model trained on the uploaded video that can identify cars in videos.
Using Roboflow Rapid to train a model on video data
You can also skim through the video to see how the newly built object detection model works across video frames, or run detections throughout the video, as shown below.
Running the trained model from Roboflow Rapid on a video snippet.
Once detections are generated throughout the video, you can adjust the bounding boxes in any frame to update the model, as shown below:
Adjusting the annotated bounding boxes in Roboflow Rapid on the video snippet.
You can also use the “Improve Model” feature in Roboflow Rapid to add more images and retrain the model for further improvement.
In this way, Roboflow Rapid makes it easy to go from a video to a detection model trained on that video in just a few minutes and with only a few clicks.
How to Use the Roboflow Agent for Video Tasks
The Roboflow Agent is a capability within the Roboflow ecosystem that allows you to build computer vision applications using natural language instead of writing extensive code.
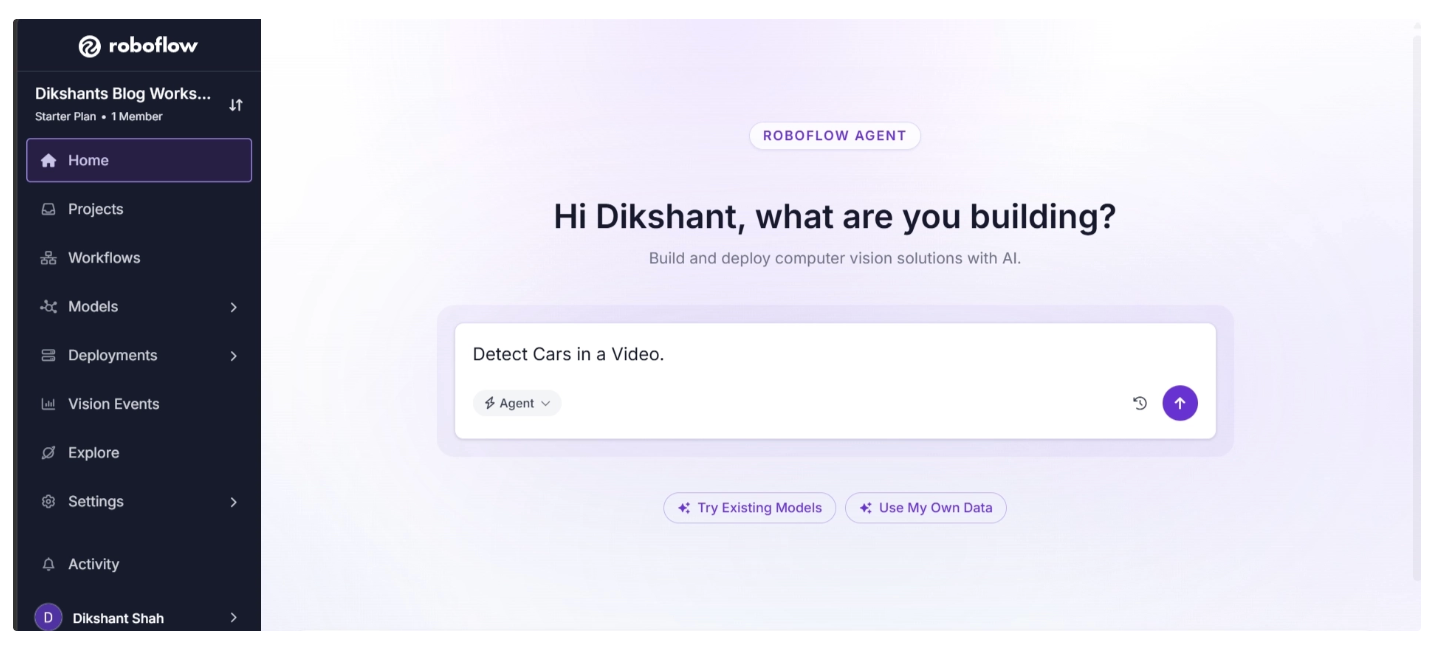
In simple terms, it is an AI assistant that can design and run complex computer vision pipelines for you with ease. You can access it directly from the Roboflow app home page.
For example, you can ask it to detect cars in videos.
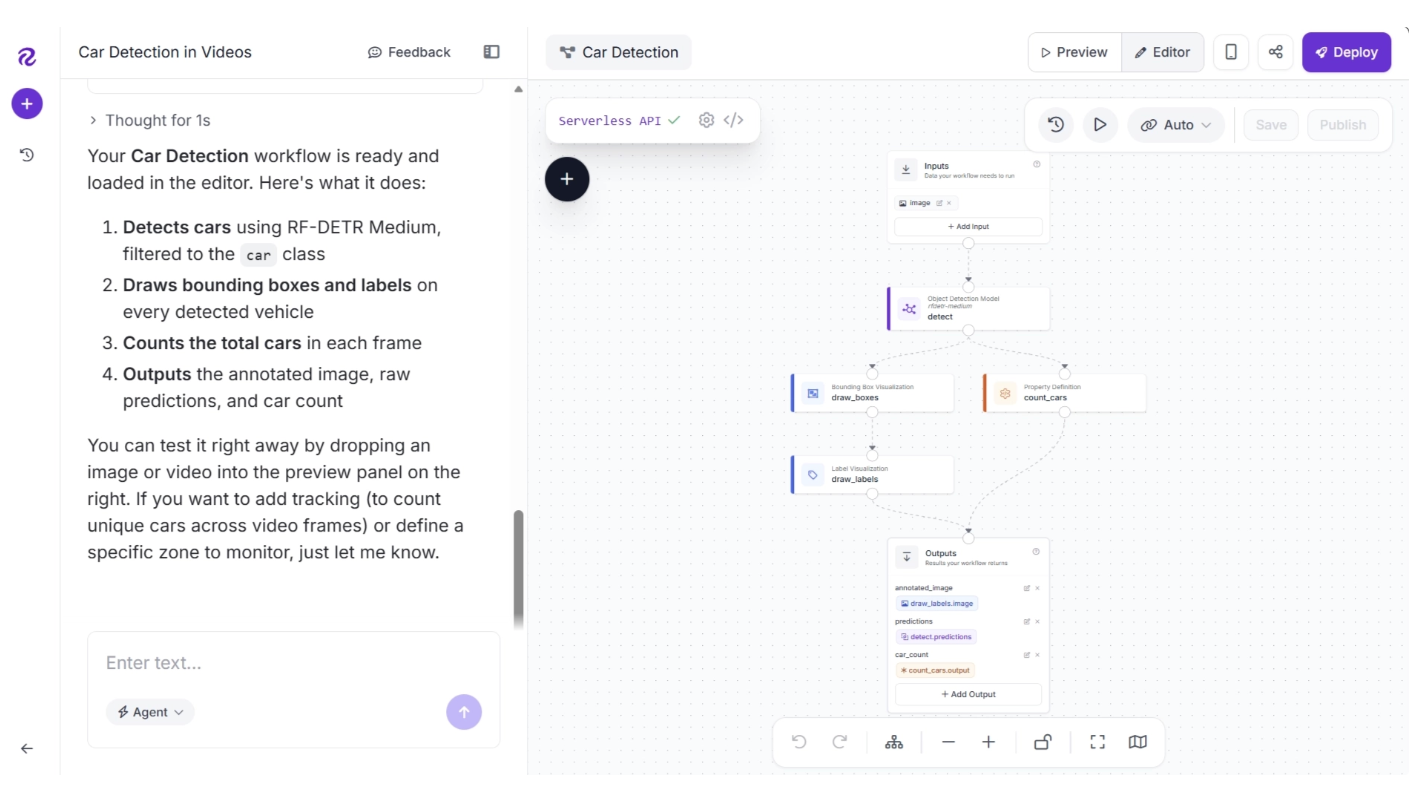
It then processes your request, asks the right follow-up questions, and builds a workflow based on your responses, as shown below:
It also provides a UI that lets you test the workflow on images or videos through a built-in preview interface, as shown below:
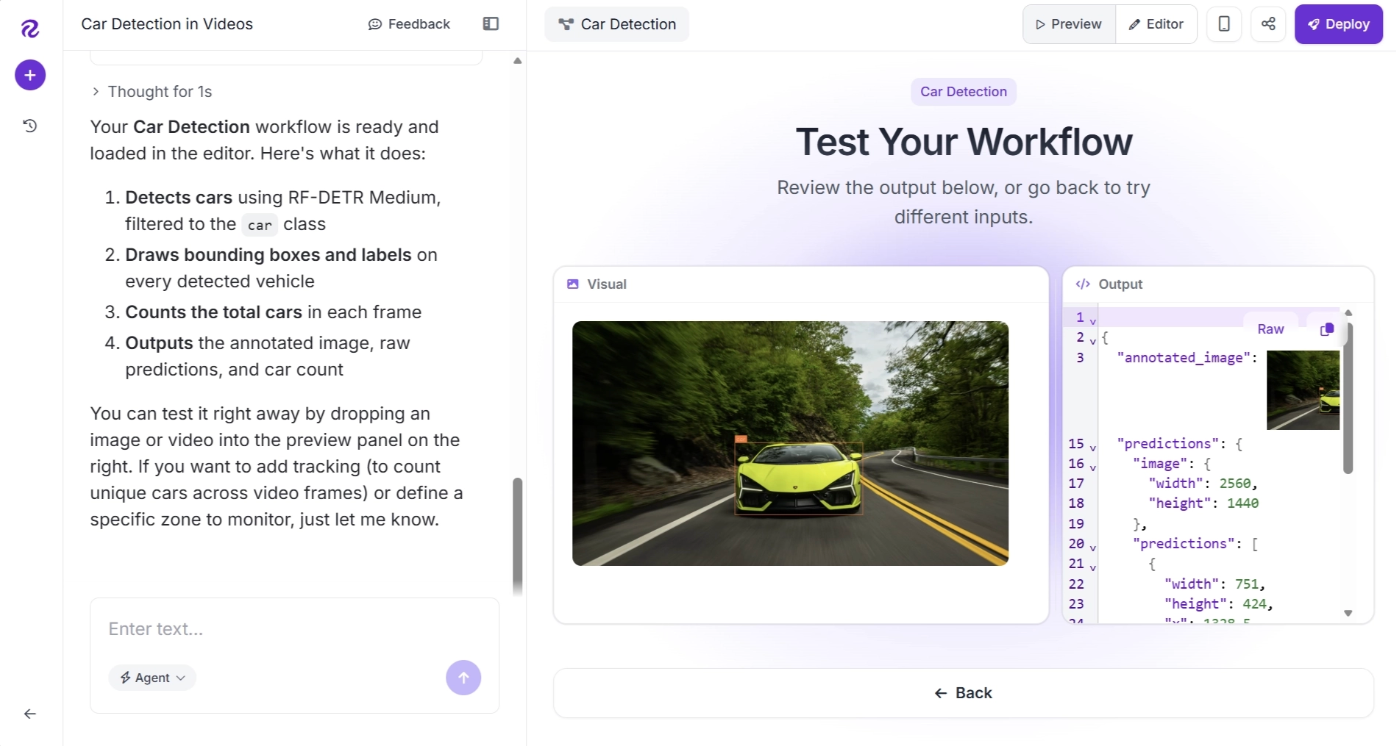
The example below shows the output of the car detection workflow created by Roboflow Agent above.
Output video from the car detection workflow created using Roboflow Agent
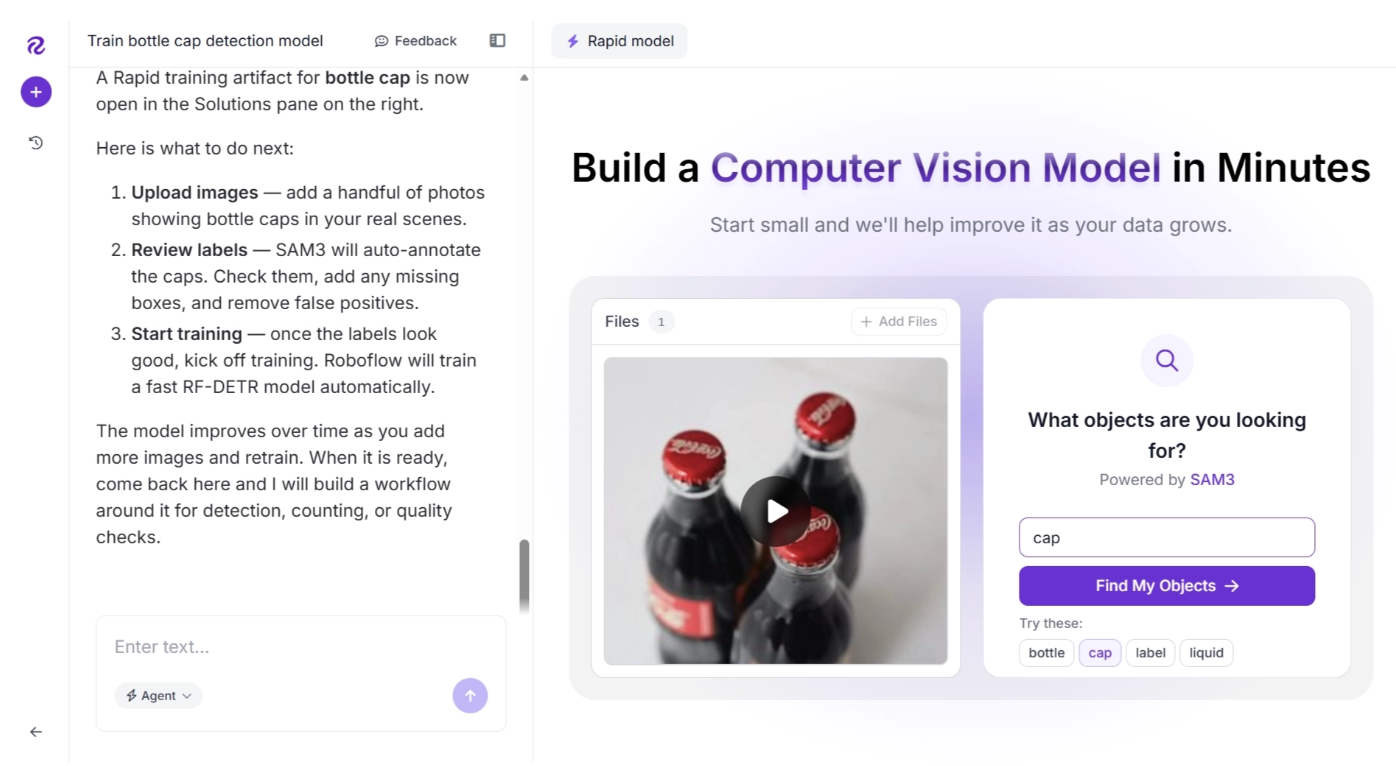
You can also ask Roboflow Agent for the best way to carry out a computer vision task. For example, I asked it how to train a detection model to detect bottle caps for a video (here's the example I'll use).
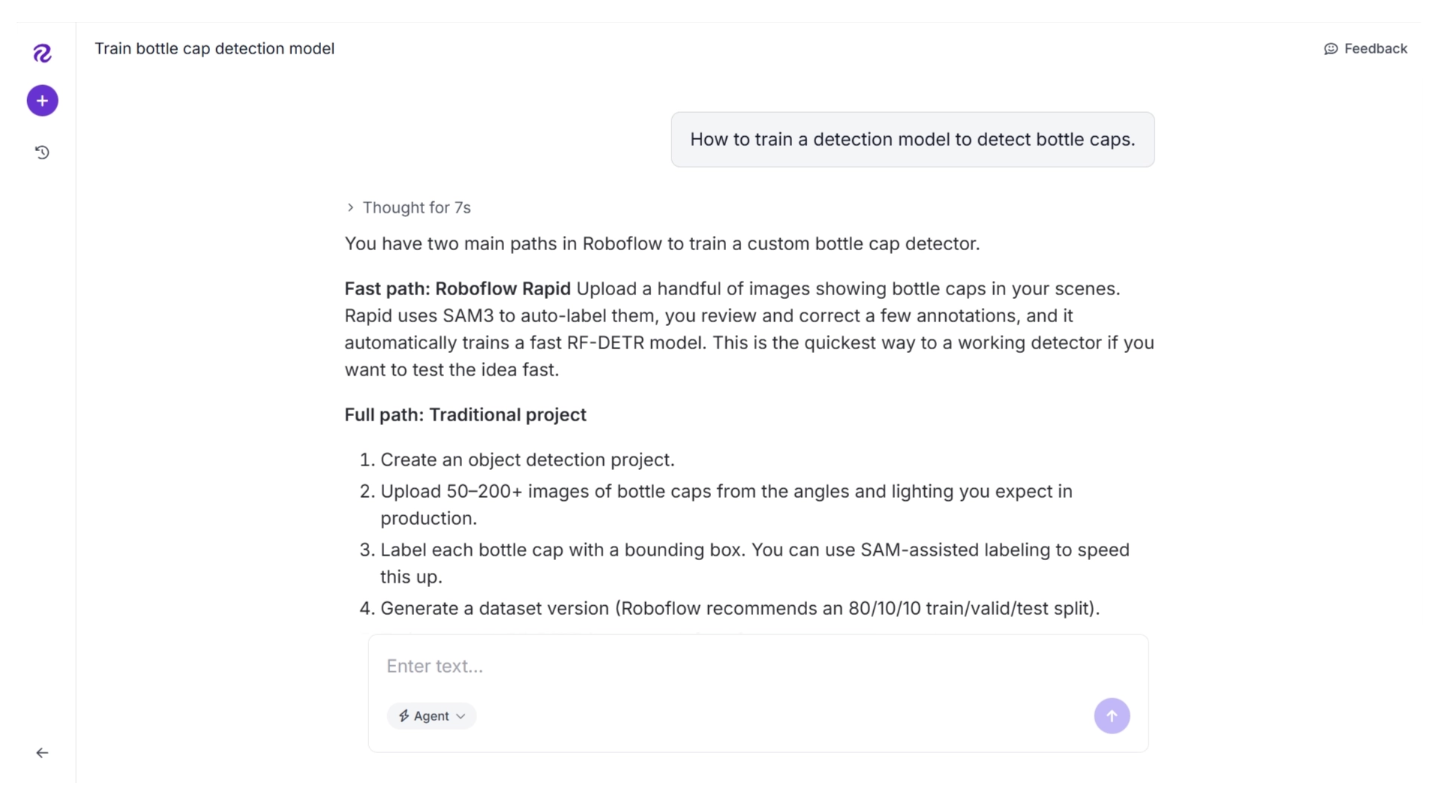
It suggested that since “bottle caps” are not a COCO class, unlike “cars”, a custom model needs to be trained to detect them.You can then access Roboflow Rapid directly from the Roboflow Agents UI to train a custom model, as shown below:
You can then evaluate, improve, and use the model directly from the Roboflow Agents UI, as shown below:
Roboflow Rapid running within the Roboflow Agent UI.
Roboflow Agent acts as a conversational layer on top of Roboflow’s tools, including models, datasets, and workflows. You can describe what you want in plain English, and it handles the process of building it for you making it easier to create, test, and deploy computer vision applications without needing to write complex code.
It provides a solid starting point while also giving you the ability to adjust workflows to fit your specific use case.
What’s Next After Annotating Visual Data?
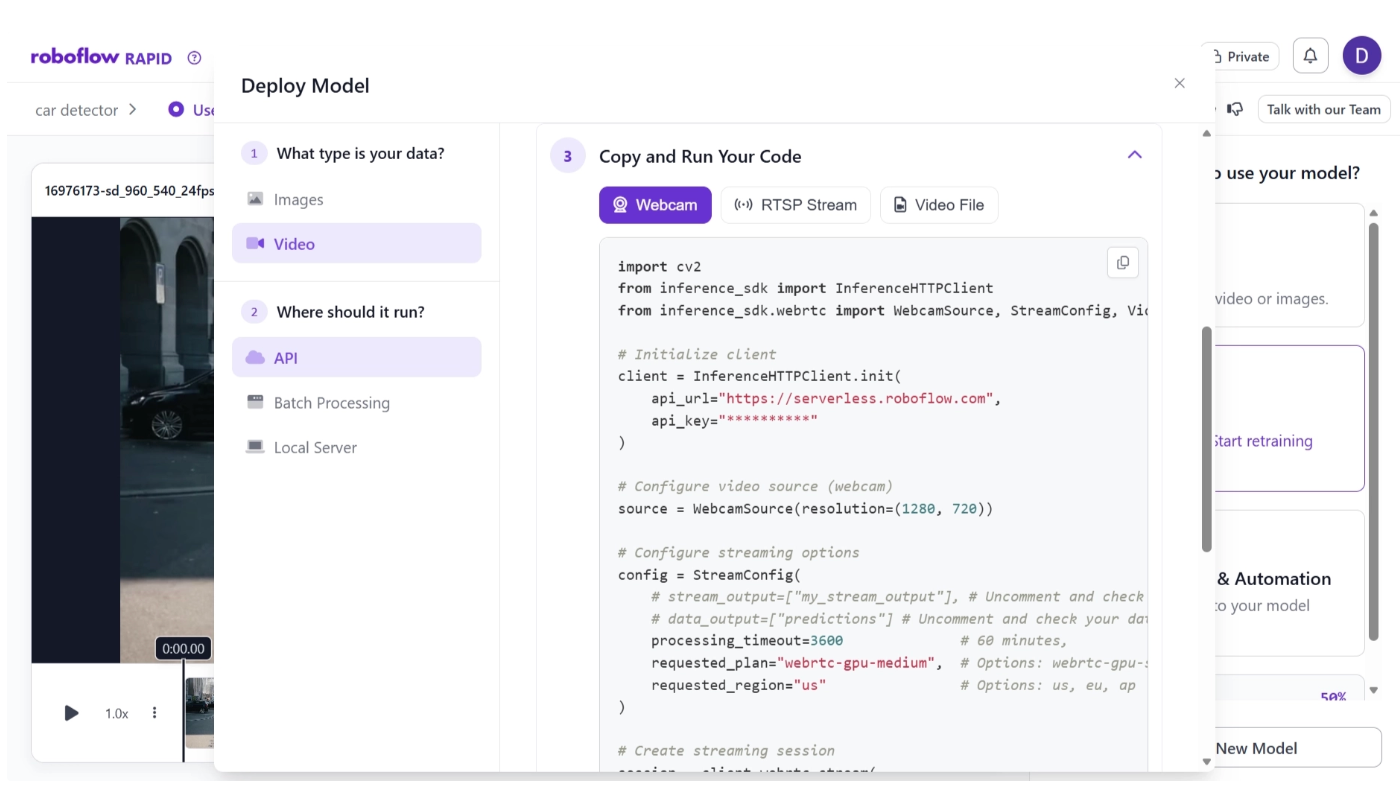
Once your video frames are annotated and a model is trained, you can deploy it to start generating predictions in real-world applications. All of the deployment options are available directly within Roboflow Rapid under the “Deploy Model” or “Use Model” button, as shown below.
You can also import Roboflow Rapid models directly into your Roboflow workflow to add logic around them and build a complete computer vision pipeline.
The same model can be further used to improve itself with more training data through Label Assist, which can speed up annotation on additional videos and images.
To learn more, check out this blog on video annotation, which provides a detailed explanation of the process.
Cite this Post
Use the following entry to cite this post in your research:
Contributing Writer. (Apr 2, 2026). Using Videos as Training Data. Roboflow Blog: https://blog.roboflow.com/annotating-video/