

This guide builds a multi-stage document pipeline in a single Roboflow Workflow that reads a photo of a shopping receipt, then filters non-perishables and categorizes food items by spoilage rate. It chains three layers: a custom-trained RF-DETR detector locates the receipt, an OpenAI vision-language model handles OCR to pull raw text, and an LLM applies business logic to return structured output. Doing the visual work first keeps the pipeline fast and holds down token spend on the text analysis.
Modern computer vision systems are moving beyond isolated predictions. In the past, deploying an object detection model meant receiving bounding boxes and stopping there. If you wanted to read the text inside those boxes or make intelligent decisions based on that text, you had to write complex, brittle glue code to link multiple APIs together.
Today, intelligent vision pipelines require a multi-stage architecture that combines spatial awareness, text extraction, and semantic reasoning.
By chaining models together within a single, unified workflow, you can turn raw visual data into structured, actionable intelligence. In this guide, we will demonstrate how to create a multi-stage vision pipeline that processes a photo of a shopping receipt, extracts its text, filters out non-perishables, and categorizes food items by their spoilage rate.
Chaining Models: Combining Detection, OCR, and an LLM in a Single Workflow
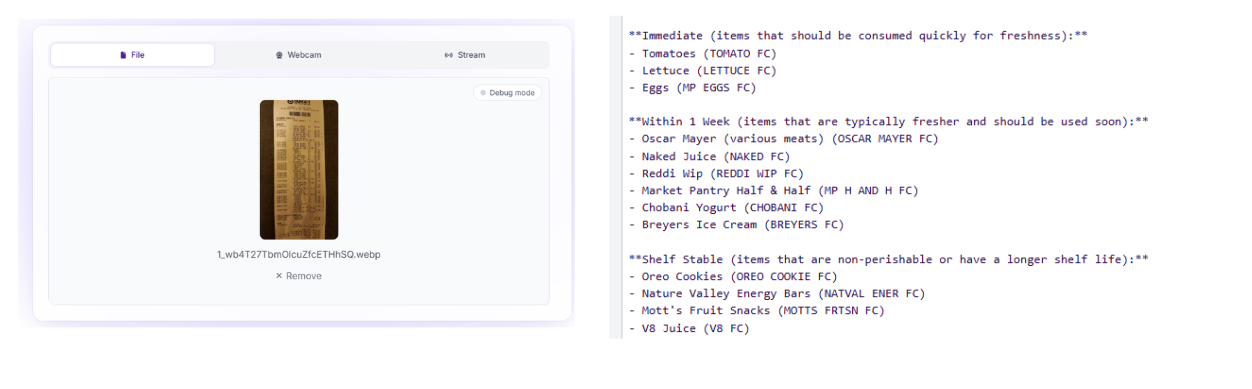
Intelligent Document Processing
To build a production-grade document intelligence tool, we decouple the perception, extraction, and reasoning layers into a modular pipeline:
- The Locator (Perception Layer): An object detection model acts as the system's eyes. It scans the entire image frame to locate the precise boundaries of the document, ensuring the system ignores background noise like table textures or casual clutter.
- The Transcriber (Extraction Layer): A specialized vision-language model functions as the optical character recognition (OCR) engine. It isolates the cropped document and translates pixels into raw text strings.
- The Analyst (Reasoning Layer): A large language model (LLM) acts as the brain. It takes the unstructured text, applies custom business logic, filters out irrelevant data, and outputs organized information.
Phase 1: Training the Custom Receipt Detector
Before we can extract text, our system needs to know where the receipt is. Training a lightweight, specialized model ensures that the pipeline remains fast and resilient against varying backgrounds.
Step 1: Initialize the Workspace
Begin by logging into your Roboflow Dashboard. If you are creating a new project, set up a free account to manage your custom computer vision models. Create a new Object Detection project to house your dataset.
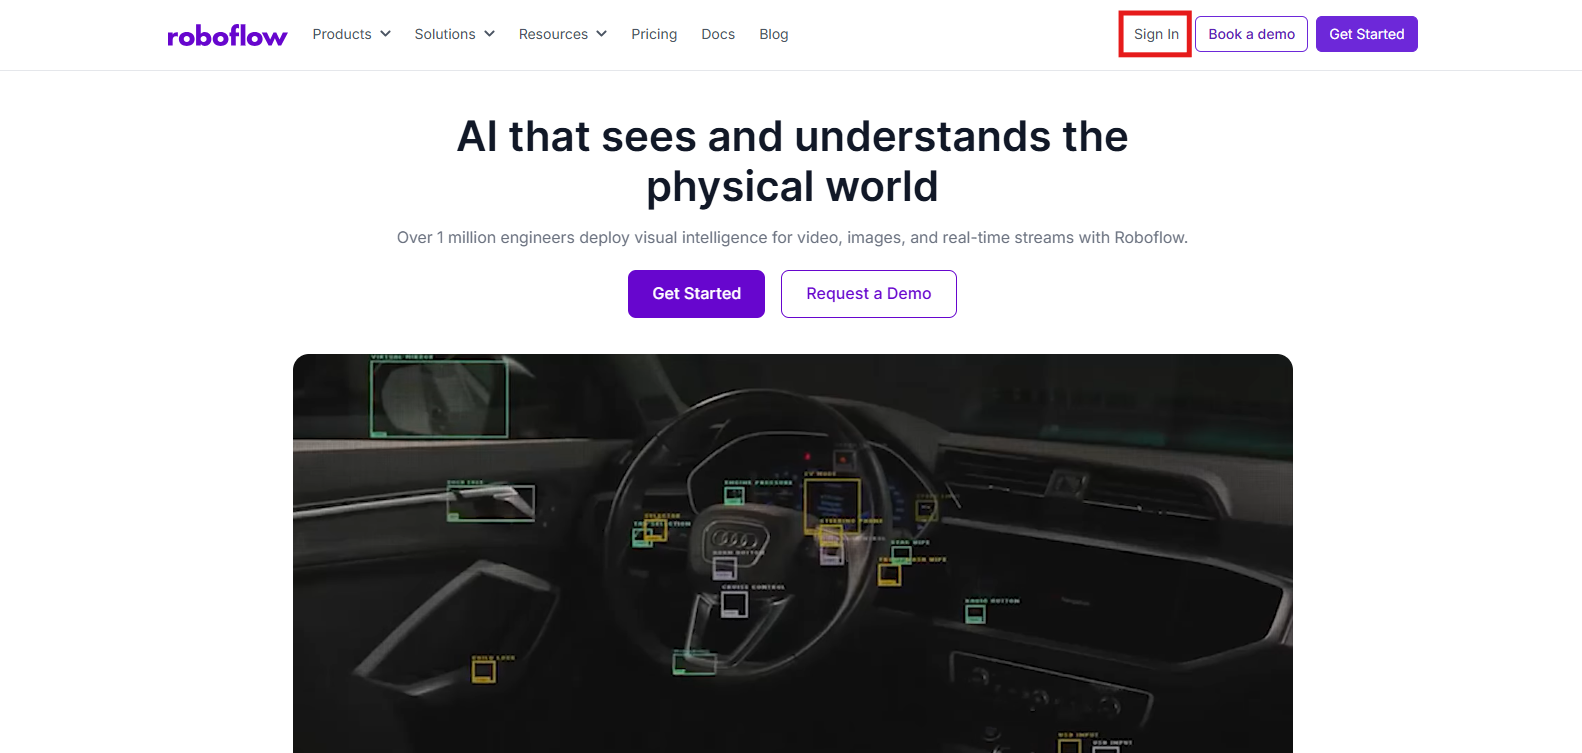
Step 2: Assemble the Training Dataset
High-performing models require representative data. For this workflow, you can collect and upload images of receipts captured under different lighting angles, or leverage pre-curated datasets available on Roboflow Universe.
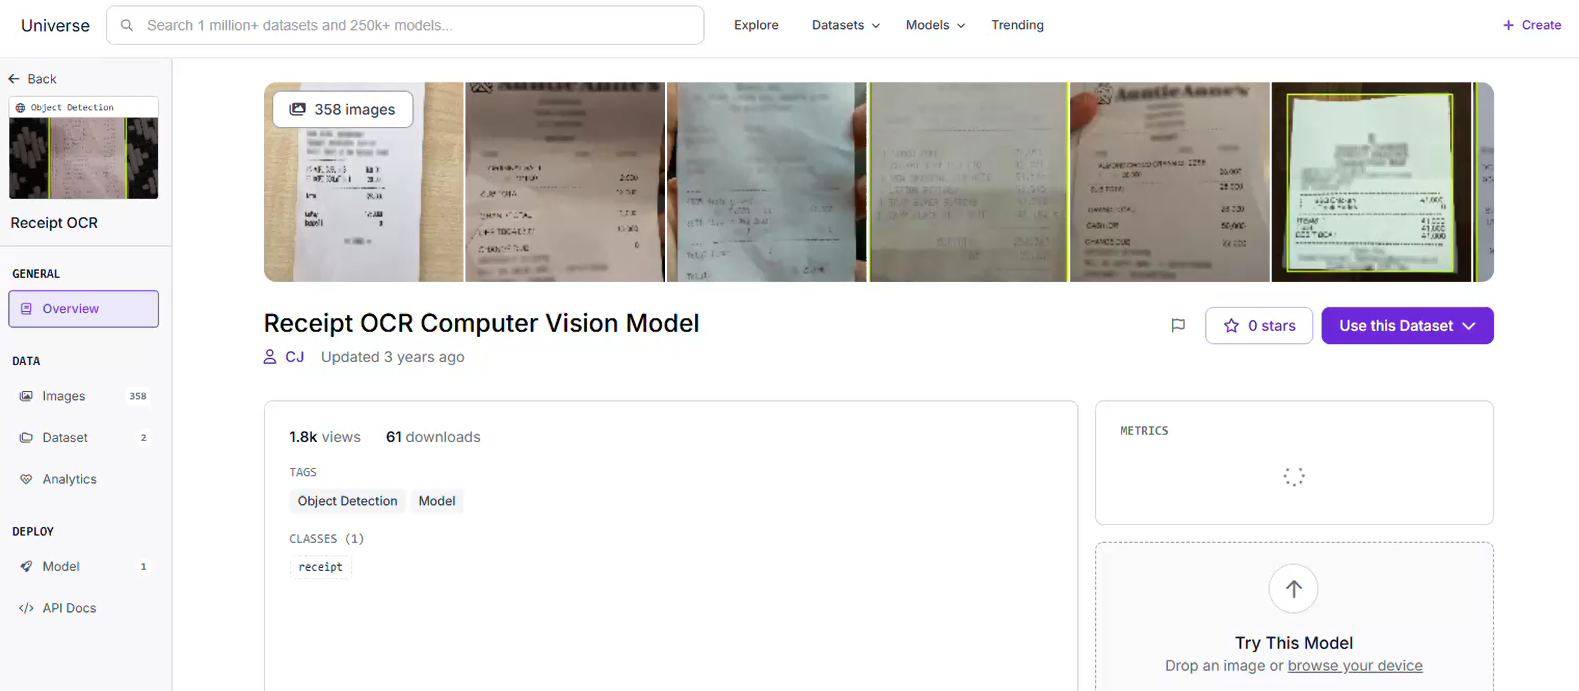
Ensure your dataset captures variations in paper folds, shadows, and print degradation to make the detector resilient. We can locate a suitable project on Roboflow Universe and select "Fork Project" to import the images into our local workspace for custom training.
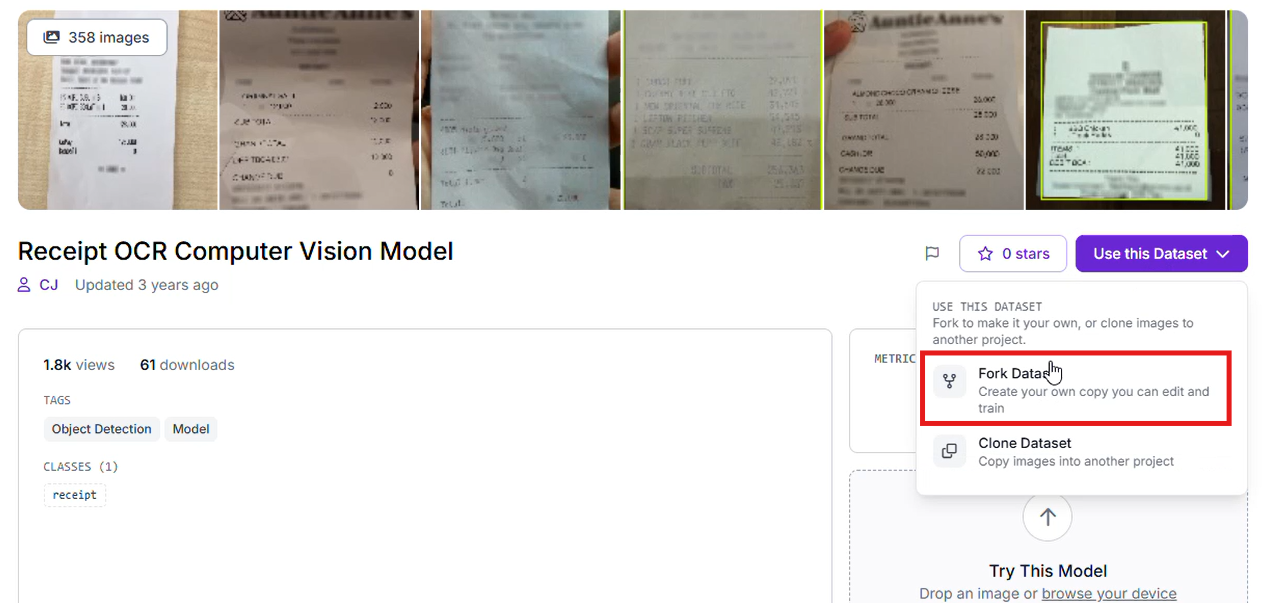
Step 3: Document Annotation
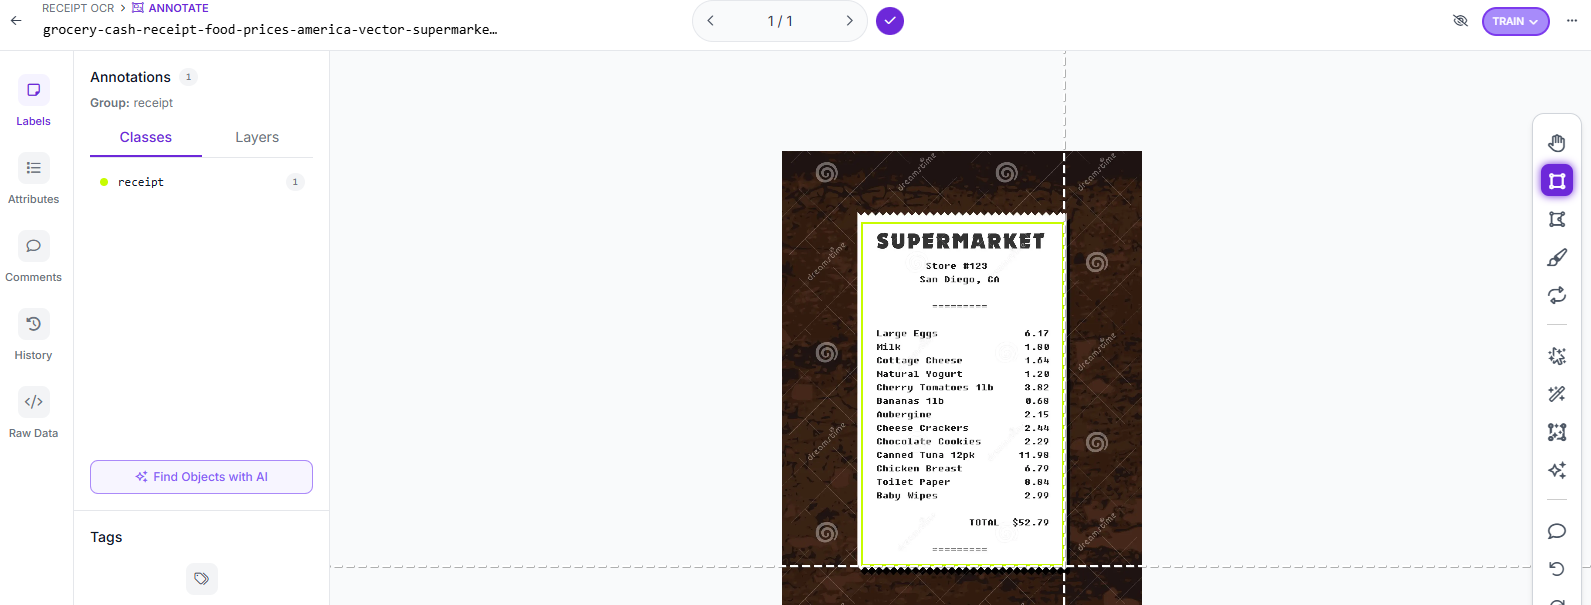
If you are uploading your own images, use Roboflow's web-based annotation suite to draw bounding boxes tightly around the edges of the receipts. Assign the label receipt to these regions. Accurate bounding boxes prevent background text or patterns from corrupting the subsequent OCR stage.
Step 4: Train the RF-DETR Model
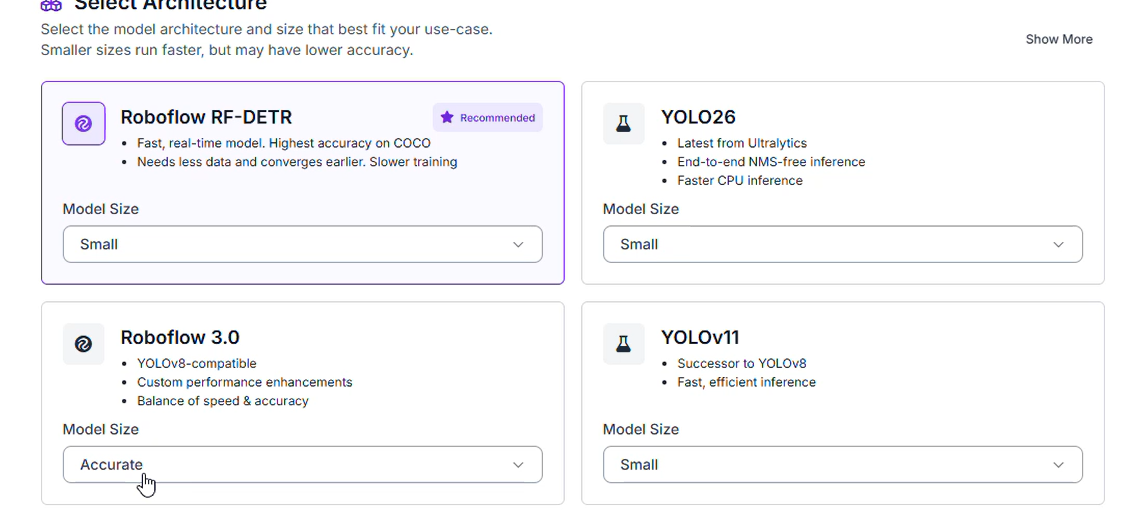
For the perception stage, we utilize the RF-DETR architecture. As a modern transformer-based model, it delivers excellent spatial accuracy while maintaining low latency.
Navigate to the Train tab and initiate a new training job. We select the Small variant of the model for several strategic reasons:
- Low Latency Processing: The lightweight footprint allows the model to localize documents instantly, preventing a bottleneck before data reaches the LLM.
- Resource Efficiency: It minimizes computational overhead, making it highly compatible with edge deployments or cost-effective cloud endpoints.
Step 5: Establish Dataset Splits
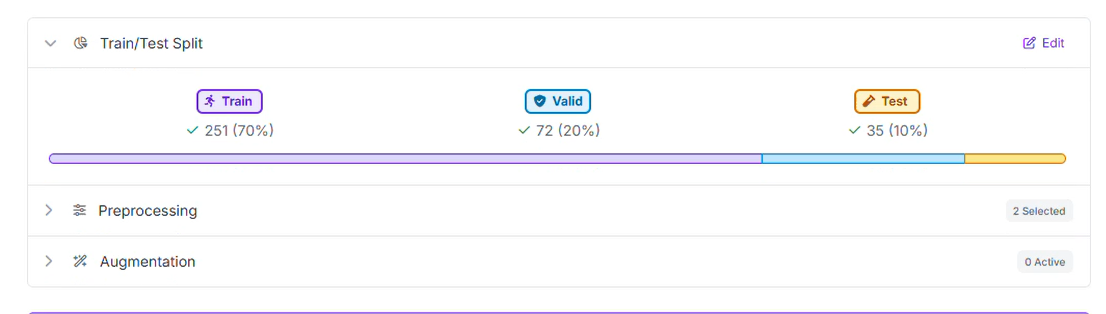
To evaluate the model rigorously, configure your data splits using a standard 70/20/10 distribution:
- 70% Training: Instructs the RF-DETR transformer to identify receipt geometries and borders across diverse environments.
- 20% Validation: Serves as an internal benchmark to tune model parameters during training.
- 10% Testing: Provides an unbiased final evaluation using images the model has never encountered.
Step 6: Preprocessing and Augmentation
To ensure the system functions under imperfect ambient lighting conditions, apply targeted configuration steps.
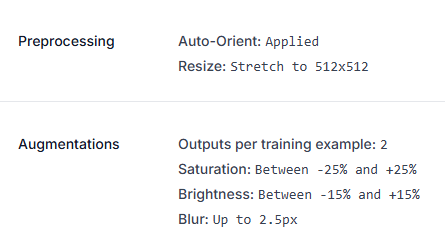
Preprocessing:
- Auto-Orient: Standardizes image orientation based on EXIF data.
- Resize (Stretch to 512x512): Normalizes the input dimensions to align with the fixed resolution expected by the transformer architecture.
Augmentations (Generating 2 outputs per training image):
- Saturation (Between -25% and +25%): Prepares the model for faded ink or colored receipt paper.
- Brightness (Between -15% and +15%): Simulates harsh overhead kitchen lighting or dim environments.
- Blur (Up to 2.5px): Mimics slight camera shake or out-of-focus smartphone captures.
Step 7: Evaluate Detector Performance
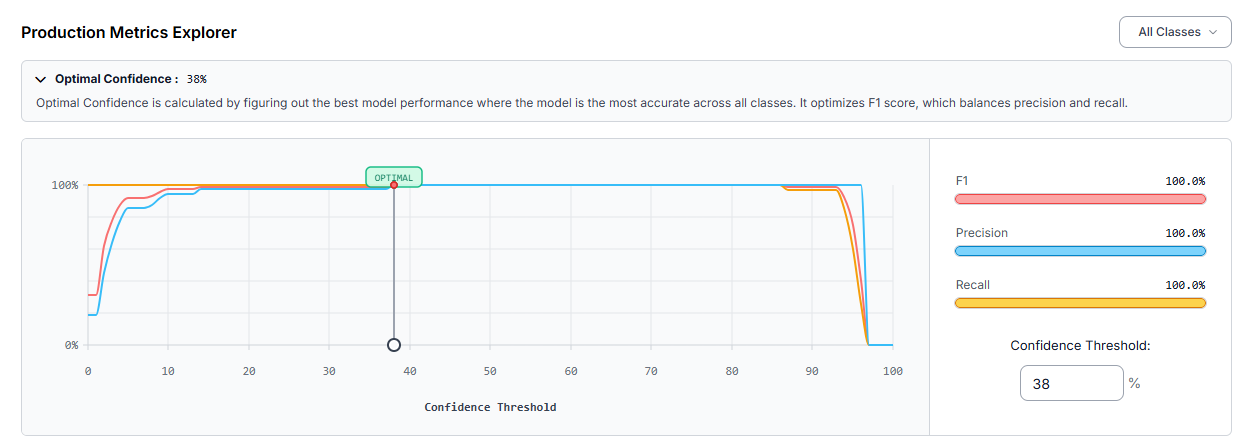
Upon completion, our RF-DETR Small model achieved a perfect mAP@50 of 100.0%, with 100.0% Precision, 100.0% Recall, and a 100.0% F1-Score on our current validation set.
Production Note: The current evaluation set contains 35 images. For a resilient real-world deployment, we recommend expanding the test set to at least 50 distinct images. Adding diverse background surfaces and highly wrinkled receipts will ensure these optimal metrics hold true when pushed to production.
Phase 2: Building the Multi-Stage Workflow
With our trained detector ready, we transition to the Roboflow Workflows canvas to architect our interconnected pipeline. Workflows allow you to map out complex logic visually and deploy it via a single API call.
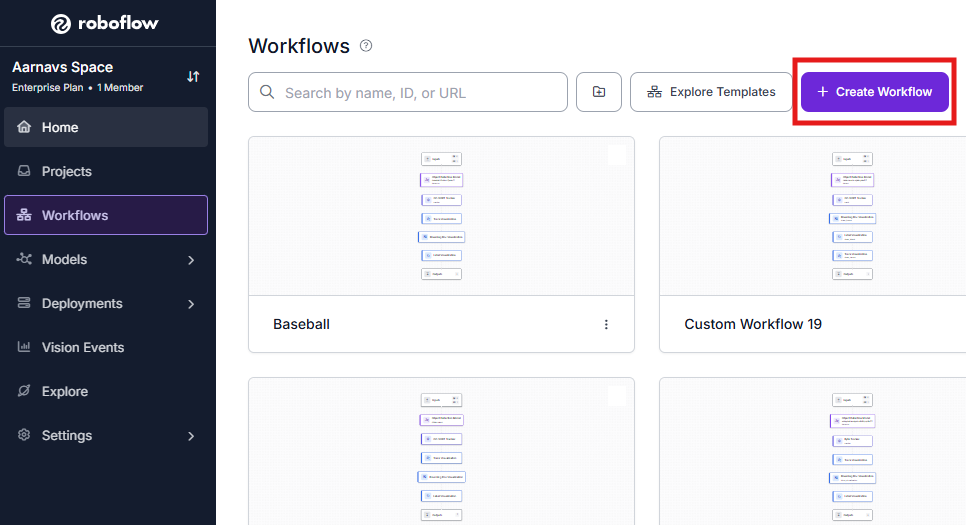
1. Workflow Initialization
Begin by establishing the logical framework within the Roboflow Workflows interface.
Locate the Workflows tab in the left-hand navigation menu of your Roboflow Dashboard.
2. Perception Stage: Object Detection Model
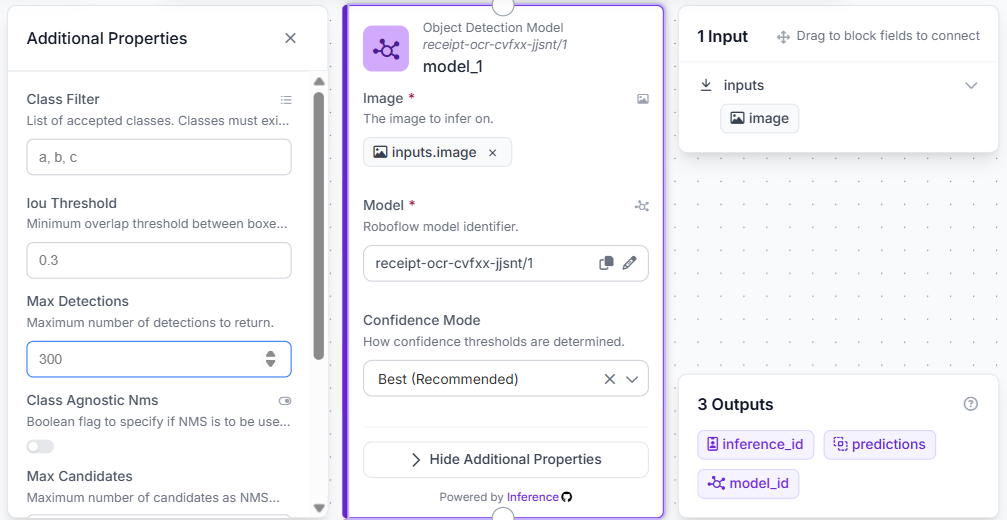
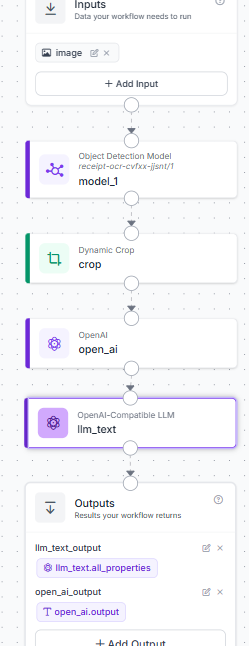
We drag an Object Detection Model block onto the canvas and name it model_1. We configure it to use our custom-trained receipt model (receipt-ocr-cvfxx-jjsnt/1). This block takes the raw image input, runs inference, and outputs the bounding box coordinates for any detected receipt.
3. Localization Stage: Dynamic Crop
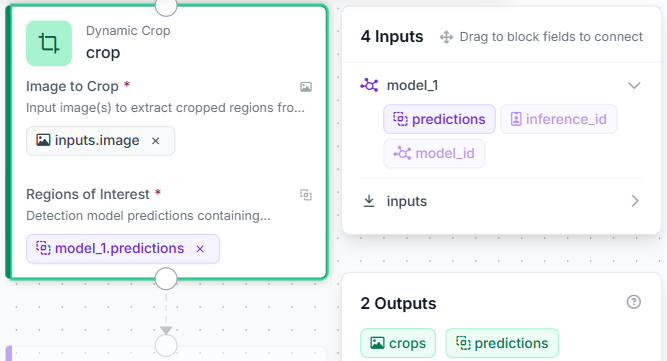
Passing a giant, uncropped image to an OCR engine wastes compute and introduces text noise from surrounding objects. To isolate the document, we connect a Dynamic Crop block named crop.
- Inputs Required: It takes both the original raw image from the entry block and the predictions output from model_1.
- Behavior: It extracts only the pixels bounded by the detector’s coordinates, passing a clean, high-density crop of the receipt to the next stage.
4. Extraction Stage: OpenAI VLM OCR
Next, we place an OpenAI block named open_ai onto the canvas. This block receives the high-definition crop directly from the crop step. Configured with a lightweight, vision-capable model like gpt-5-mini or equivalent, its sole responsibility is to transcribe every visible line of text on the paper into an unstructured text string. We chose GPT-5-mini because of its top ranking in Roboflow Playground when this article was being written.
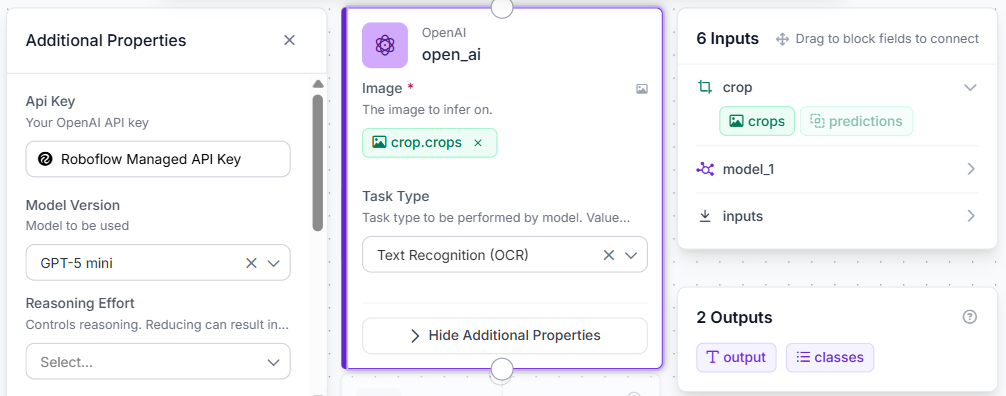
5. Reasoning Layer: OpenAI Compatible LLM
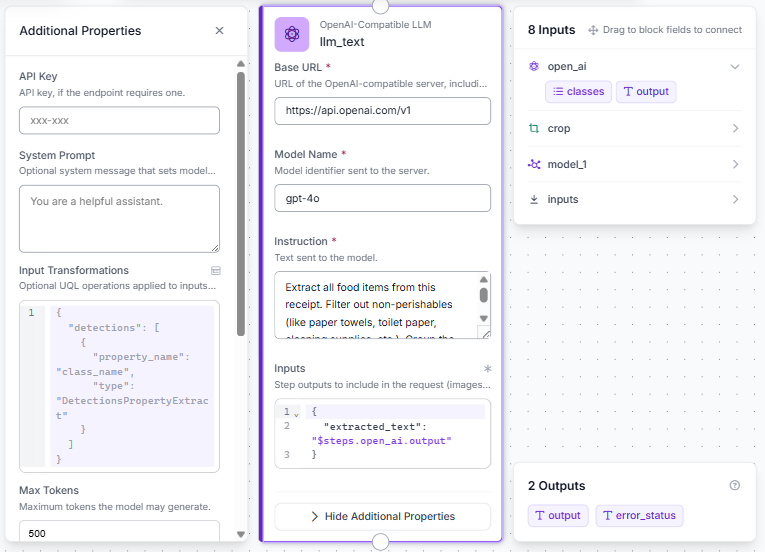
The raw text contains metadata we don't need, such as store IDs, payment methods, barcodes, tax rates, and non-food items. To distill this information, we add an OpenAI-Compatible LLM block named llm_text and route it to OpenAI's endpoint using gpt-4o.
The block utilizes two fields to build its context dynamic payload:
- Prompt: The structured instructions detailing the business logic.
- Prompt Parameters: A dictionary that links placeholders in your prompt to upstream outputs.
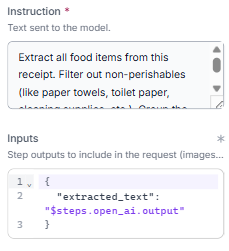
We include the template placeholder {{ $parameters.extracted_text }} inside our prompt. At runtime, the workflow takes the text output from our OpenAI OCR step and injects it directly into that variable.
The prompt:
Extract all food items from this receipt. Filter out non-perishables (like paper towels, toilet paper, cleaning supplies, etc.). Group the remaining items by how quickly they need to be consumed: Immediate, Within 1 Week, or Shelf Stable.

Receipt text:{{ $parameters.extracted_text }}
By utilizing the text-only configuration of the openai_compatible block rather than sending high-resolution images directly to an expensive LLM (like a regular OpenAI or Gemini block), we keep the system modular. The heavy visual processing happens upstream inside specialized, cost-effective vision components. The final analytical step is pure text processing, making the overall workflow faster and cheaper to scale. We apply a max_tokens: 500 cap to limit response lengths and prevent unexpected token expenditure on exceptionally long documents.

6. Workflow Outputs
Finally, we configure our Outputs block to structure the API response. We map two outputs:
- open_ai_output: Returns the raw transcribed text from the OCR step for verification.
- llm_text_output: Collects the all_properties payload from our reasoning engine, yielding the neatly grouped grocery breakdown.
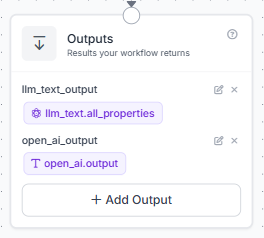
7. Workflow Structure
You can further add a JSON parser block, but for now, this structure should work. Ensure that your workflow looks like so:
Chaining Models: Combining Detection, OCR, and an LLM in a Single Workflow Conclusion
Building modern computer vision applications requires connecting different kinds of models smoothly. By joining an RF-DETR object detector, an accurate OCR step, and the contextual smarts of an LLM, we turn simple pictures into helpful data. This modular workflow structure handles the visual steps early on, saving token space and making the text analysis fast and affordable.
Ready to build your own custom model chain? Sign up for a free Roboflow account and explore thousands of open-source datasets on Roboflow Universe to jumpstart your next multi-stage workflow.


Cite this Post
Use the following entry to cite this post in your research:
Aarnav Shah. (May 28, 2026). Chaining Models: Combining Detection, OCR, and an LLM in a Single Workflow. Roboflow Blog: https://blog.roboflow.com/chaining-models-in-a-workflow/