

To augment a YOLO dataset, create a dataset version in Roboflow and apply transformations such as flips, rotation, brightness changes, or blur to the training images based on conditions your model will encounter. Train a YOLO model on that version and compare it with a model trained without augmentation using the same validation set.
Your YOLO model performs well on the training images, then misses objects when the lighting changes or they appear at a new angle. YOLO augmentation can help close that gap by adding realistic variation to the training set. The key is choosing changes that reflect what your camera will actually see.
In this guide, you’ll use Roboflow to train a YOLO26 baseline, create an augmented dataset version, and train again. I’ll show how to choose augmentations, keep validation and test images untouched, and compare both models to find out whether the changes helped.
Preprocessing vs. Augmentation for YOLO
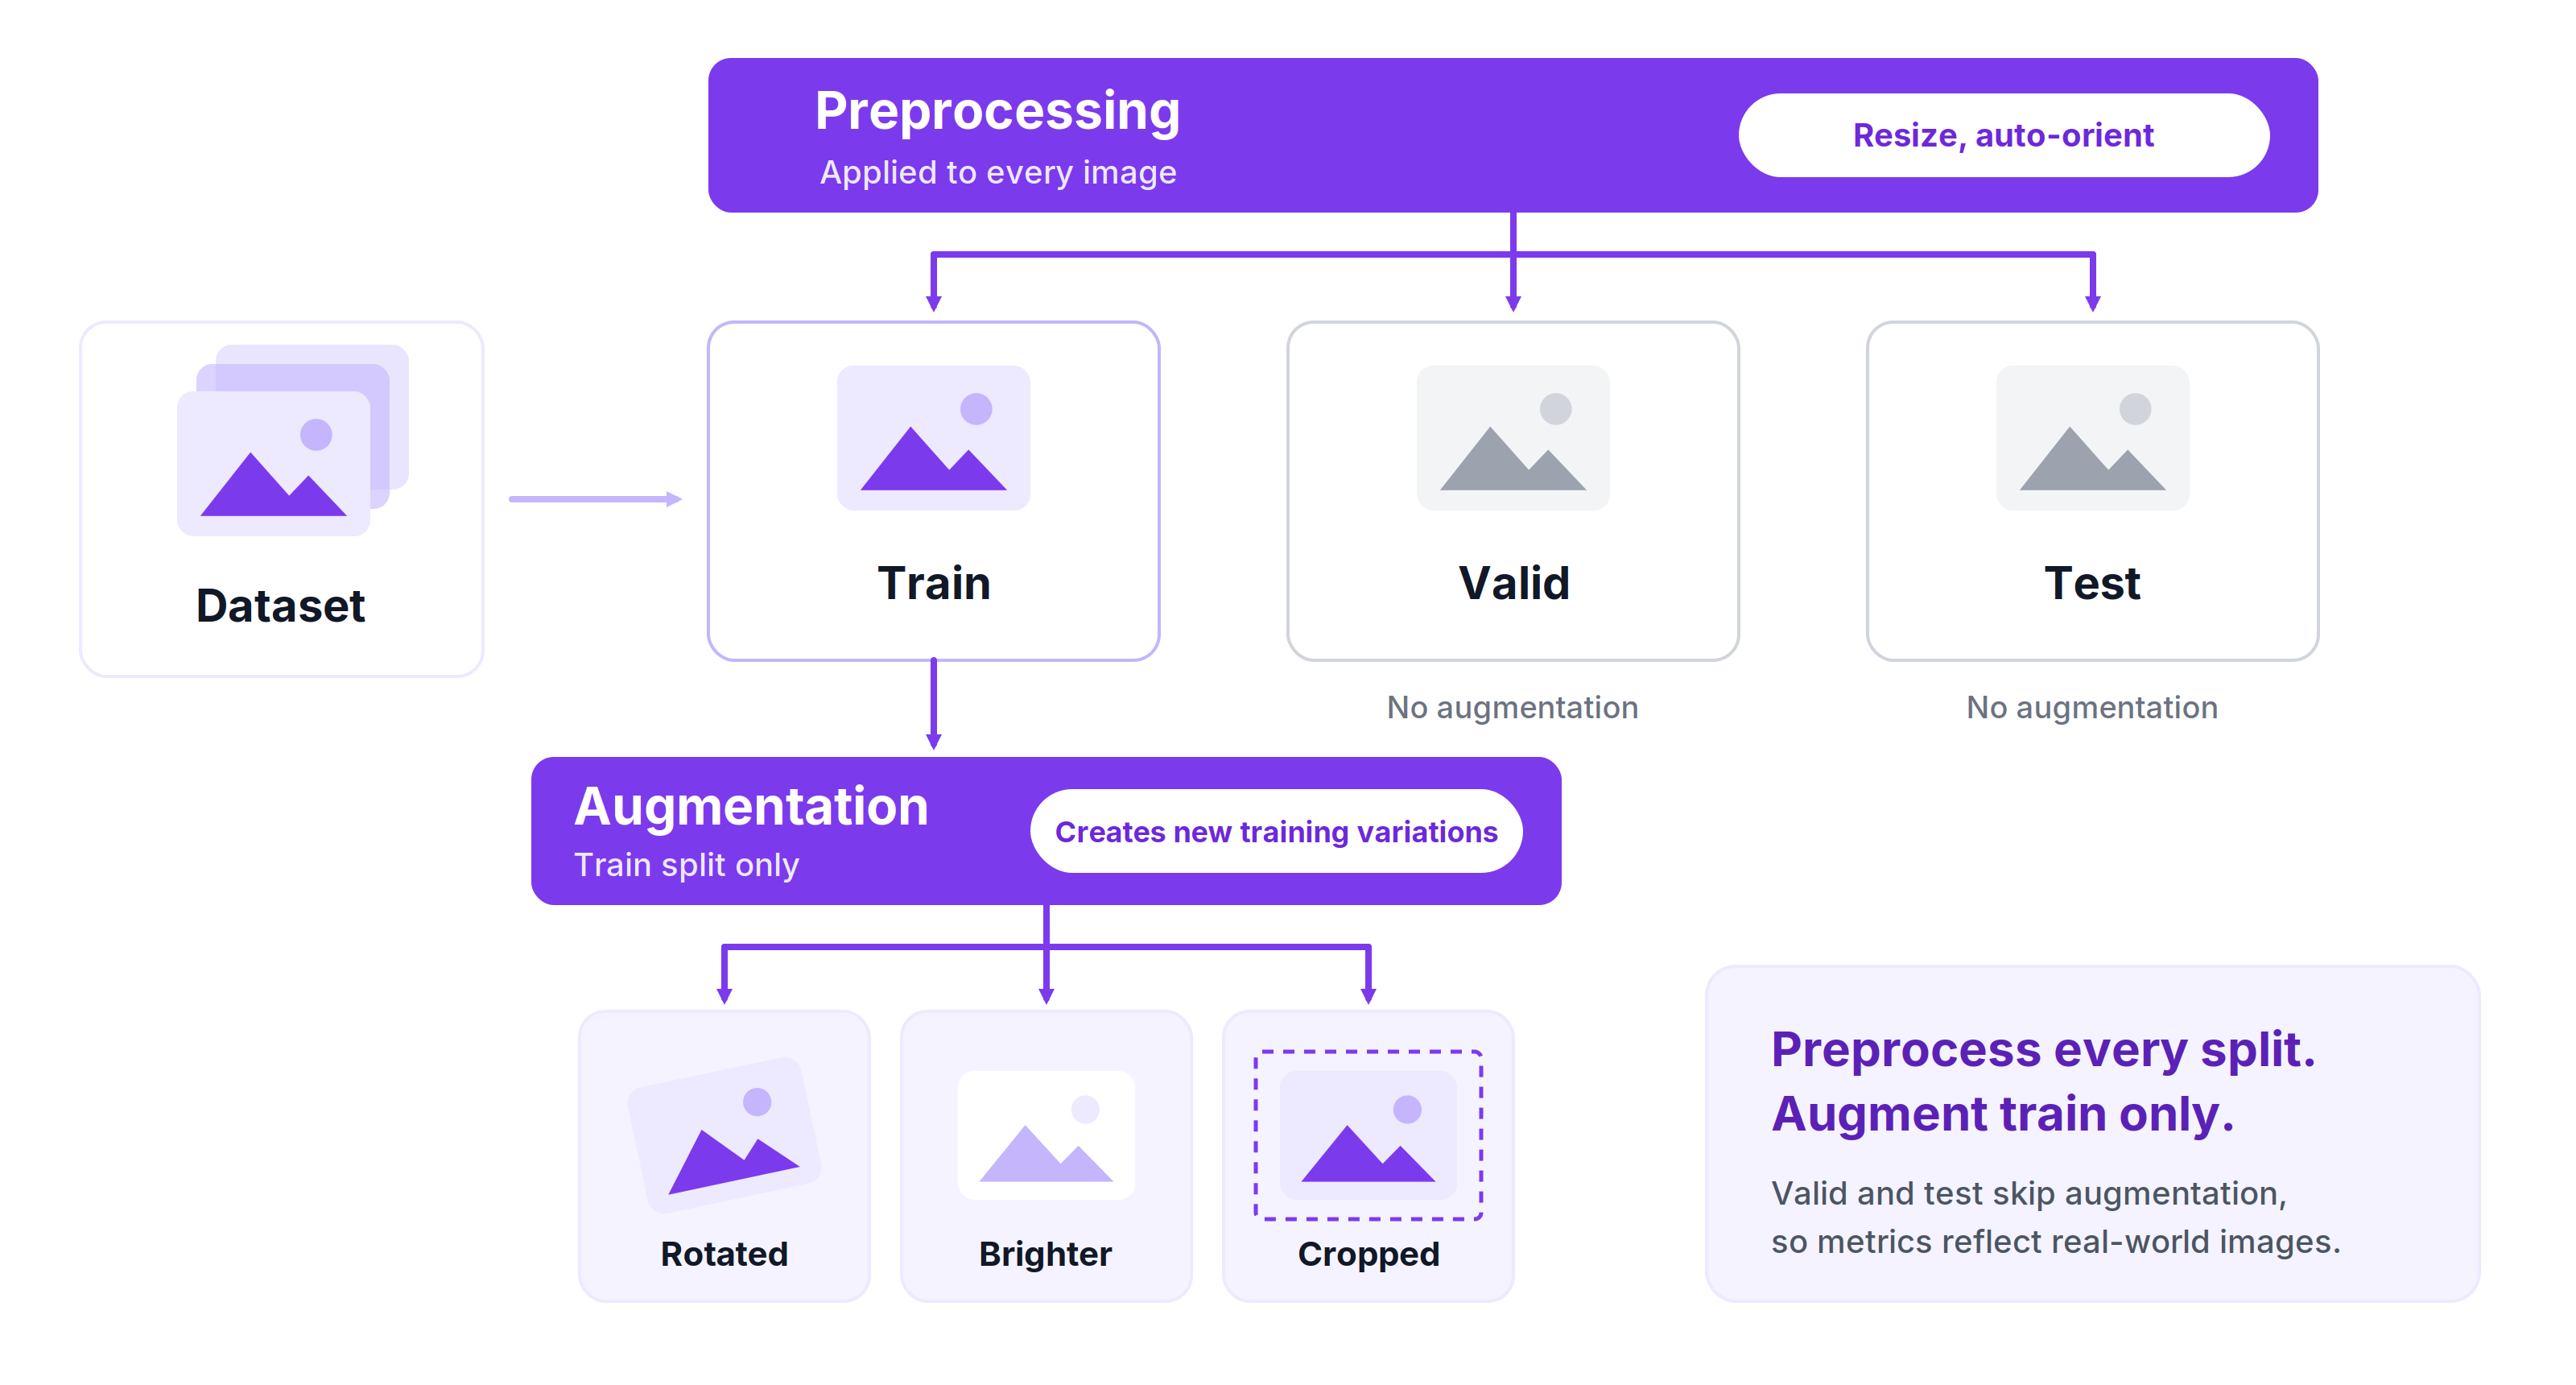
Roboflow lets you configure preprocessing and augmentation when you create a dataset version. Both change images, but they serve different purposes.
Preprocessing standardizes images across the training, validation, and test splits. For example, you can resize images to the dimensions your model expects or correct their orientation before training and evaluation.
Augmentation adds variation to the training split only. Roboflow creates altered training images, such as brighter or rotated versions, to help the model learn to recognize objects under different conditions. Validation and test images are not augmented, so you can evaluate the model on images it was not trained on.
As a result, augmentation can increase the number of training images and change the displayed split percentages without adding images to the validation or test sets. Keep that in mind when comparing dataset versions. For more detail, see our guide to image preprocessing and augmentation
Start Without Augmentation
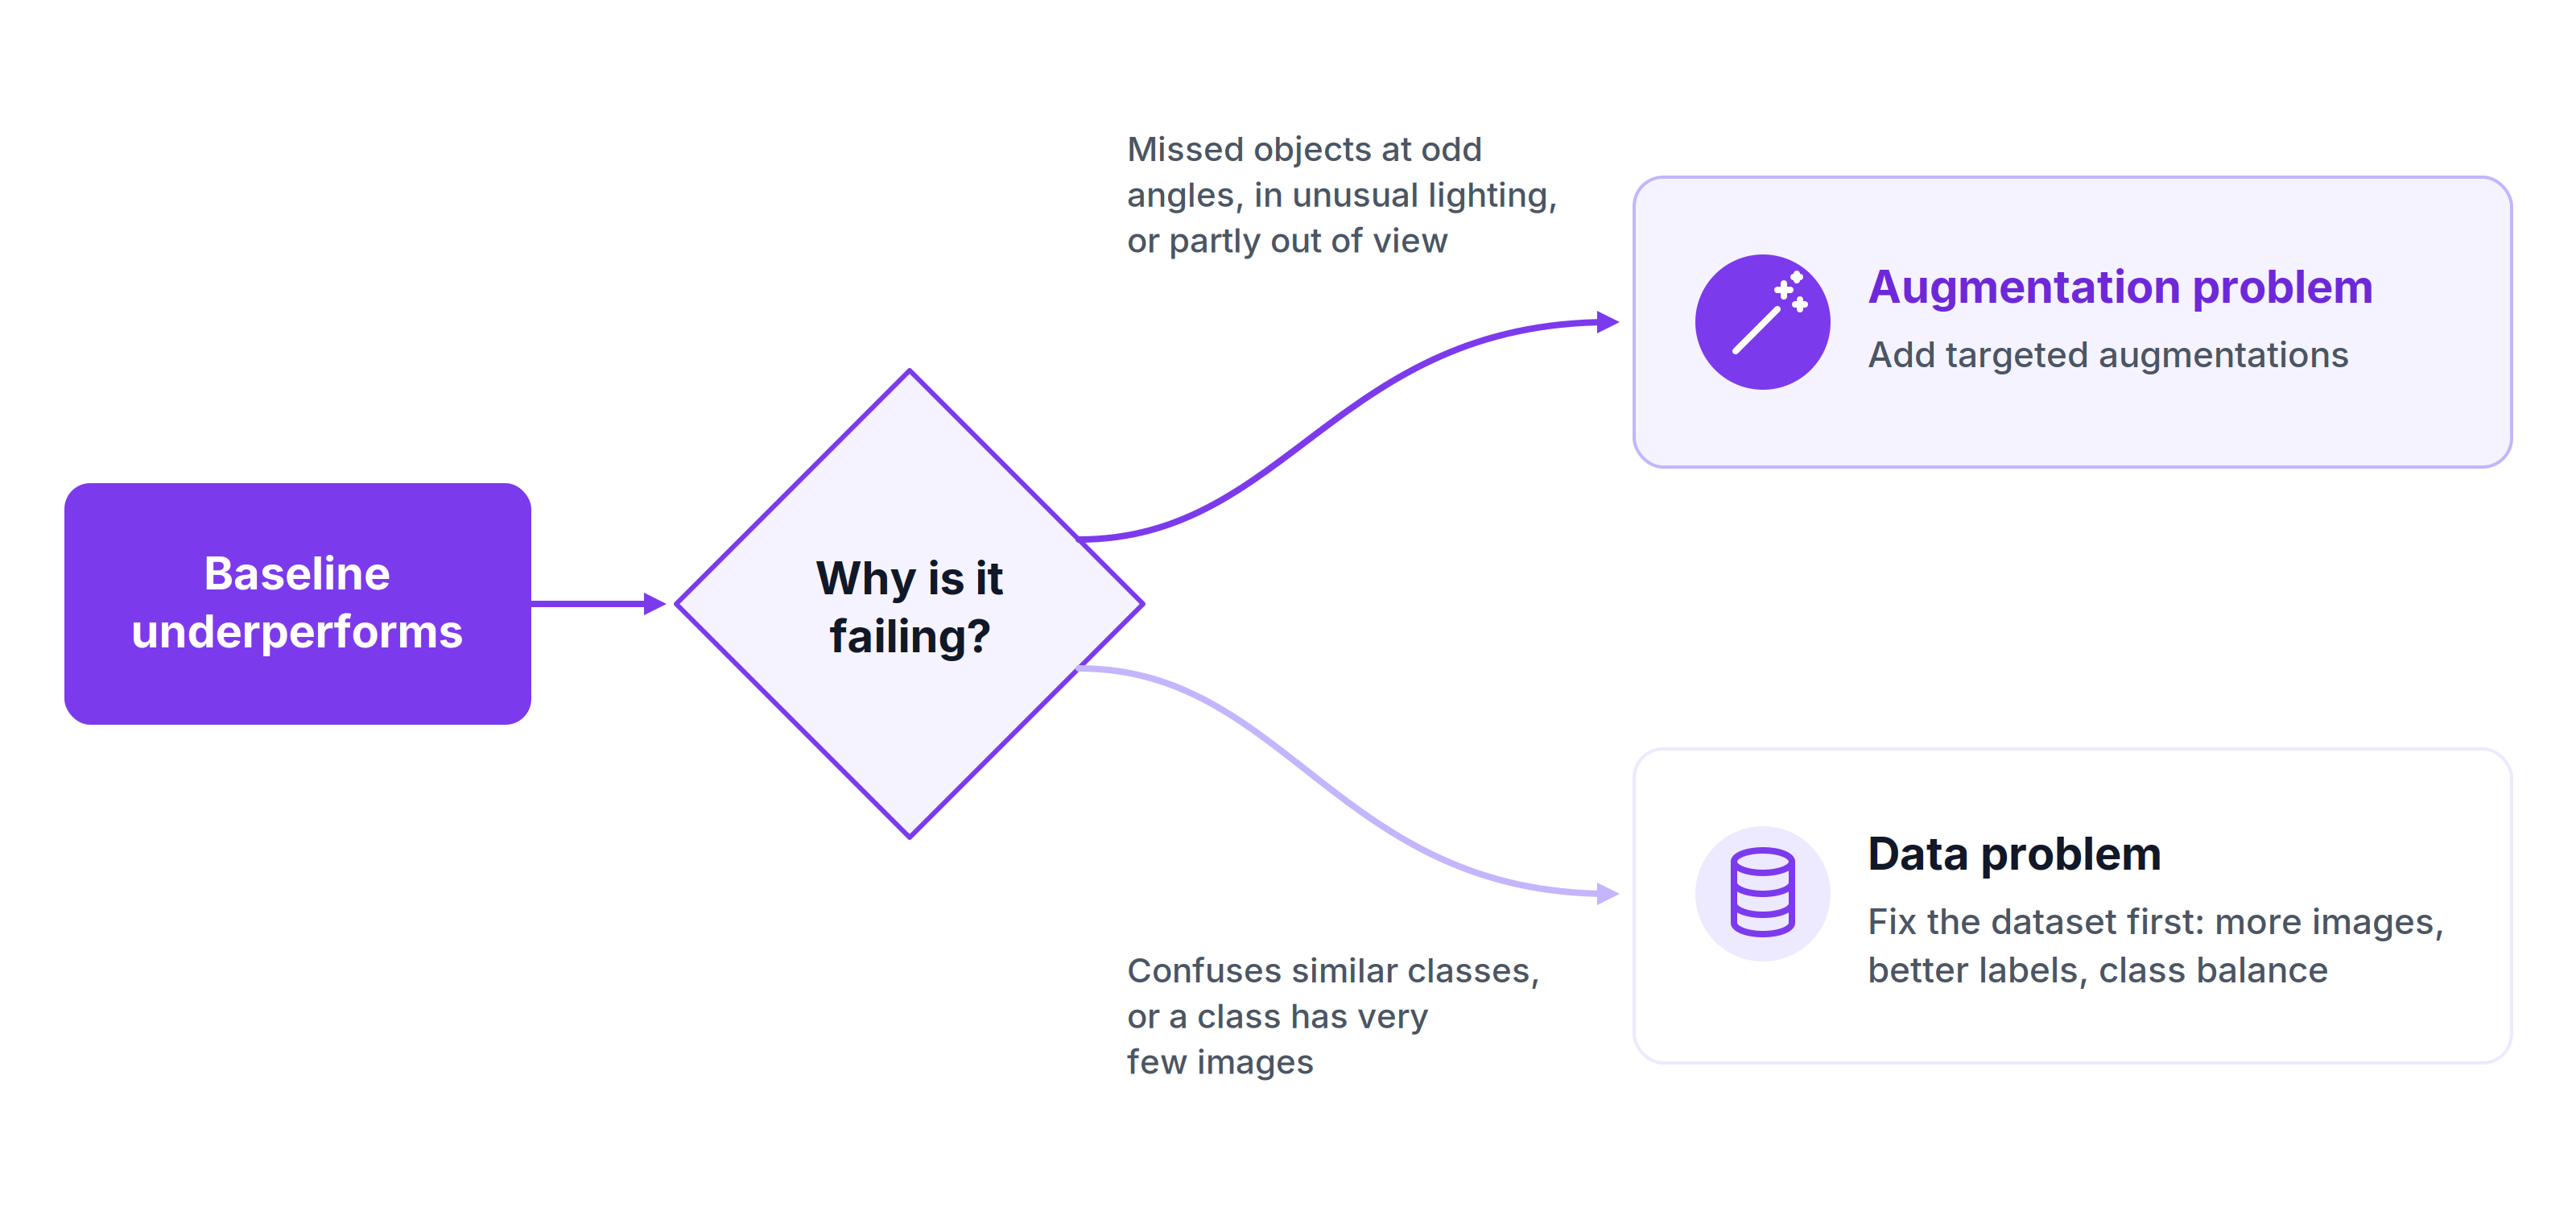
We recommend that you train a baseline first, with no augmentation applied at all. This gives you a clean read on how the raw dataset performs before anything gets added on top of it.
Skipping this step makes it impossible to tell whether augmentation actually helped. If a model performs well, you won't know how much of that came from the augmentation versus how much came from the dataset itself. If a model performs poorly, you won't know whether to fix the augmentation settings or the underlying dataset, class balance, image quality, label accuracy, none of which augmentation can fix on its own.
Before adding anything, look at where the baseline actually falls short. A low recall on one specific class points to a data problem worth addressing directly, more images of that class, better labels, rather than reaching for augmentation as a first move. Only once the baseline's real weaknesses are clear does it make sense to choose augmentations that target them.
Augmentation is the right move when the baseline's weakness looks like a variation problem rather than a data problem. If the model misses objects captured at slightly different angles, in different lighting, or partially out of frame, that's augmentation territory, you're teaching the model to handle conditions it hasn't seen examples of yet.
If instead the model is confusing two visually similar classes, or a class has almost no training images to begin with, augmentation won't fix that, since it can only vary the images you already have, it can't manufacture examples of something the dataset barely represents or teach the model a distinction it was never shown clearly.
A practical way to tell: look at where the baseline's false negatives and false positives come from. Missed detections tied to unusual angles, lighting, or partial visibility point toward augmentation. Missed detections tied to a specific class with few examples, or misclassifications between similar-looking classes, point toward fixing the dataset itself first.
Choosing Augmentations That Match Your YOLO Use Case
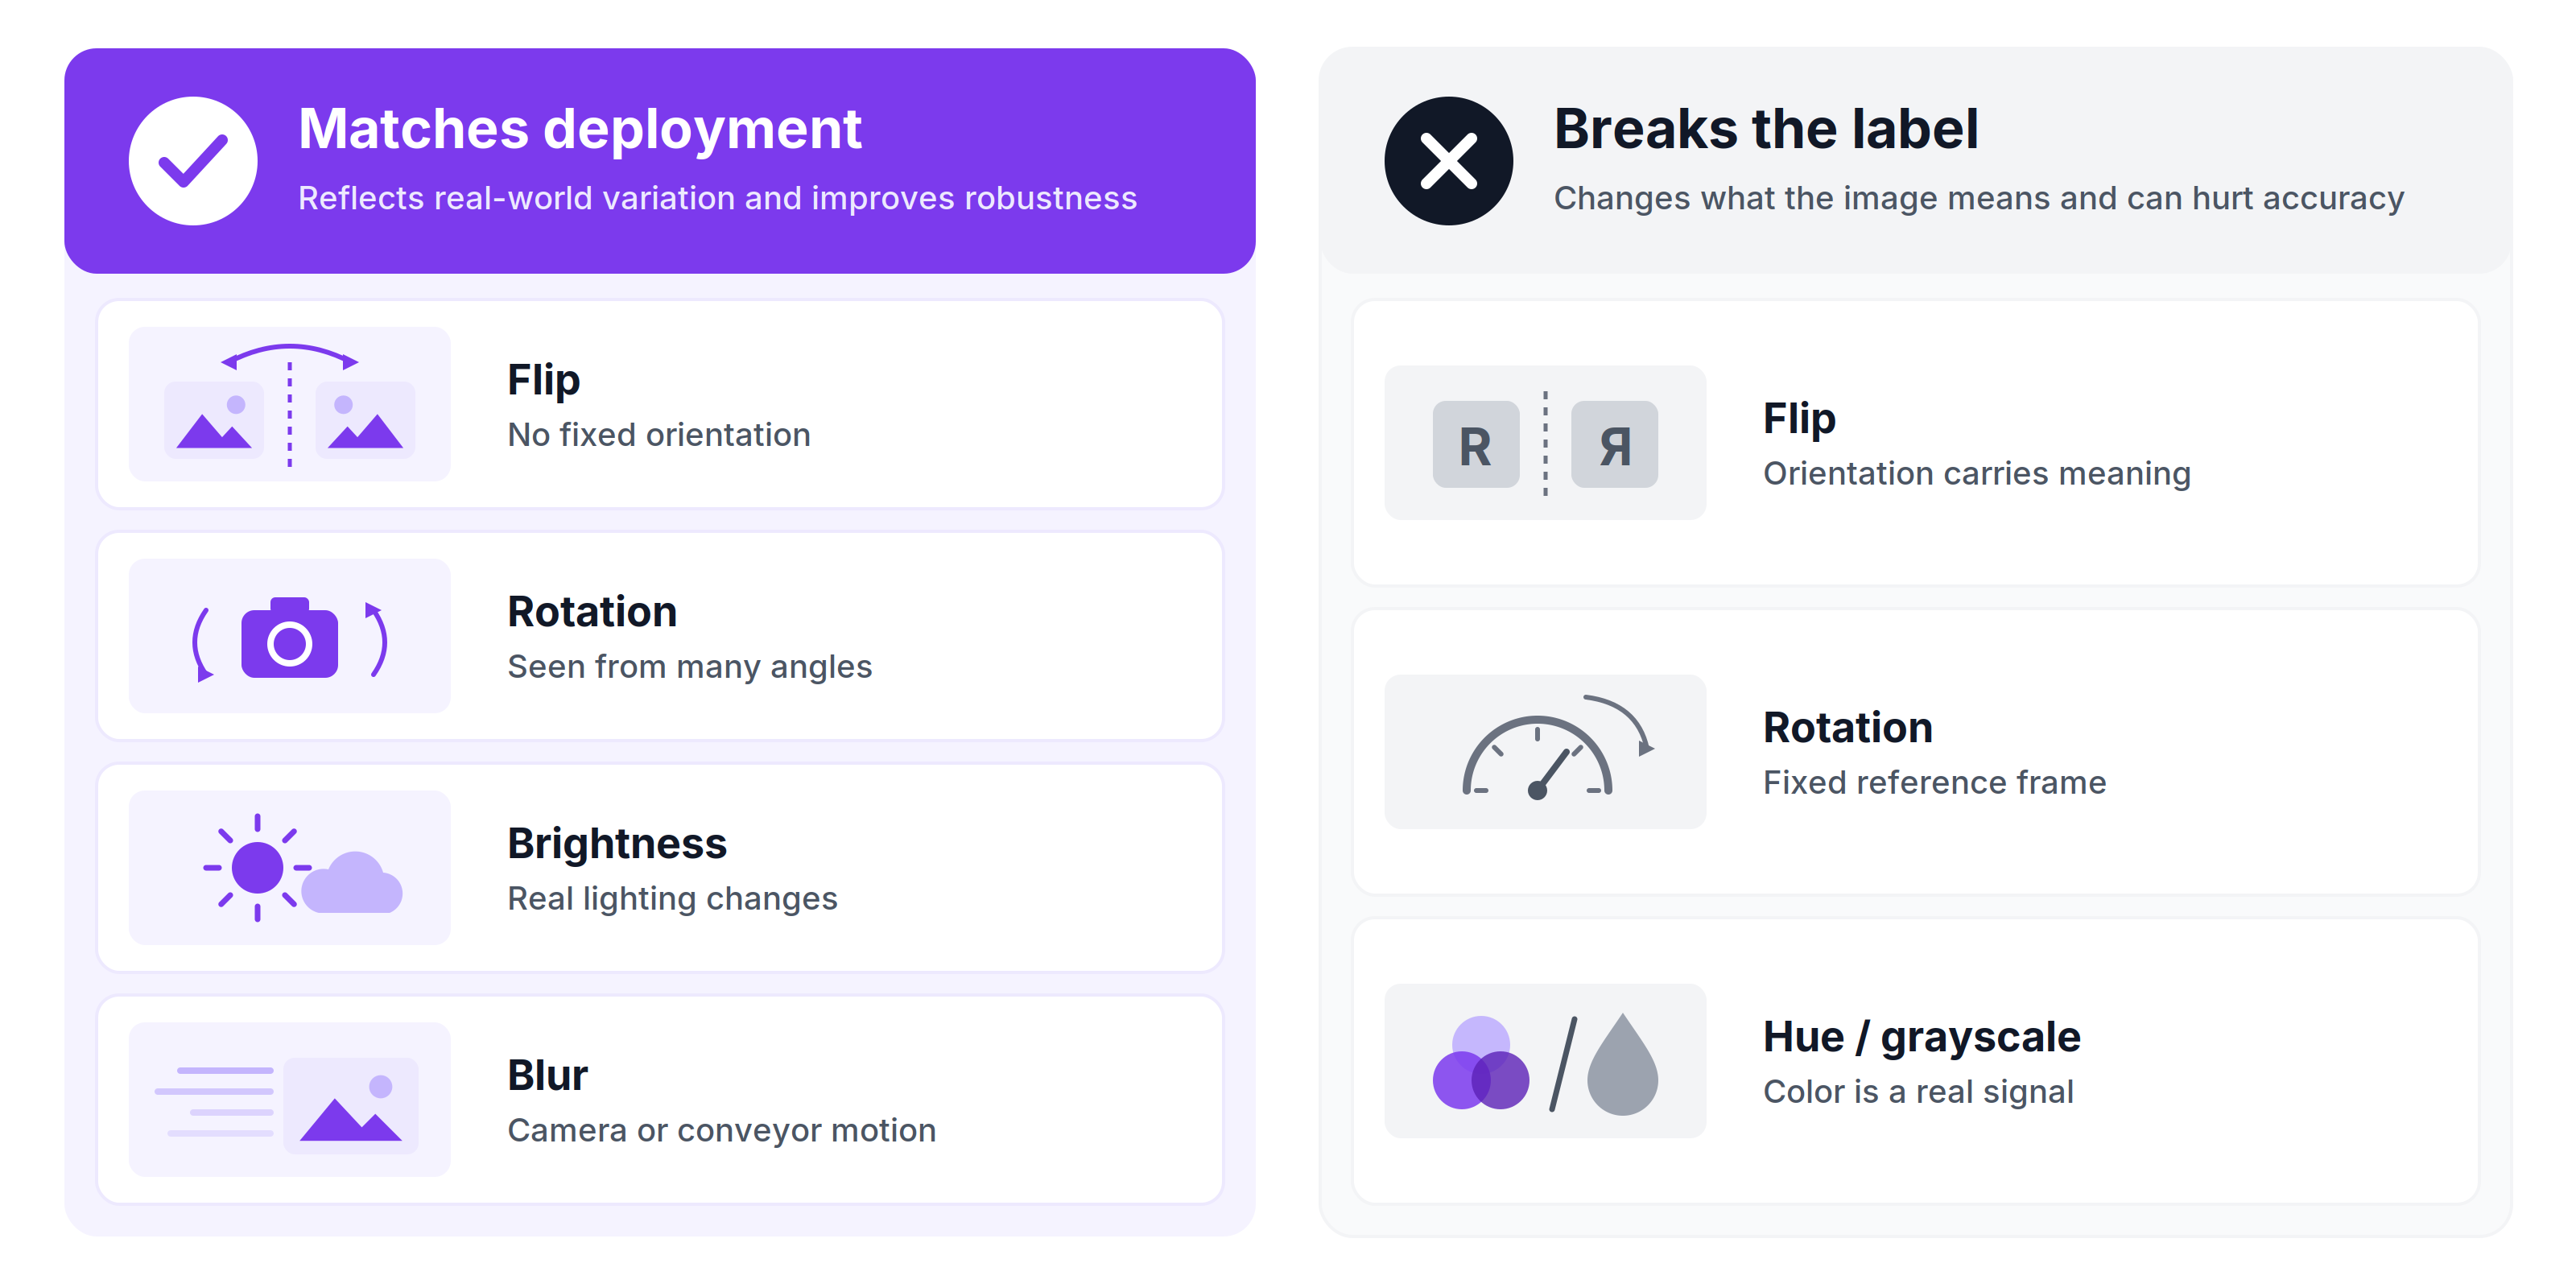
Every augmentation option in Roboflow looks equally harmless in the preview thumbnail. Whether it actually helps depends entirely on what your model will face once deployed, not on what looks visually interesting.
- Flip: Fine when the scene has no fixed orientation, waste tumbling onto a belt, for instance. Wrong when orientation carries meaning, a document, a gauge, a sign, where a flipped version is something the model will never actually encounter.
- Rotation: Useful for objects genuinely seen at multiple angles in the real deployment. Risky for anything with a fixed reference frame, where rotating past a certain point produces an orientation the object simply won't appear in.
- Brightness/exposure: Matches real lighting variation the model will face, different times of day, overhead versus natural light, inconsistent facility lighting.
- Blur, noise, cutout: Simulate camera or occlusion conditions specific to the deployment environment, motion blur from a moving belt or handheld camera, sensor noise from a dusty or low-light setting, partial occlusion from overlapping objects.
The general rule for all of this: an augmentation should mimic a real variation the model will actually encounter once deployed, not just add randomness for the sake of adding randomness. If you can't picture the real-world condition an augmentation is meant to simulate, it's probably not one worth adding.
Generate the Dataset Version
With the split configured, generate a first version with no augmentation applied, your baseline.
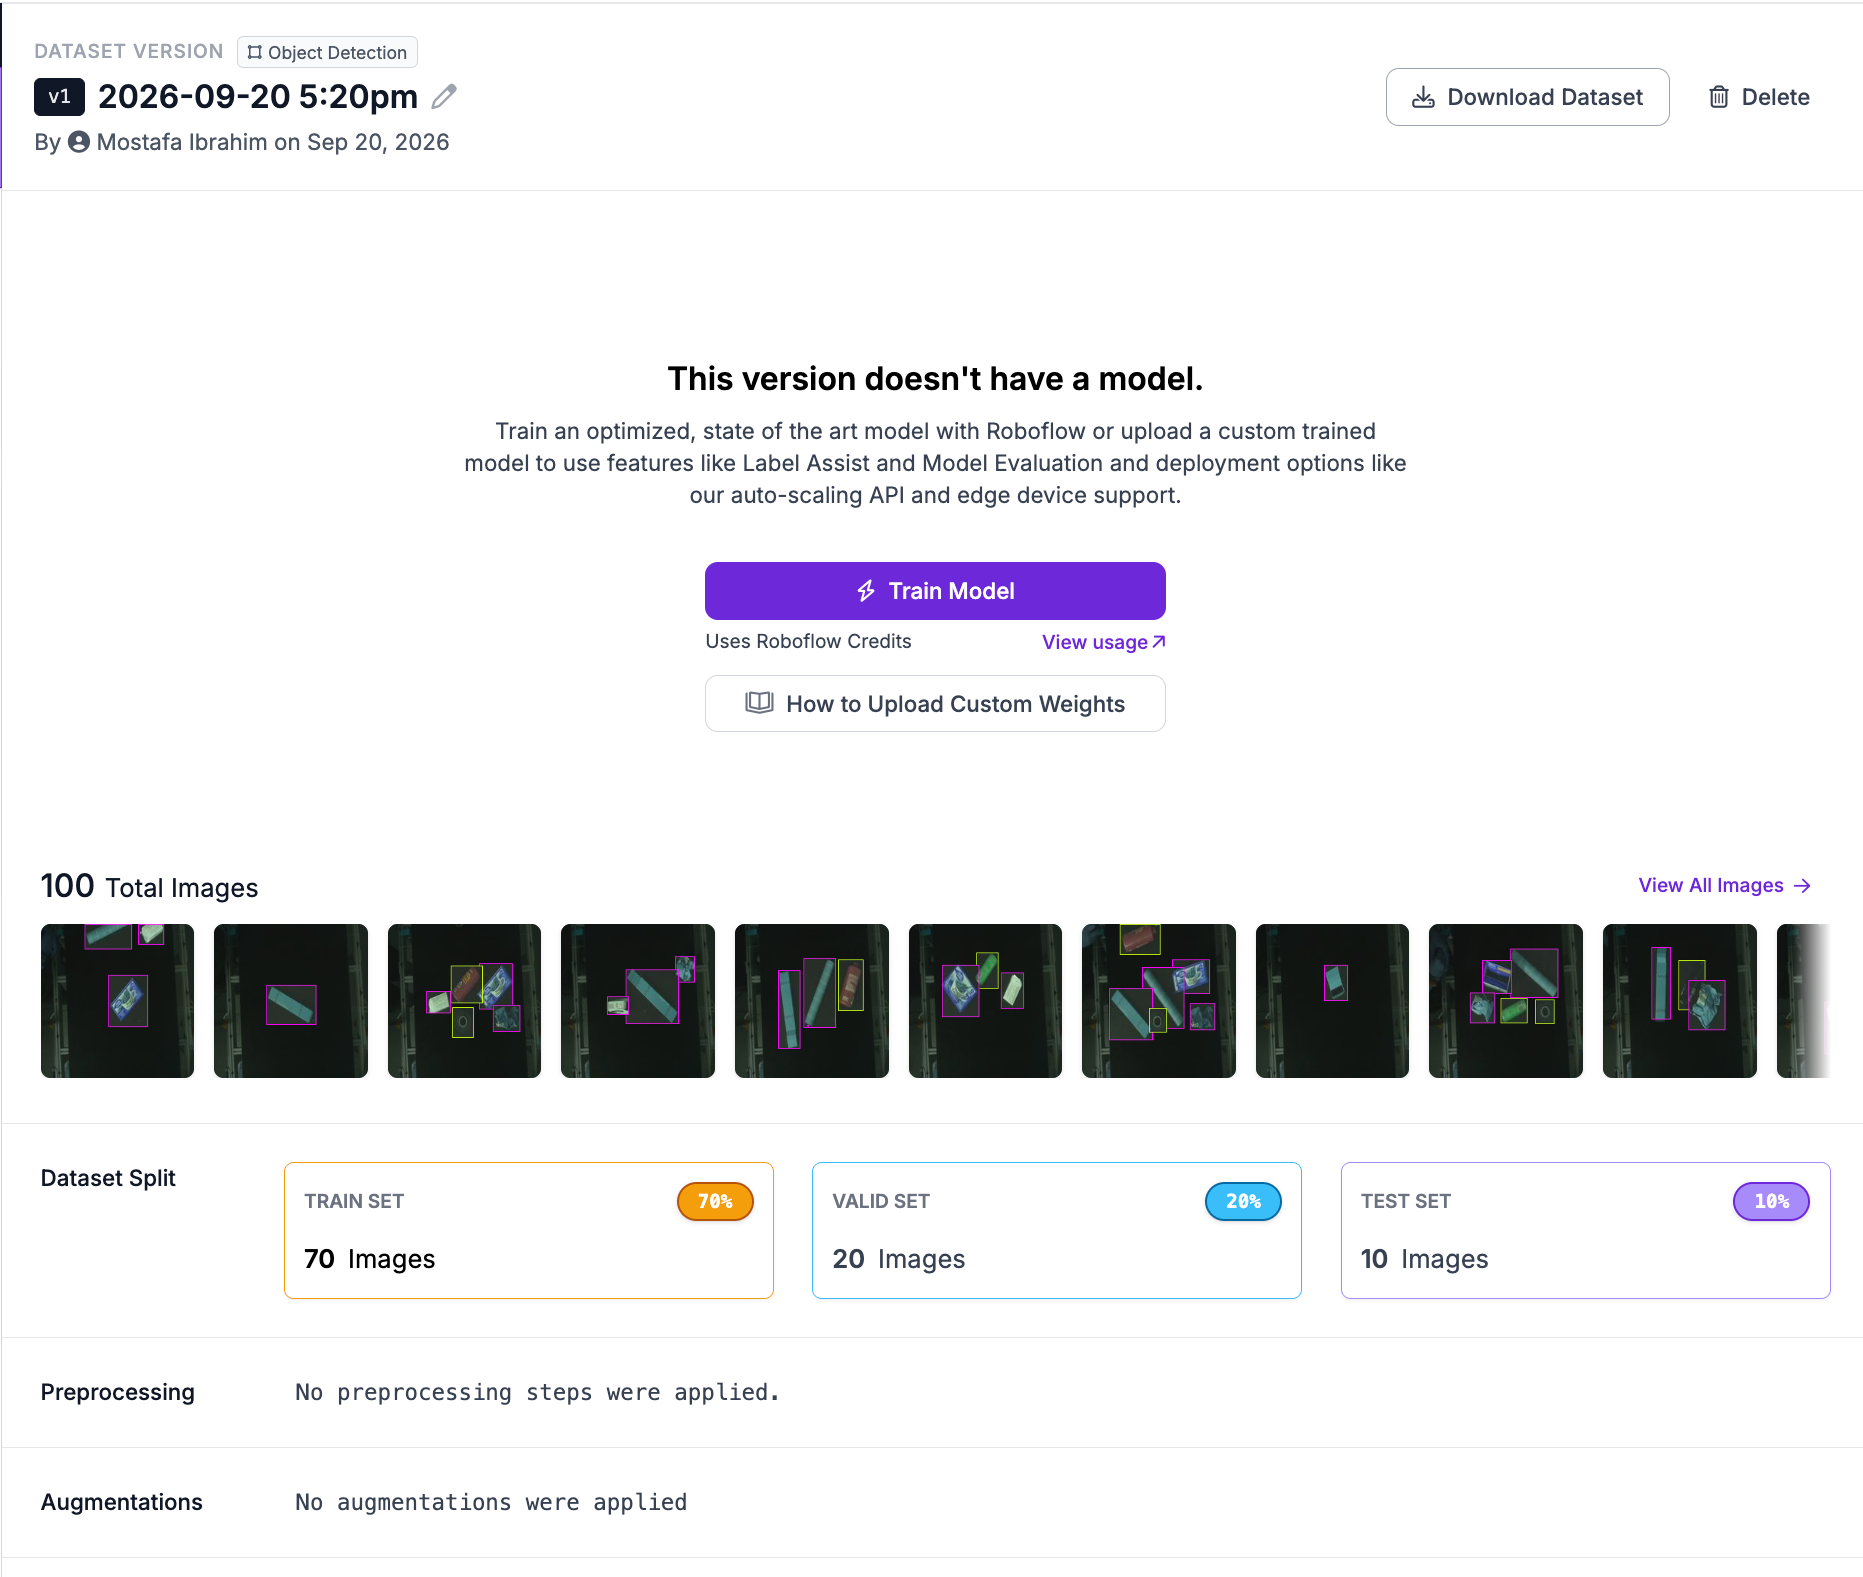
Train and review this baseline before touching anything else. Once you know where it actually falls short, generate a second version with augmentation added. For this dataset, the following settings were used:
- 3 outputs per training example
- Flip (Horizontal and Vertical)
- Crop (0% minimum zoom, 35% maximum zoom)
- Rotation (between -30° and +30°)
- Brightness (between -15% and +15%)
- Blur (up to 2.5px)
- Noise (up to 0.1% of pixels)
Each chosen to reflect real conditions this model will face: tumbled orientation, partial visibility, inconsistent lighting, and camera or motion artifacts.
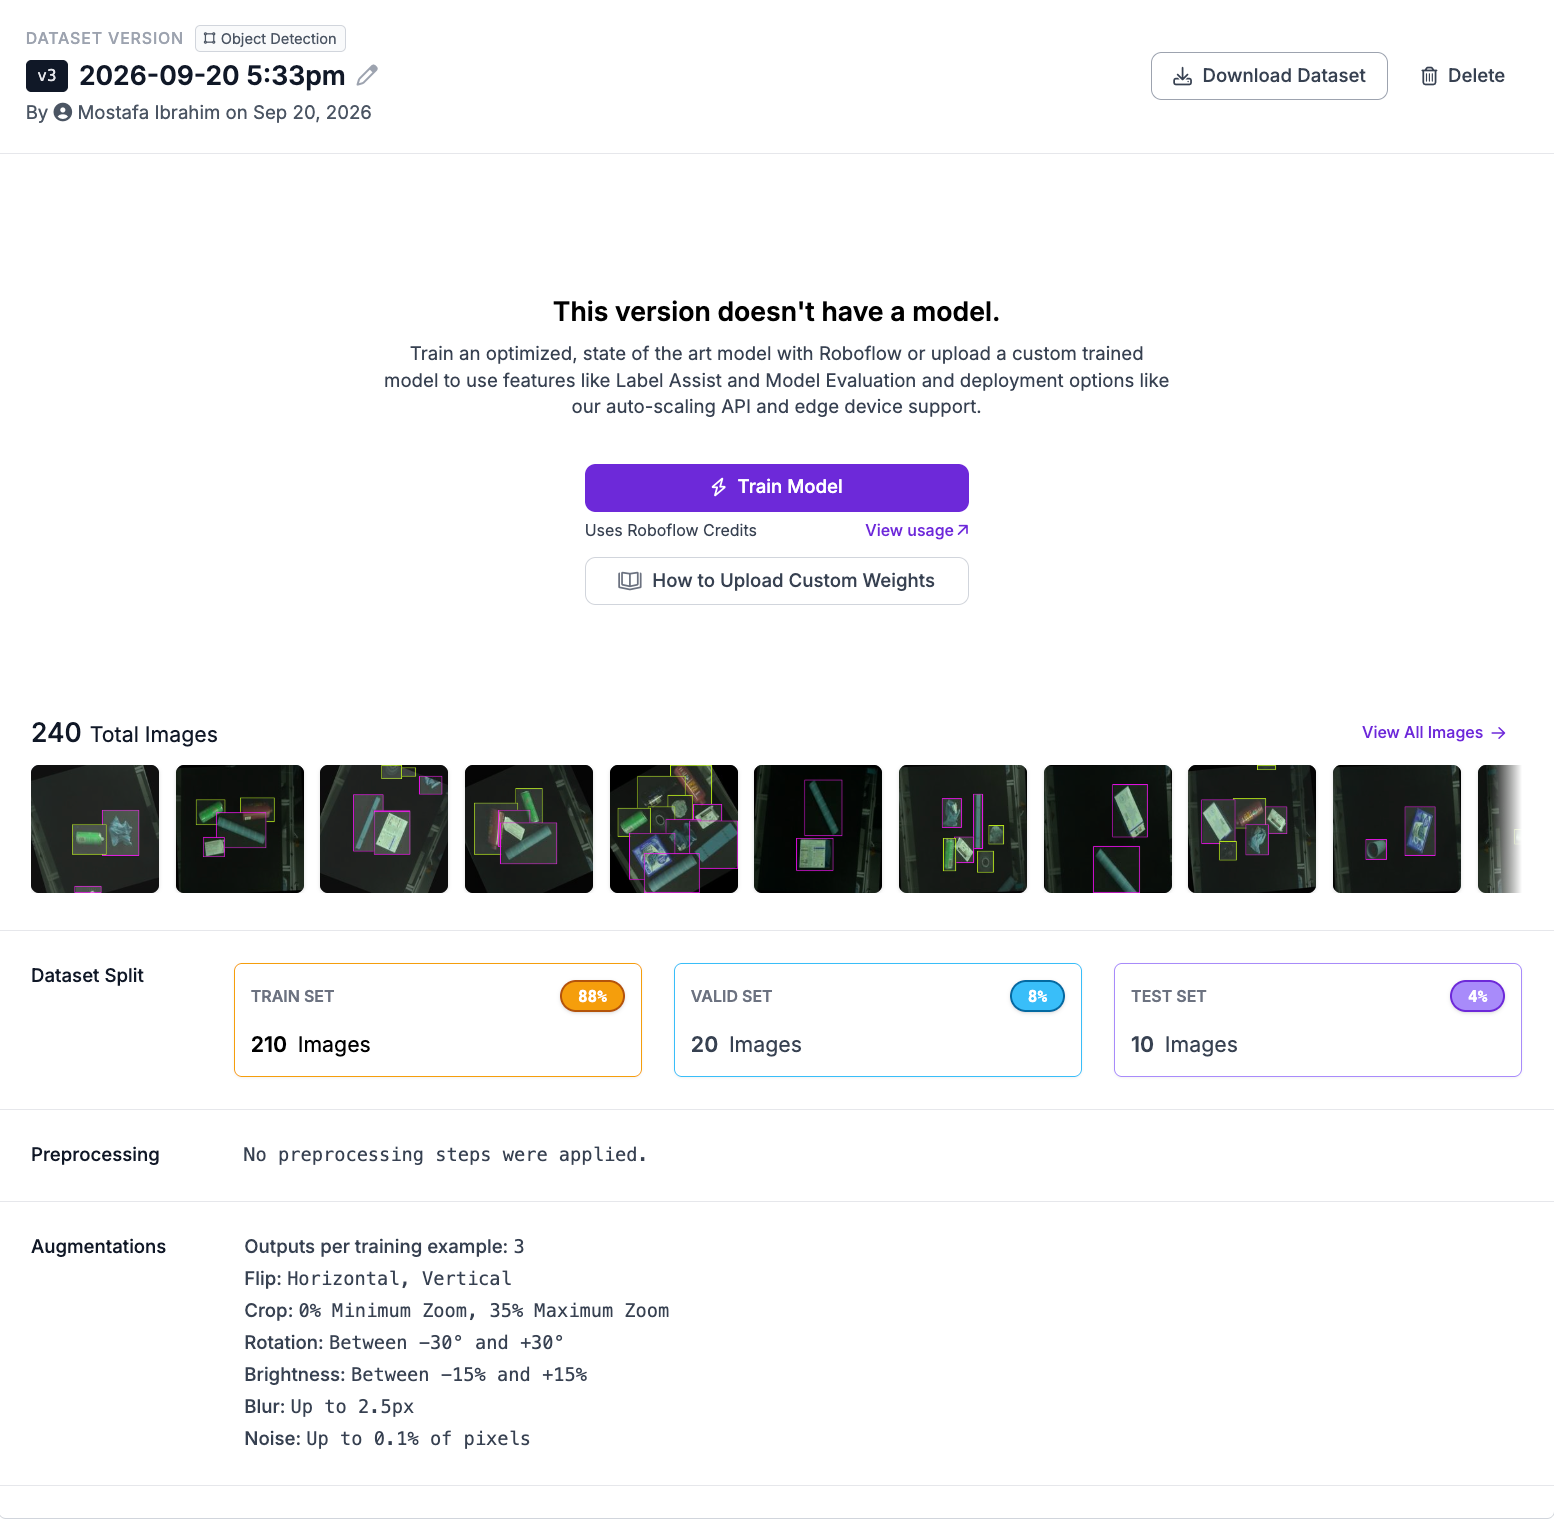
Notice the training split's image count jumps well past its original size, while valid and test stay exactly as they were. That's expected; augmentation only multiplies the training set, so don't be thrown off by the split percentages shifting once the version generates.
Train YOLO26 with Custom Training
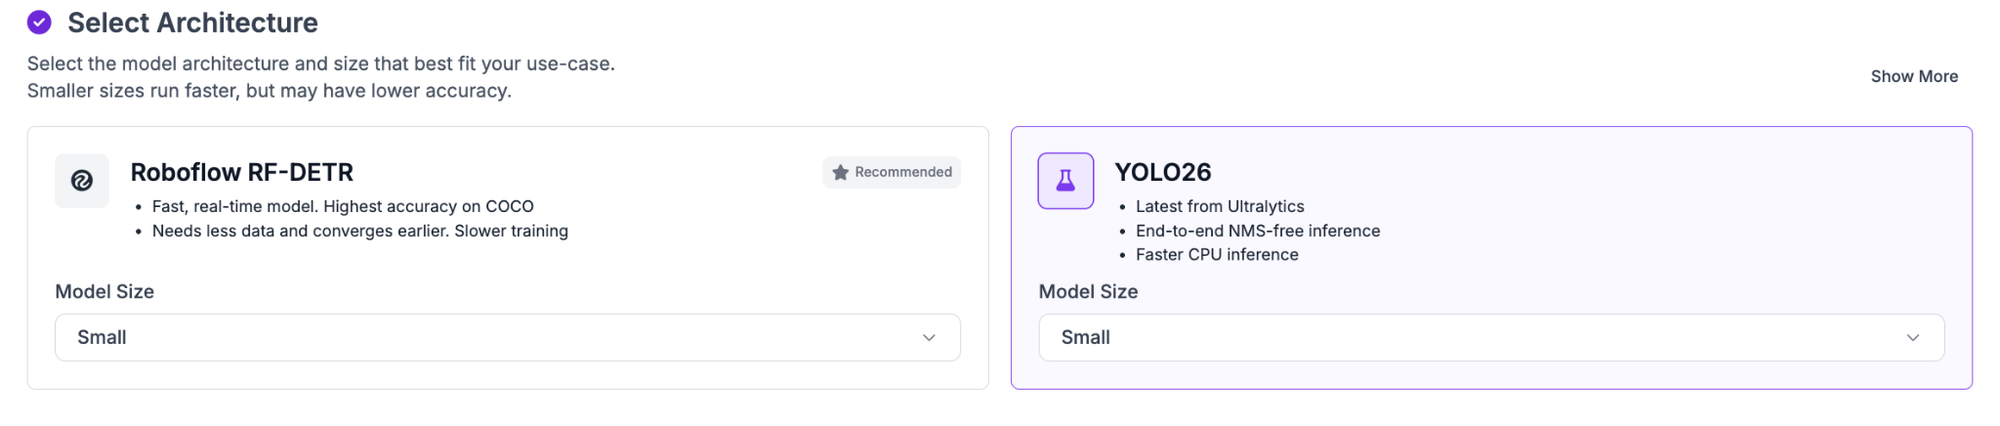
From the version page, click Train Model, then select Custom Training and choose YOLO26. Pick a model size, Nano through Extra Large, based on your needs: smaller sizes train and run faster and fit tighter deployment constraints, while larger sizes trade that speed for higher accuracy.
Read the Results
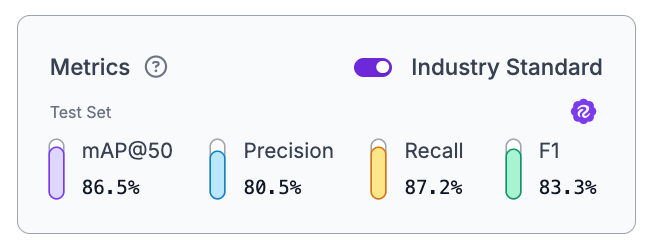
Once training finishes, check the same four metrics for both models: mAP@50, precision, recall, and F1.
Baseline model metrics
Augmented model metrics
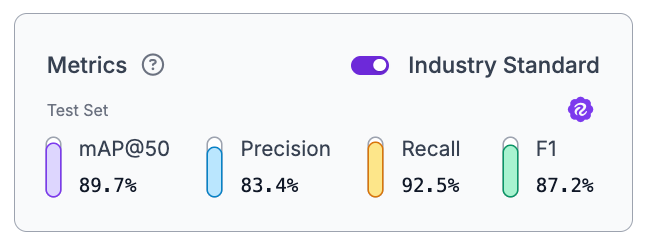
Every metric moved in the right direction: mAP@50 up 3.2 points, precision up 2.9, recall up 5.3, and F1 up 3.9. Recall improved the most, which lines up with what the augmentations were chosen to do, help the model recognize items in the tumbled orientations, partial visibility, and lighting variation it would actually face on a moving belt. This is the comparison that confirms whether augmentation was worth adding, not just whether the final model looks good on its own.
Conclusion
Start with a baseline trained without augmentation, so you have a clean read on how the raw dataset performs. Augment deliberately, choosing each option based on a real variation the model will actually face, not just because it's available in the menu. Then compare the augmented model back against that baseline before assuming any of it worked.
Augmentation is a tool for matching training data to deployment conditions, not a default setting to maximize. More augmented images isn't automatically better, the goal is closing the gap between what the model trains on and what it will actually see once deployed.
A reasonable first step is generating one version with no augmentation and one with a small, deliberate set applied, then training both on YOLO26 and comparing the metrics directly, exactly as done above, on your own dataset. Start free.
Further reading:


Cite this Post
Use the following entry to cite this post in your research:
Mostafa Ibrahim. (Jul 24, 2026). How to Do Augmentation for YOLO in Roboflow. Roboflow Blog: https://blog.roboflow.com/how-to-do-augmentation-for-yolo/