Creating a high quality dataset for computer vision is essential to having strong model performance.
In addition to collecting images that are as similar to your deployed conditions as possible, labeling images carefully and accurately is essential.
But how do you label images? What should you keep in mind to label images well? We're going to answer those questions in this post. By the end of this post, you'll have a few tips to keep in mind so that your image annotations are correct and helpful a model.
Check out the video version of this article on our YouTube channel.
What is image labeling?
Image labelling is when you annotate specific objects or features in an image. Image labels teach computer vision models how to identify a particular object in an image. For example, in a set of aerial view images, you might annotate all of the trees. The labels will help a model understand what a tree is.
Image labelling can be done with a variety of annotation tools. These annotation tools let you draw specific boundaries around objects. These boundaries are called "bounding boxes". Each bounding box is given a label so that the model can differentiate different objects. For example, all trees might be labeled as "tree" and all houses might be annotated as "house".
The quality of your image labels will directly affect the accuracy of a trained model. Using the right labeling and annotation strategy, you can produce a high-quality dataset that will help a model better learn how to identify the objects you have labelled.
Caveat: Labeling instructions depend on your task
While the below best practices are generally true, it is important to note that labeling instructions are highly dependent on the nature of the task at hand.
Moreover, images labeled for one task, may not be suitable for another task – re-labeling is not uncommon. It is best to think of a dataset and its labels as something alive: constantly changing and improving to fit the task at hand.
Label and Annotate Data with Roboflow for free
Use Roboflow to manage datasets, label data, and convert to 26+ formats for using different models. Roboflow is free up to 10,000 images, cloud-based, and easy for teams.
How to label images for computer vision tasks
With that in mind, lets walkthrough a few tips on how to effectively label images.
Unsure which images to label first? Consider how to use active learning in computer vision.
1. Label Every Object of Interest in Every Image
Computer vision models are built to learn what patterns of pixels correspond to an object of interest.
Because of this, if we're training a model to identify an object, we need to label every appearance of that object in our images. If we do not label the object in some images, we will be introducing false negatives to our model.
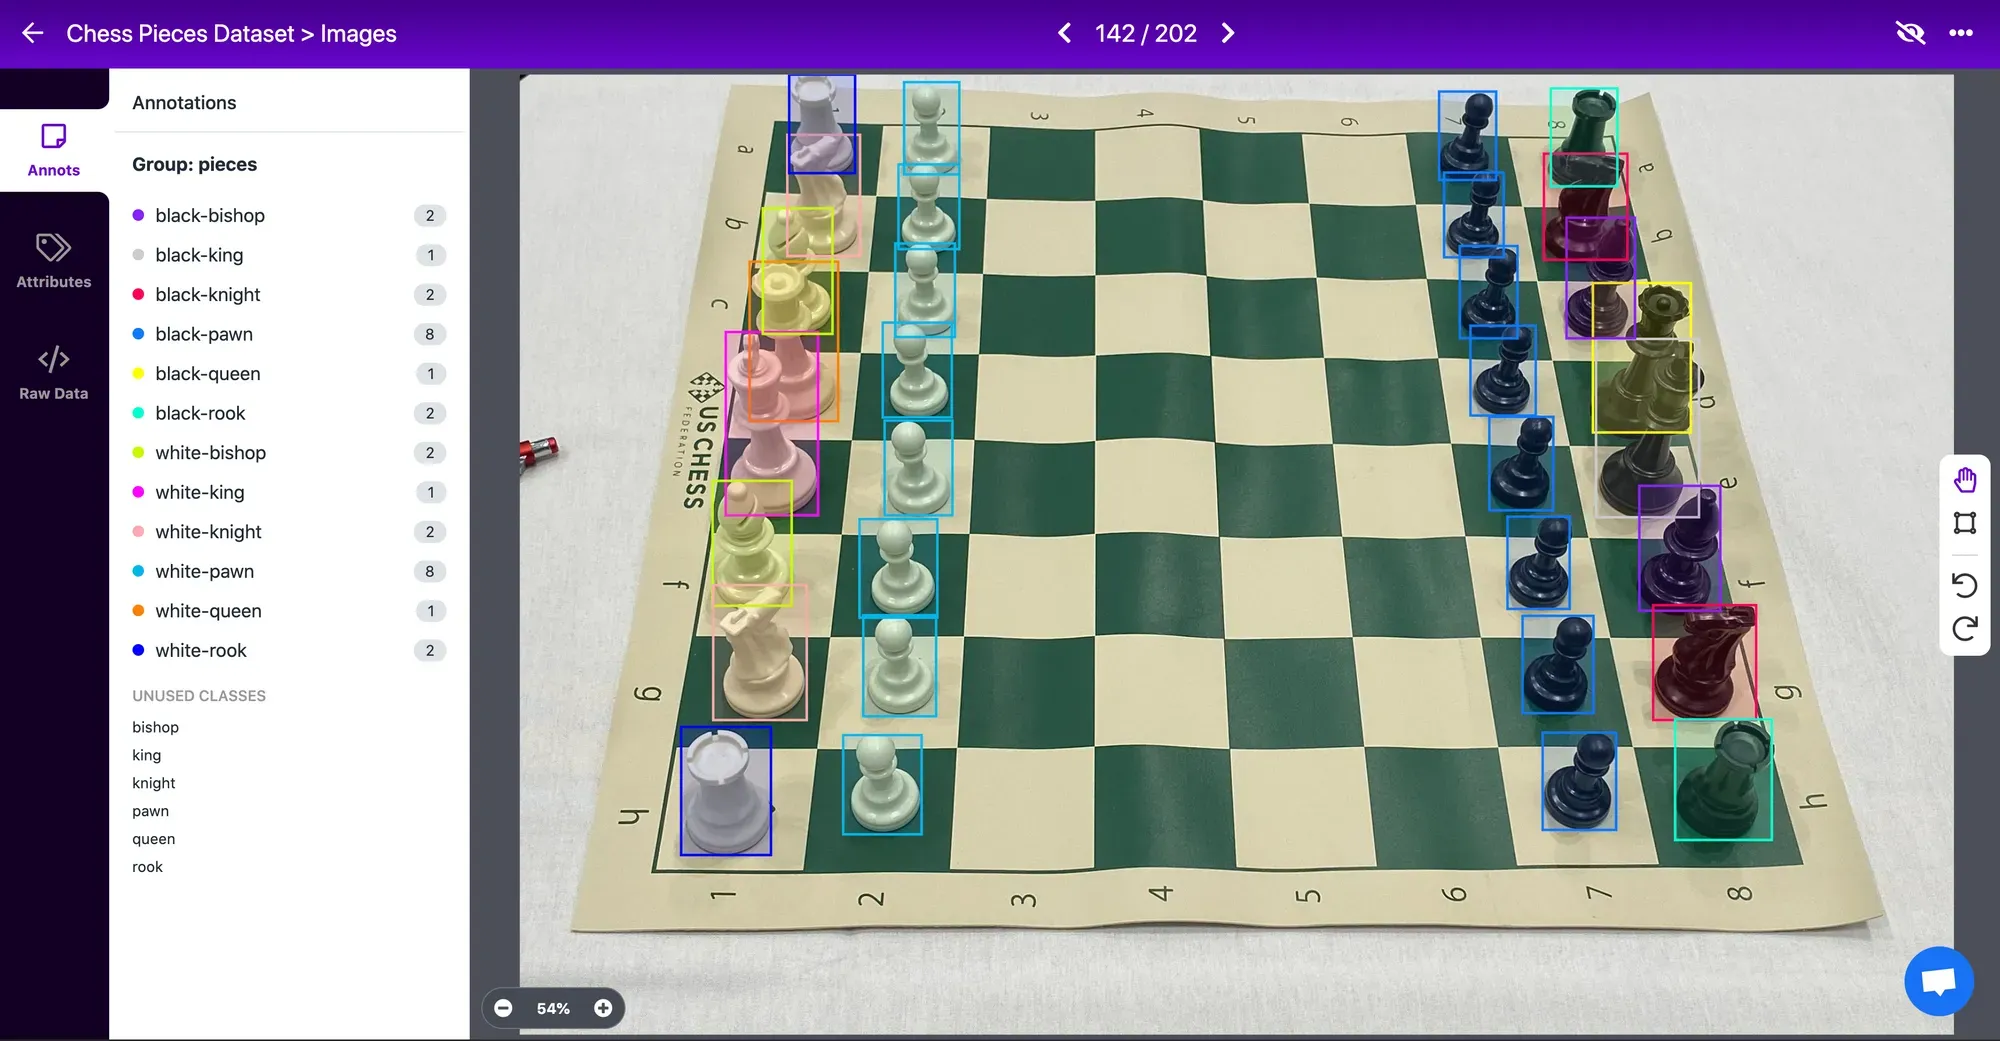
For example, in a chess piece dataset, we need to label the appearance of every single piece on the board – we would not label only some of, say, the white pawns.
2. Label the Entirety of an Object
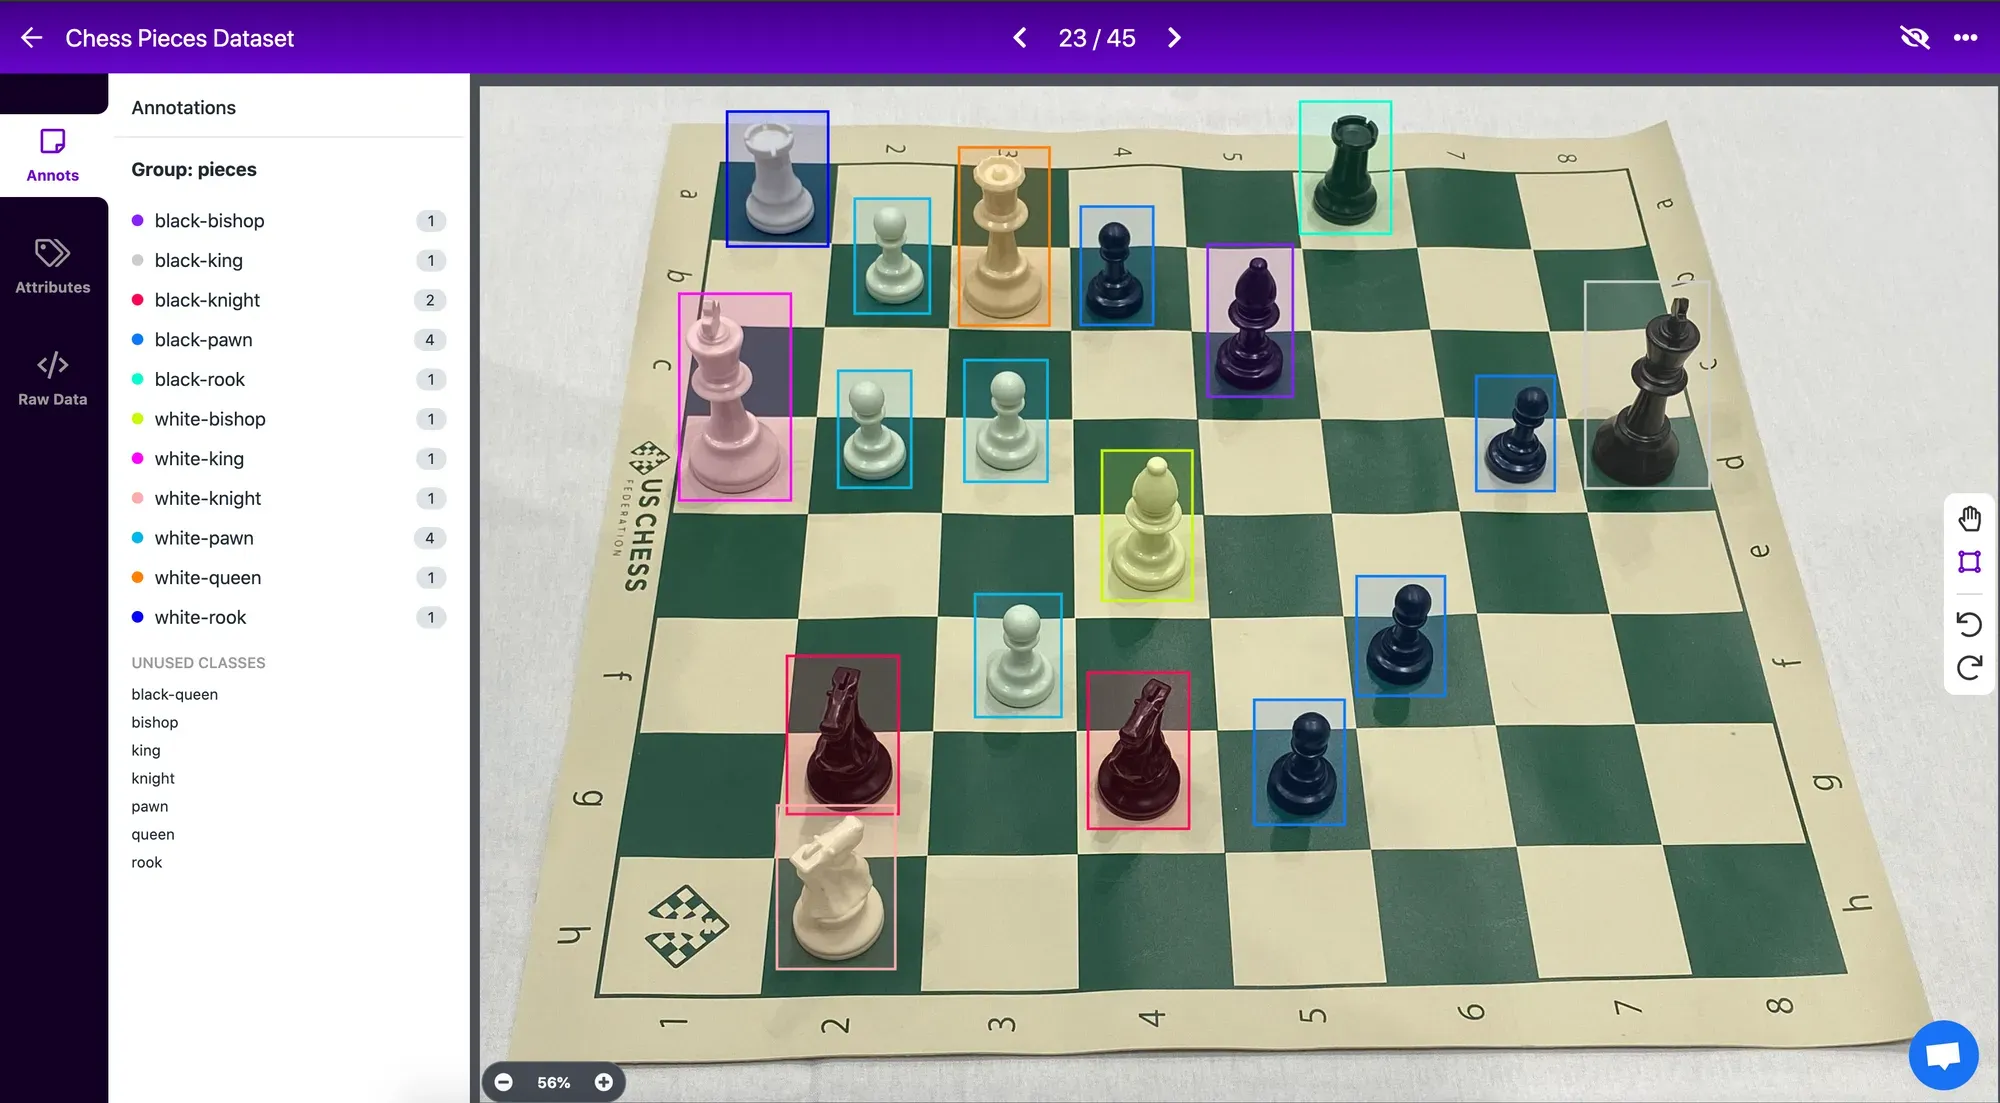
Our bounding boxes should enclose the entirety of an object of interest. Labeling only a portion of the object confuses our model for what a full object constitutes.
In our chess dataset, for example, notice how each piece is fully enclosed in a bounding box.
3. Label Occluded Objects
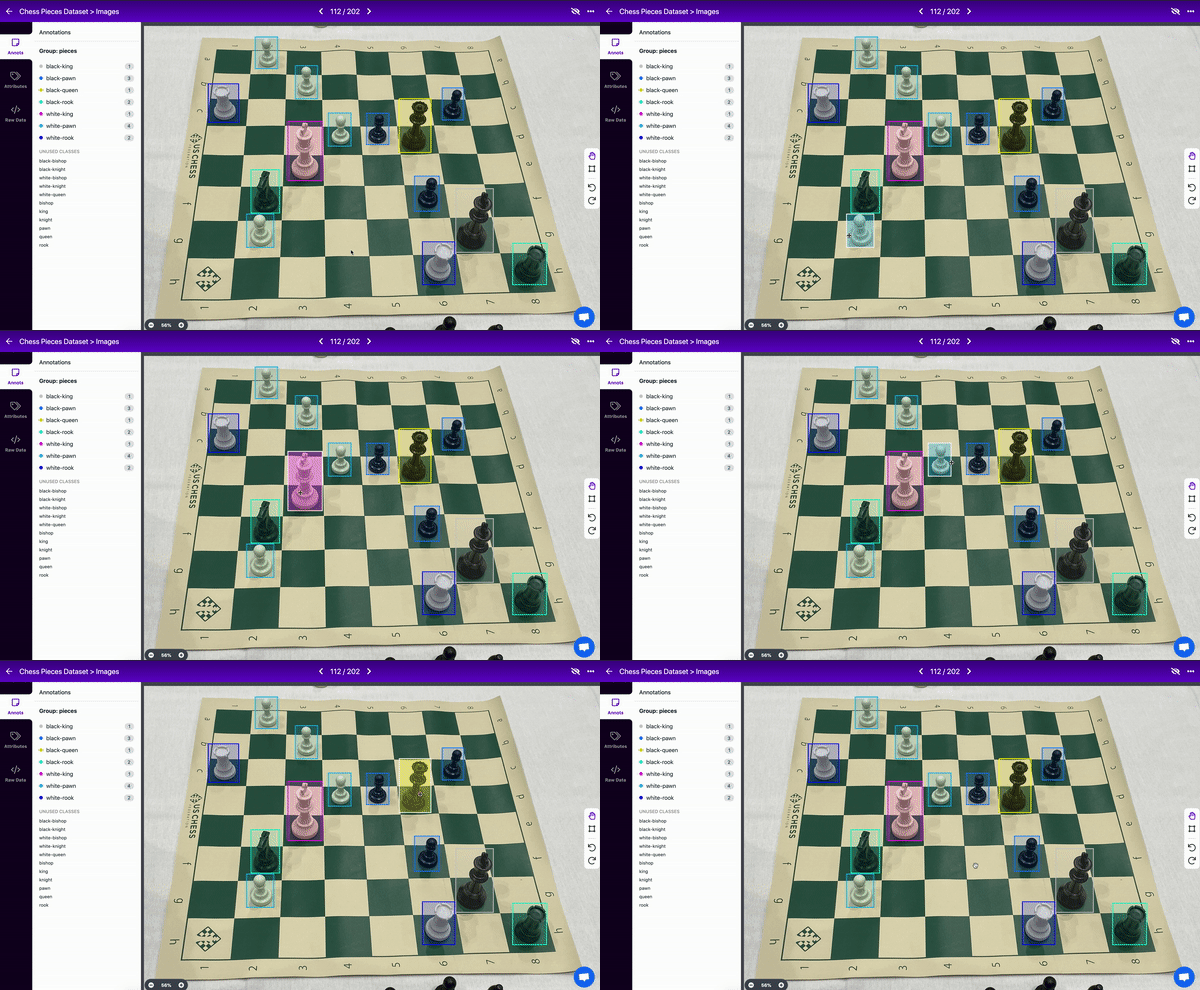
Occlusion is when an object is partially out of view in an image due to something blocking it in a photo. It is best to label even occluded objects.
Moreover, it is commonly best practice to label the occluded object as if it were fully visible – rather than drawing a bounding box for only the partially visible portion of the object.
For example, in the chess dataset, one piece will regularly occlude the view of another. Both objects should be labeled, even if the boxes overlap. (It is a common misconception that boxes cannot overlap.)
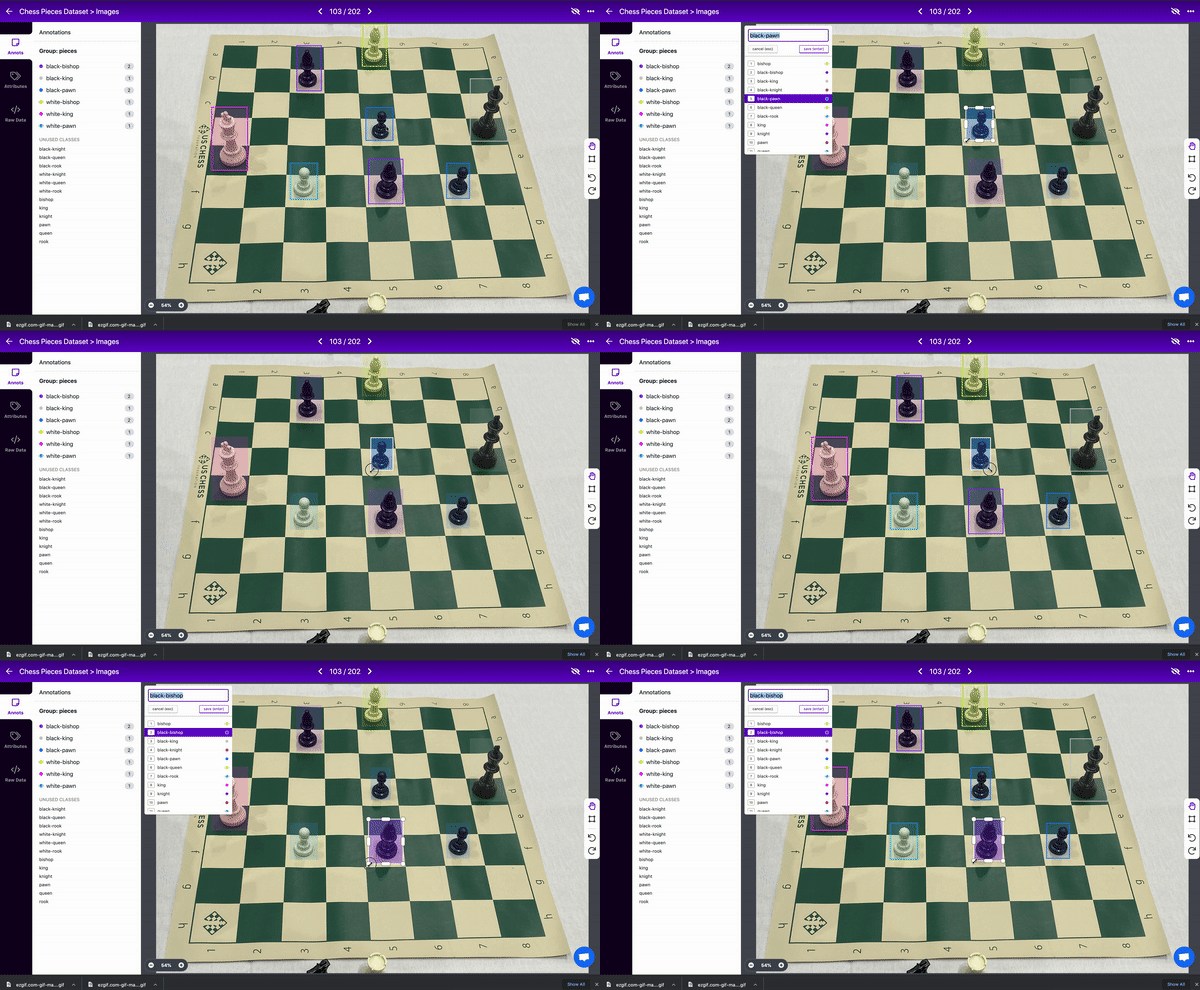
4. Create Tight Bounding Boxes
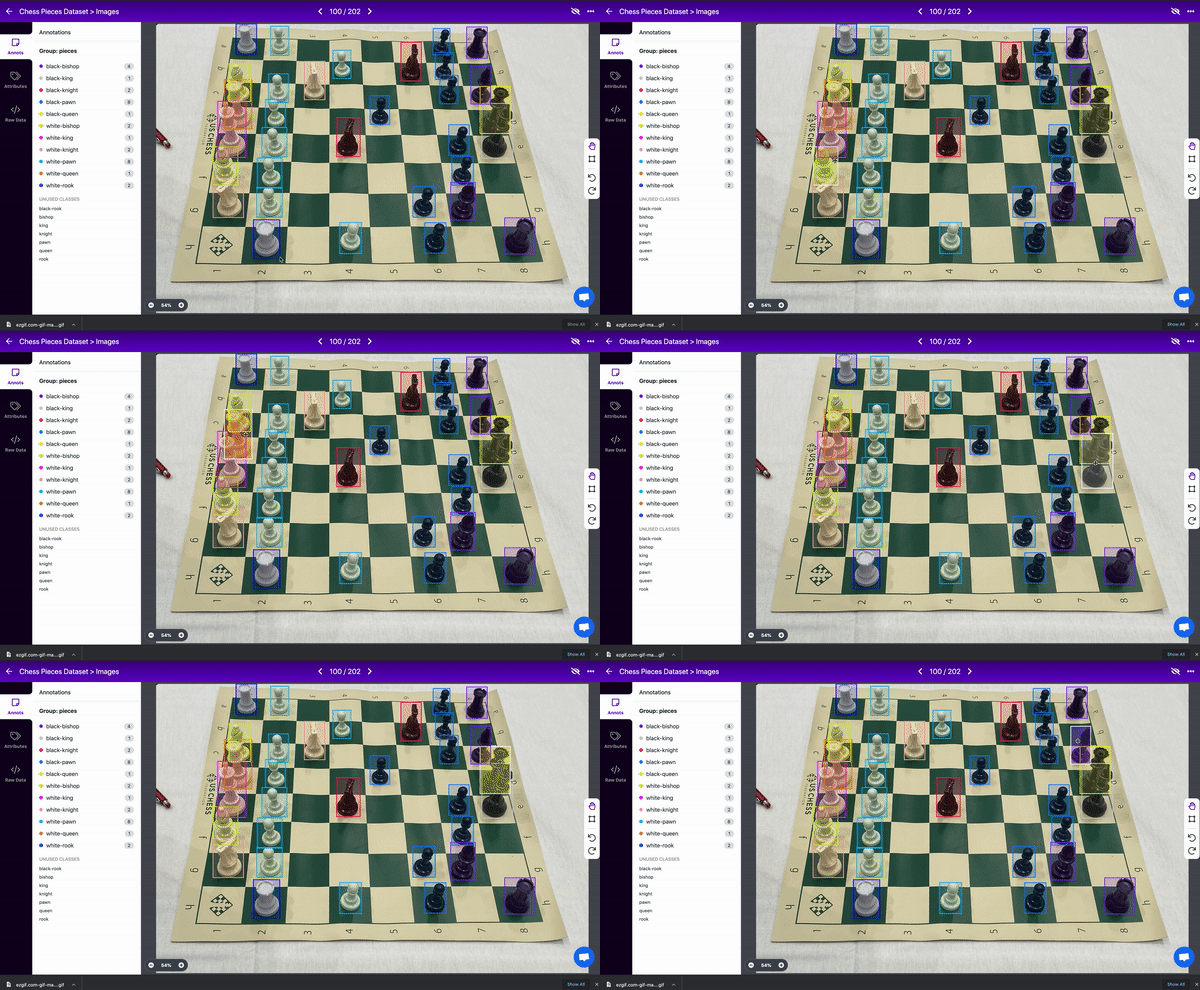
Bounding boxes should be tight around the objects of interest. (But, you should never have a box so tight that it is cutting off a portion of the object.) Tight bounding boxes are critical to helping our model learn, precisely, which pixels constitute an object of interest vs irrelevant portions of an image.
5. Create Specific Label Names
When determining a given object's label name, it is better to error on the side of being more specific rather than less. It is always easier to remap label classes to be more general, whereas being more specific requires relabeling.
For example, imagine you are building a dog detector. While every object of interest is a dog, it may be wise to create a class for labrador and poodle. In initial model building, our labels could be combined to be dog. But, if we had started with dog and later realized having individual breeds is important, we would have to relabel our dataset altogether.
In our chess dataset, for example, we have white-pawn and black-pawn. We could always combine these to be pawn, or even combine all classes to be piece.
6. Maintain Clear Labeling Instructions
Inevitably, we will need to add more data to our dataset – this is a key element to model improvement. Tactics like active learning ensure that we spend our time labeling intelligently. As such, having clear, shareable, and repeatable labeling instructions is essential for both our future selves and coworkers to create and maintain high quality datasets.
Many of the techniques we've discussed here should be included: label the entirety of an object, make labels tight, label all objects, etc. It is always better to err on the side of more specificity than less.
7. Label Faster with Roboflow’s Professional Labelers
Through Roboflow’s Outsource Labeling service, you can work directly with professional labelers to annotate projects of all sizes. Roboflow manages workforces of experts who are trained in using Roboflow’s platform to curate datasets faster and cheaper.
The first step in getting started with Outsource Labeling is to fill out the intake form with your project’s details and requirements. From there, you will be connected with a team of labelers to directly work with on your labeling project(s).
When working with professional labelers, clearly documenting your instructions is an essential part of the process. We often see that the most successful labeling projects are the ones in which well documented instructions are provided upfront, a period of initial feedback takes place with the labelers regarding an initial batch of images, and then the labeling volume is significantly ramped up. Read our guide to writing labeling instructions for more information about how to write informative instructions..
As part of the Outsource Labeling service, you will also be working with a member of the Roboflow team to help guide your labeling strategy and project management to ensure you are curating the highest quality dataset possible.
8. Get the Most Out of Roboflow’s Annotation Tools
Roboflow has a suite of annotation tools to make the process of labeling data more efficient and accurate.
- Label Assist: a tool that uses model checkpoints (i.e. a previous version of your model) to recommend annotations.
- Smart Polygon: a tool that leverages the Segment Anything Model to create polygon annotations with a few clicks.
- Auto Label (Beta): a tool that leverages large foundational models to label images based on prompted descriptions of each Class.
- Commenting: a feature that allows for seamless cross-team collaboration throughout the labeling process.
Label and Annotate Data with Roboflow for free
Use Roboflow to manage datasets, label data, and convert to 26+ formats for using different models. Roboflow is free up to 10,000 images, cloud-based, and easy for teams.
When we're ready to scale up our labeling efforts either with teammates or an outsourced workforce, we manage large scale labeling projects with team workflows and label-only users.
As always, happy building!
Cite this Post
Use the following entry to cite this post in your research:
Joseph Nelson. (Jan 5, 2024). How to Label Image Data for Computer Vision Models. Roboflow Blog: https://blog.roboflow.com/tips-for-how-to-label-images/
