
YOLO-NAS, an Apache 2.0 open source object detection model developed by Deci AI, is one of many pioneering computer vision model ranges built on top of the YOLO architecture. Using YOLO-NAS, you can train a fine-tuned model to detect objects of interest. YOLO-NAS was generated using a Neural Architecture Search (NAS), a method of testing different architectures to find the optimal one given a set of parameters.
We are excited to announce that you can now train and deploy YOLO-NAS object detection models on the Roboflow platform. This option will appear alongside the Fast and Accurate training options offered in Roboflow Train.
In this guide, we are going to walk through how to train a YOLO-NAS object detection model in Roboflow and how to deploy your model to the edge with Inference, an open source inference server.
Without further ado, let’s get started!
What is YOLO-NAS?
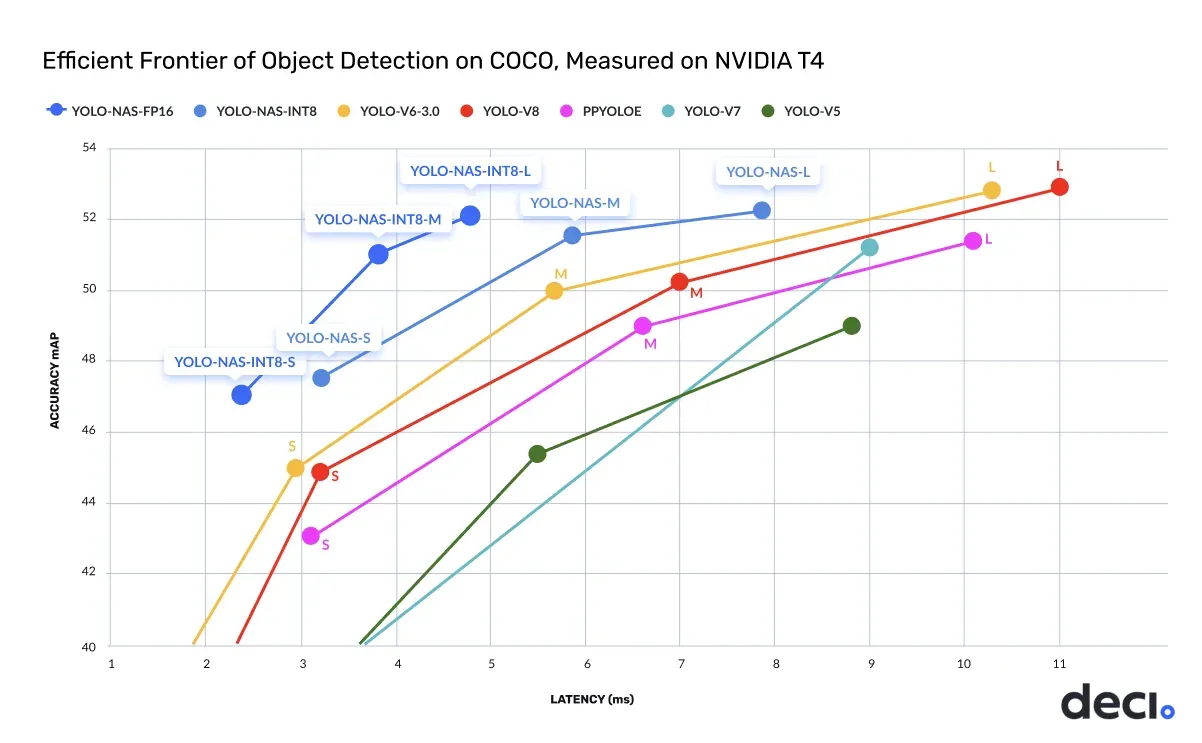
YOLO-NAS is an open source computer vision model architecture for object detection. When evaluated on the COCO dataset, YOLO-NAS achieved both lower latency and higher accuracy relative to its predecessors like YOLOv6, YOLOv7, and Ultralytics YOLOv8. The model is available as part of the super-gradients model ecosystem maintained by Deci AI.
You can now train and deploy object detection YOLO-NAS models on Roboflow.
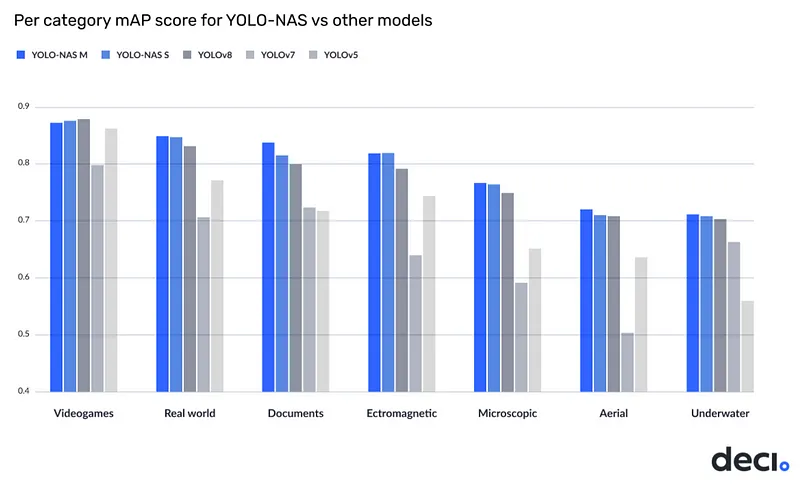
The Deci team benchmarked the performance of YOLO-NAS on the Roboflow 100 dataset, designed to measure a model’s performance when trained on a specific, defined set of tasks. The results demonstrated strong model performance across all categories.
How to Train a YOLO-NAS Model in Roboflow
You can train a YOLO-NAS object detection model on the Roboflow platform. To do so, you need to:
- Label your images and prepare a dataset version.
- Select the YOLO-NAS training option from the model training window.
From there, you can monitor your training progress, test, and deploy your model.
Step #1: Prepare a Dataset
First, create a free Roboflow account.
To train a model, you will need a labeled dataset. You can label your dataset in Roboflow Annotate, or you can upload images you have already labeled to the Roboflow platform for use in dataset generation and model training.
You can label data from the “Annotate” tab in your Roboflow project.
Once you have labeled your data, you can generate a dataset version which you can use to train your model. You can generate a dataset version from the “Generate” tab in your project.
To learn more about setting up a project in Roboflow, refer to the Roboflow Getting Started guide.
Step #2: Select YOLO-NAS Training
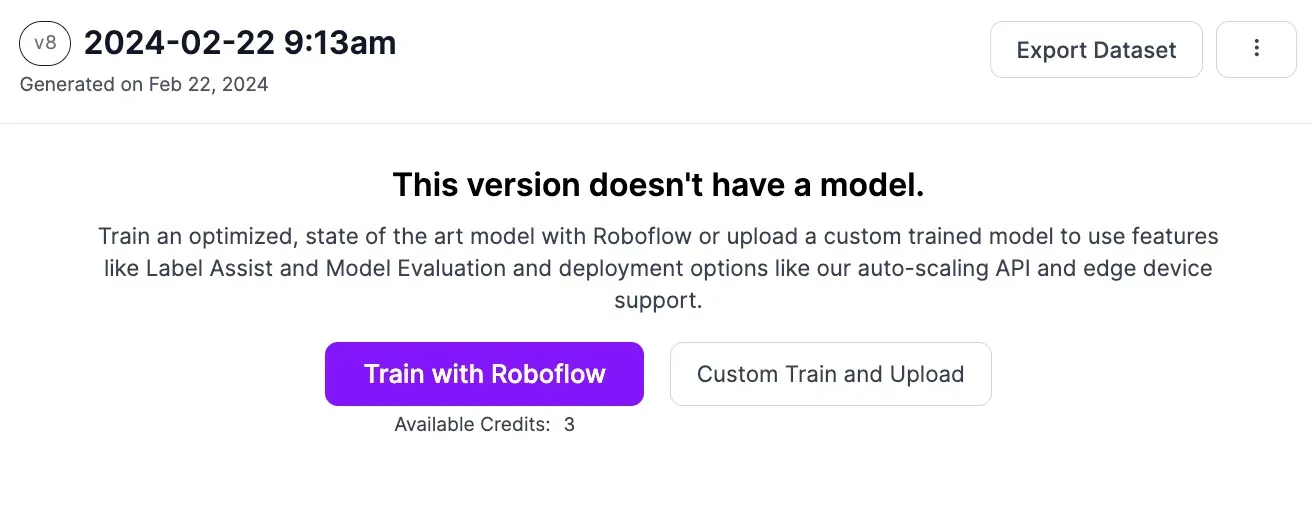
Once you have generated a dataset version, you can train your YOLO-NAS model. To do so, click the “Train with Roboflow” button on your dataset page.
Then, select the “YOLO-NAS” option.
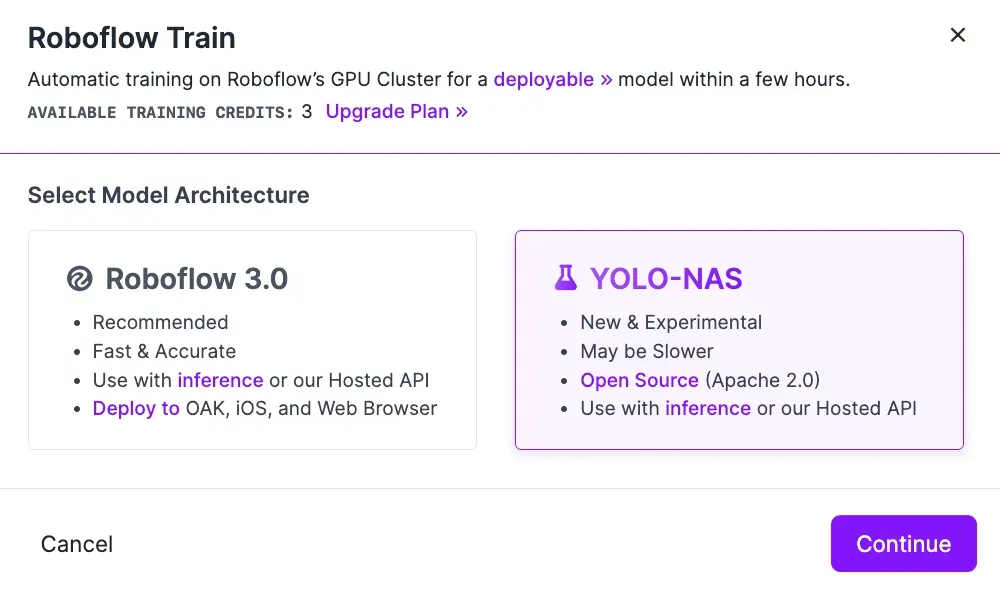
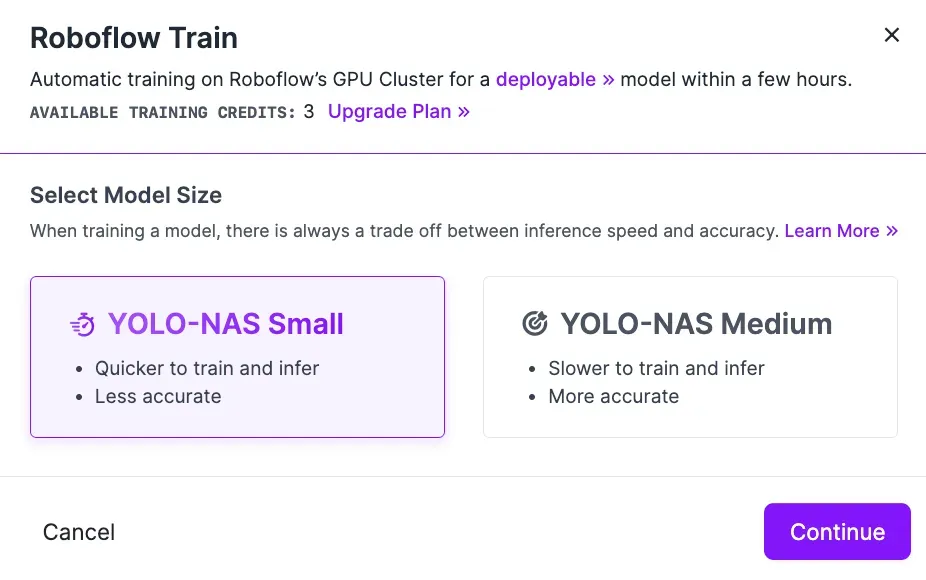
Once you have selected “YOLO-NAS”, you will be asked to choose a model size. We recommend training from Small for testing, and Medium if you are tuning to achieve maximum accuracy before taking your model to production.
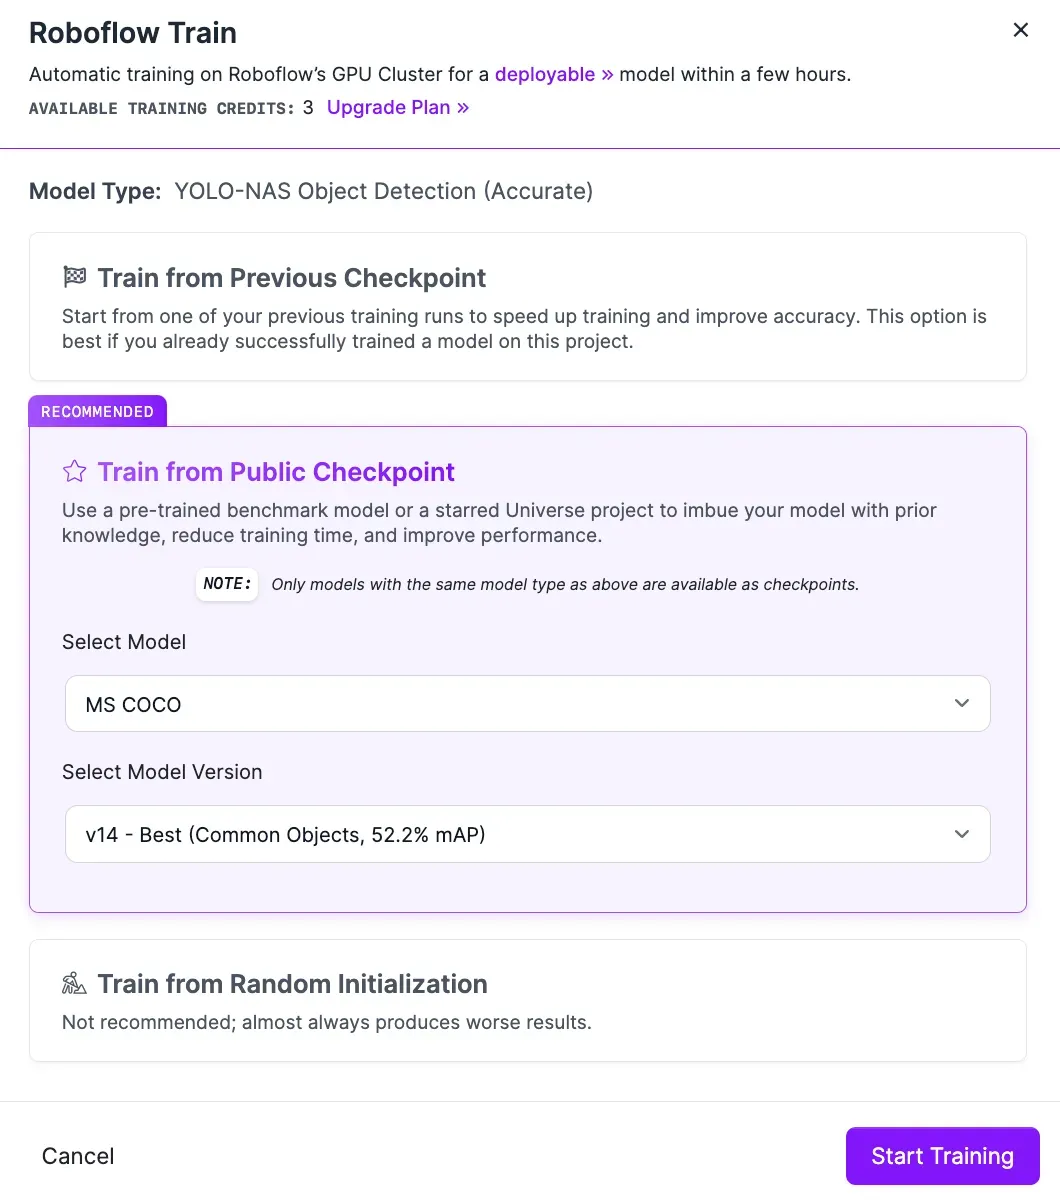
Next, select from which checkpoint you want to train. We recommend training from the Roboflow MS COCO pre-trained weights checkpoint for the first version of your model. If your model performs well, you can use existing versions of your model as a checkpoint. This will help you achieve optimal performance as you tune your model over time.
You can only use existing YOLO-NAS models as a checkpoint. Other model types you have trained or uploaded in Roboflow (i.e. Roboflow Train 3.0) cannot be used as a checkpoint for YOLO-NAS training.
Click “Continue”.
Your training job will be allocated to a server for processing and you will receive an estimate of how long it will take for your model to train. When the computer tasked with training your model is ready, a graph will appear that enables you to evaluate how your model training job is going in real time.
Step #3: Test the YOLO-NAS Model
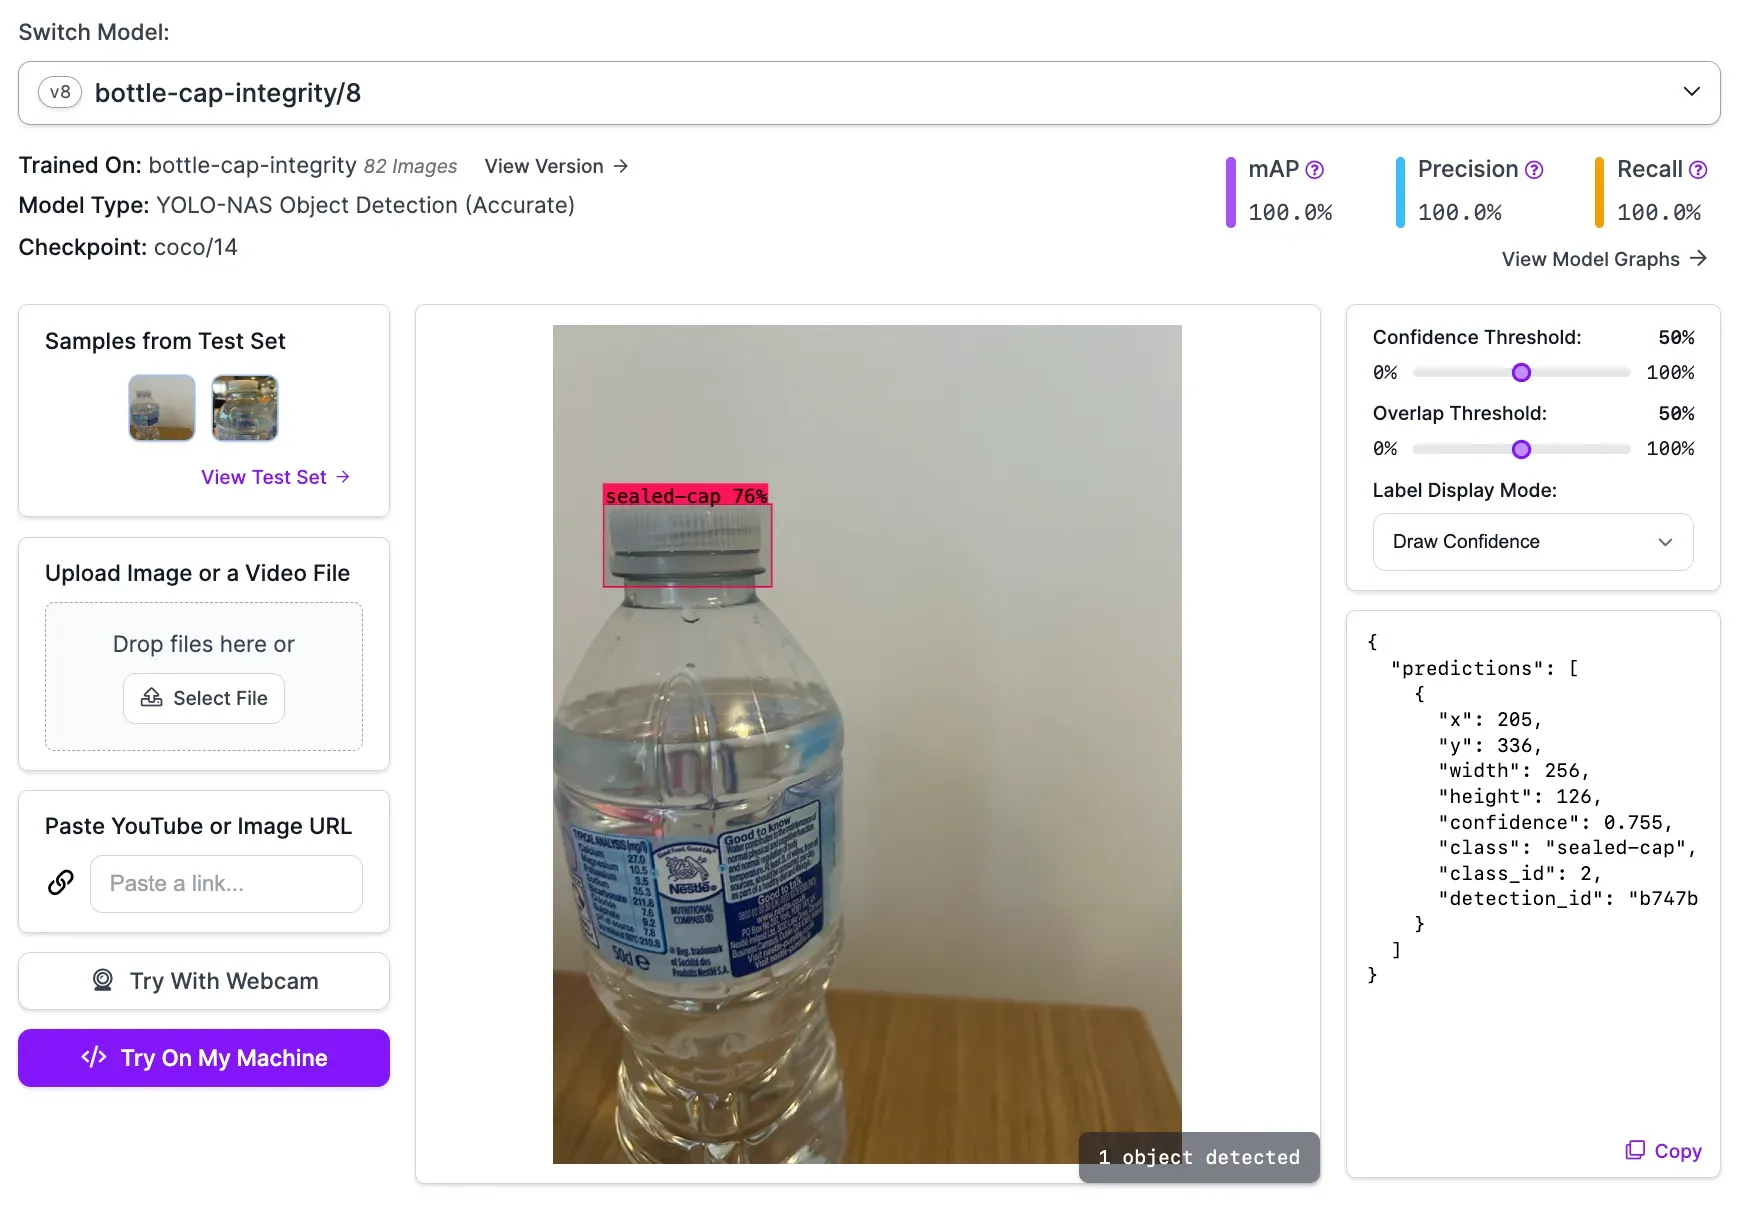
Once you have trained your model, you can test it in Roboflow. To do so, click “Visualize” in the left sidebar. From this page, you can select an image from the test set of your dataset to evaluate model performance. You can also upload a video or provide a URL to an image or video on which you want to run your model.
Here is an example of a bottle cap detection model running on an image from the model test set:
How to Deploy YOLO-NAS with Roboflow
Once you have trained a YOLO-NAS model on Roboflow, you can use it through the Roboflow hosted API or deploy the model on your own hardware with Roboflow Inference, an open source inference server.
Deploying using the hosted API is ideal if you have a large number of images that you want to process in bulk. For scenarios where you want to run your model in real-time, we recommend deploying your model with Roboflow Inference.
Let’s walk through the steps required to deploy our YOLO-NAS model to a webcam feed on our own hardware.
Step #1: Install Inference
First, we need to install Inference, open source software that you can use to run a wide range of computer vision model architectures, from CLIP to YOLO-NAS.
To install Inference, run:
pip install inferenceNext, retrieve your Roboflow API key from the Roboflow dashboard. Set your API key in an environment variable called ROBOFLOW_API_KEY:
export ROBOFLOW_API_KEY=""We are now ready to deploy our model.
Step #2: Use InferencePipeline to Deploy to a Camera
You can use the InferencePipeline in Inference to deploy your model to a camera. You can also use InferencePipeline to run your model on a video file or an RTSP stream. Let’s deploy our model on a webcam stream.
Create a new Python file and add the following code:
from inference import InferencePipeline
from inference.core.interfaces.stream.sinks import render_boxes

pipeline = InferencePipeline.init(
    model_id="your-model-id/1”,
    video_reference=0,
    on_prediction=render_boxes,
)

pipeline.start()
pipeline.join()
Above, replace:
your-model-id/1with your Roboflow model ID. Learn how to retrieve your Roboflow model ID.0with your webcam ID. Your default webcam should use the ID 0. You can also set this value to a video file name or an RTSP stream URL.
In the code above, we use Inference to run our model. The render_boxes callback will display our webcam in real time with bounding boxes that correspond to detections from our model.
When you first run the script above, the weights associated with your model will be downloaded to your device. This will take a few moments. Then, your model will start running.
Here is an example of our model running on a webcam:
Our model is running on our hardware successfully.
You can use the supervision Python library to write custom logic on top of your model. For example, you can add object tracking, detections smoothing, customizations to bounding box annotations, and more
Conclusion
You can now train YOLO-NAS models from the Roboflow web interface. This option is offered in addition to the Roboflow Fast and Accurate training options. You can then deploy YOLO-NAS using Roboflow Inference, an open source tool for running computer vision models on your hardware.
In this guide, we discussed how to train a YOLO-NAS model from Roboflow. To do so, prepare a dataset, then select “YOLO-NAS” from the window that lets you customize your training job. We then demonstrated how to deploy a YOLO-NAS model trained on Roboflow using Roboflow Inference. We used the InferencePipeline method to deploy our model on a webcam.
Cite this Post
Use the following entry to cite this post in your research:
James Gallagher. (Feb 22, 2024). Launch: Train and Deploy YOLO-NAS Models on Roboflow. Roboflow Blog: https://blog.roboflow.com/train-deploy-yolo-nas/