

What Is EasyOCR?
EasyOCR is a Python OCR library built by JaidedAI, released under the Apache 2.0 license. Its recognition pipeline has three stages: deep learning models like ResNet and VGG extract visual features, LSTM networks model the sequential context of characters, and the CTC (Connectionist Temporal Classification) algorithm decodes those sequences into readable text. In short, two lines of Python turn an image into text, in any of 80+ languages, on CPU or GPU.
This tutorial shows how to use EasyOCR end to end. It also covers the production pattern that makes OCR reliable in real applications, detect the text region first, then read it, and how to run EasyOCR as a hosted API with no local setup.
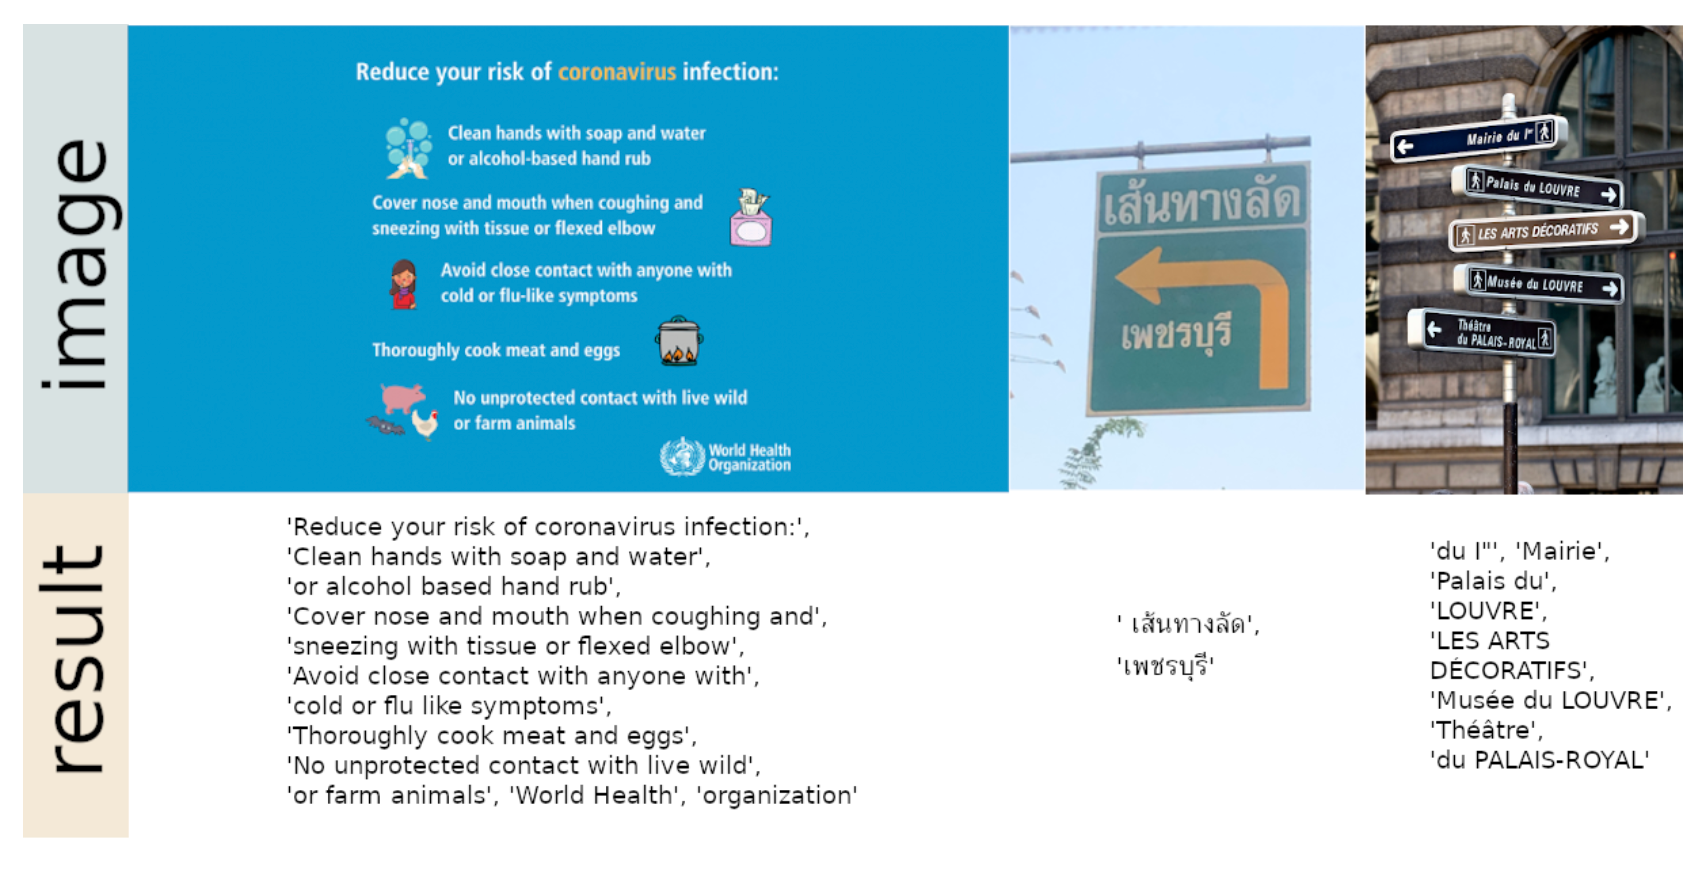
How To Use EasyOCR In Python Tutorial
Now that we have taken a look at what EasyOCR is and some of its use cases, next, we’ll explore a coding example that showcases how to use EasyOCR to extract text from an image.
Step 1: Installation
To get started, install all the necessary libraries required. We will be installing the PyTorch library (which is a core dependency) and the EasyOCR library, using the ‘pip’ package installer. Open a command prompt or terminal and run the following commands to start installations.
pip install torch torchvision torchaudio easyocrStep 2: Initializing the Reader
After installing the dependencies, we can import the EasyOCR package and initialize its ‘reader’ function. We can also select the language we want to detect and extract. There are over 80 languages to choose from. For this example, let’s choose English as ‘en.’
import easyocr
reader = easyocr.Reader(['en'])
In the ‘reader’ function, we can also manage system specification settings like enabling or disabling GPU or selecting a custom directory to store the EasyOCR models. For the EasyOCR library, GPU is recommended for faster processing, but it can be disabled to work on your CPU as well. To disable the GPU setting (it is set to ‘True’ by default):
reader = easyocr.Reader(['en'],gpu=False)To choose a custom directory for model storage:
reader = easyocr.Reader(['en'],model_storage_directory='path/to/directory'
)
Step 3: Running EasyOCR on an Image
Once the reader function is initialized, the models will be automatically downloaded (to a custom directory, if chosen). Next, we can initialize the ‘readtext’ function and pass the path of an input image to it.
result = reader.readtext('/path/of/image')
print(result)
In this example, we will use an image that contains the serial and part numbers of a product as input. You can also use the same image or any other relevant image.
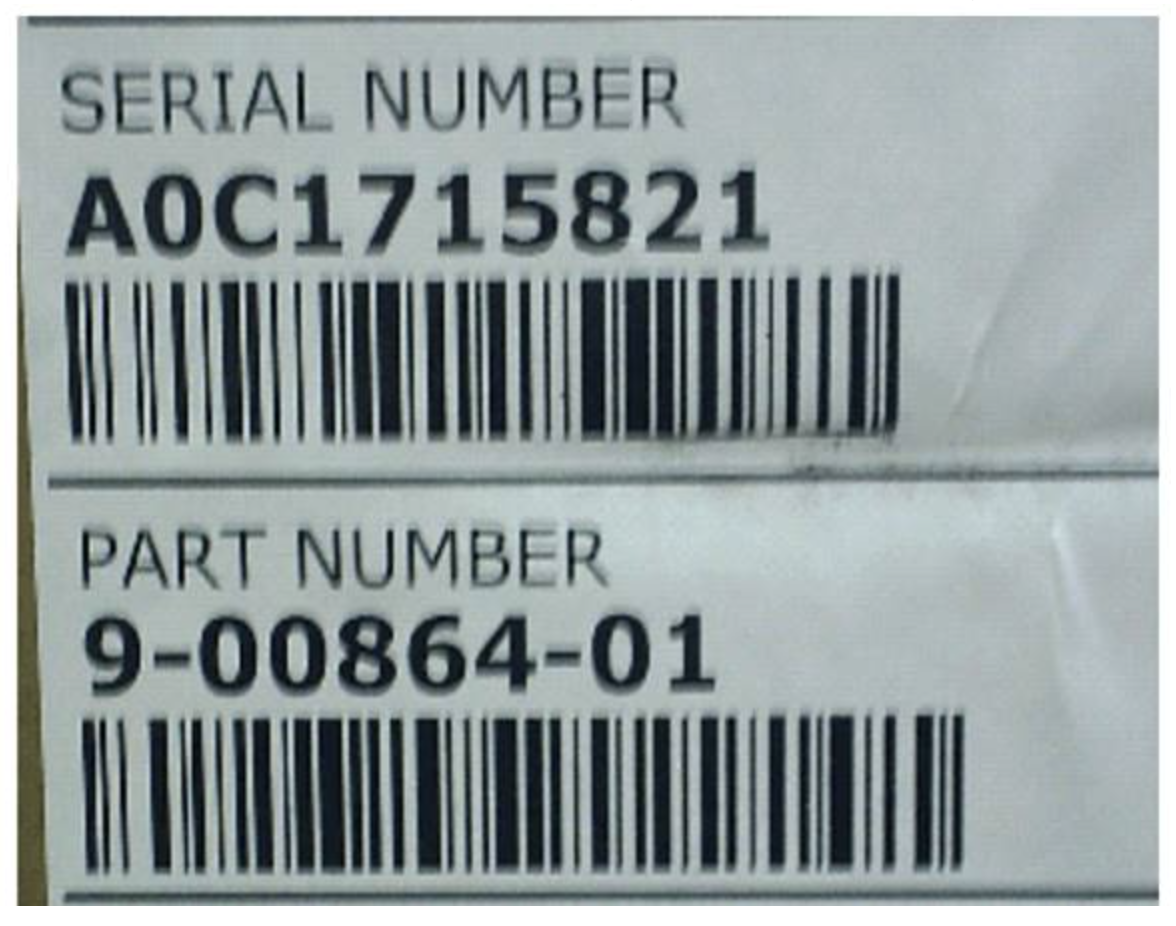
When we print out the results, it will include the bounding box coordinates of the detected text within the image, the detected text, and the confidence scores.
Here’s the output returned for our input image:
[([[28, 22], [353, 22], [353, 72], [28, 72]], 'SERIAL NUMBER', 0.8874381662616708), ([[35, 75], [397, 75], [397, 137], [35, 137]], 'AOC1715821', 0.8521895819573561), ([[39, 255], [315, 255], [315, 299], [39, 299]], 'PART NUMBER', 0.9971079202290591), ([[42, 298], [370, 298], [370, 354], [42, 354]], '9-00864-01', 0.8142346378327698)]The bounding box coordinates are shown first, followed by the extracted text, and finally, the confidence score. But ideally, we don’t need all this data; we only need the extracted text. EasyOCR allows for easy output customization options. Next, we’ll focus on customizing and visualizing the output.
Step 4: Configure Output Format
EasyOCR library offers many different output customization options. We can avoid retrieving bounding box coordinates and confidence scores by setting the ‘detail’ parameter to zero within the ‘readtext’ function as shown below.
import easyocr
reader = easyocr.Reader(['en'])
result = reader.readtext('/path/of/image',detail=0)
print(result)
For our input image, this would be the result that is printed. As you can see, we have filtered out only the detected text.
['SERIAL NUMBER', 'AOC1715821', 'PART NUMBER', '9-00864-01']We can also group the text together by setting ‘paragraph’ to true, as shown below.
result = reader.readtext('/path/of/image',detail=0, paragraph=True)
print(result)
This would be the printed result for our input image. The extracted texts are now grouped together.
['SERIAL NUMBER AOC1715821', 'PART NUMBER 9-00864-01']Here’s an example of a code snippet to print out the results line by line:
import easyocr
reader = easyocr.Reader(['en'])
result = reader.readtext('/path/of/image')
for res in result:
  coord=res[0]
  text=res[1]
  conf=res[2]
  print(text)
This would be the printed result for our input image. The extracted texts are printed out line by line in order of appearance in the document.
SERIAL NUMBER
AOC1715821
PART NUMBER
9-00864-01
If instead of printing the variable ‘text,’ we printed the variable ‘coord’ and ‘conf,’ we would get similar outputs with the bounding box coordinates and confidence scores.
Step 5: Visualize Results
We can also visualize the predictions of the EasyOCR module overlaid on top of the input image. This can be easily done using the Supervision Python package. Supervision provides a range of reusable computer vision tools for tasks like annotating predictions generated by various computer vision models.
In order to use the library, we need to install the Supervision Python package as shown below:
pip install supervisionAfter installing the module, this code uses EasyOCR to detect text in an image and annotate it with bounding boxes and labels. It initializes the EasyOCR reader for English, processes the image to extract text, bounding box coordinates, and confidence scores, and stores the data in lists.
Supervision’s annotators are then used to overlay bounding boxes and text on the image. Finally, the annotated image is displayed and saved as "Output.jpg," providing a complete workflow for OCR and visual annotation.
import easyocr
import supervision as sv
import cv2
import numpy as np
from google.colab.patches import cv2_imshow

# Image path
Image_path = '/path/to/image'

# Initialize EasyOCR reader (English language, CPU)
reader = easyocr.Reader(['en'], gpu=False, model_storage_directory='/path/to/directory')

# Perform text detection on the image
result = reader.readtext(Image_path)

# Load image using OpenCV
image = cv2.imread(Image_path)

# Prepare lists for bounding boxes, confidences, class IDs, and labels
xyxy, confidences, class_ids, label = [], [], [], []

# Extract data from OCR result
for detection in result:
    bbox, text, confidence = detection[0], detection[1], detection[2]

    # Convert bounding box format
    x_min = int(min([point[0] for point in bbox]))
    y_min = int(min([point[1] for point in bbox]))
    x_max = int(max([point[0] for point in bbox]))
    y_max = int(max([point[1] for point in bbox]))

    # Append data to lists
    xyxy.append([x_min, y_min, x_max, y_max])
    label.append(text)
    confidences.append(confidence)
    class_ids.append(0)

# Convert to NumPy arrays
detections = sv.Detections(
    xyxy=np.array(xyxy),
    confidence=np.array(confidences),
    class_id=np.array(class_ids)
)

# Annotate image with bounding boxes and labels
box_annotator = sv.BoxAnnotator()
label_annotator = sv.LabelAnnotator()

annotated_image = box_annotator.annotate(scene=image, detections=detections)
annotated_image = label_annotator.annotate(scene=annotated_image, detections=detections, labels=label)

# Display and save the annotated image
sv.plot_image(image=annotated_image)
cv2.imwrite("Output.jpg", annotated_image)
The Production Pattern
Pointing OCR at a full scene is the most common source of bad reads: the model wastes effort on irrelevant text and mangles the text you care about. Production OCR pipelines detect first and read second. A detection model like RF-DETR, trained to find your label, plate, or display, crops the exact region, and OCR runs only on that crop, larger in frame and free of distractions.
Roboflow Workflows assembles this pattern without glue code: a detection block, a dynamic crop, an OCR block, and whatever logic follows (validate the format, compare against a database, trigger an alert). See it applied to license plate reading and lot code and expiry date verification on medical packaging.
Run EasyOCR Without Local Setup
EasyOCR is a supported model in Roboflow, so you can call it through the Serverless Hosted API or run it on your own hardware with open source Roboflow Inference, alongside alternatives like DocTR and TrOCR. That gives you the detect-then-read pipeline, the OCR engine, and deployment in one stack, with no models to manage locally.
OCR Quality Considerations
Three factors dominate OCR models' accuracy. Image quality first: clear, well-lit, high-resolution input, with preprocessing (sharpening, contrast adjustment, noise reduction) recovering marginal images. Language configuration second: specify the actual language of your text from EasyOCR's 80+ options. And text presentation third: printed text on flat surfaces reads reliably, while curved surfaces, glare, and stylized fonts benefit most from the crop-first pattern above.
Applications of EasyOCR
The common thread across industries is turning printed text into structured data: manufacturing teams read serial numbers, lot codes, and label text for quality control and traceability; logistics operations capture container and shipment identifiers; retail systems read price tags and shelf labels; and document workflows digitize records for search and analysis.
Get Started
Run the code above on one of your own labels, then build the production version: create a free Roboflow account, train a detection model to find your text regions, and chain it with OCR in a Workflow you can deploy to the cloud or the edge.
Keep Exploring
- An article on text extraction using OCR
- An article on the best OCR models for text recognition in images
- An article on license plate detection and OCR using Roboflow Inference API
Is EasyOCR free for commercial use?
Yes. EasyOCR is open source under the Apache 2.0 license, with no restrictions on commercial deployment.
Do I need a GPU to run EasyOCR?
No, it runs on CPU with gpu=False, but a GPU speeds up processing considerably, which matters at batch or video scale. The hosted API option removes the hardware question entirely.
How does EasyOCR compare to Tesseract?
EasyOCR's deep learning pipeline generally handles photos, natural scenes, and varied fonts better; Tesseract remains strong on clean, scanned documents. For scene text (labels, signs, products), EasyOCR is the better default.
Can EasyOCR read handwriting?
Not reliably; it is built for printed text. For handwriting, use a model designed for it, like TrOCR, which also runs in Roboflow Inference.
How do I improve EasyOCR accuracy on my images?
Crop before you read: run a detection model to isolate the text region, then OCR the crop. Add preprocessing for low-quality images, and use confidence scores to route uncertain reads to human review.


Cite this Post
Use the following entry to cite this post in your research:
Erik Kokalj. (May 20, 2026). How to Use EasyOCR. Roboflow Blog: https://blog.roboflow.com/how-to-use-easyocr/