

To label images for YOLO, create an object detection project in Roboflow, upload your images, and assign a class and bounding box to each object manually or with Auto Label. Review the annotations, add the approved images to your dataset, and create a version you can use to train a model in Roboflow or export in a YOLO format.
A YOLO model can only learn to detect what your dataset labels consistently. If you’re building a warehouse detector, that means drawing accurate boxes around every forklift, pallet, pallet truck, and person across your images. Doing that by hand takes time, especially as the dataset grows.
Roboflow brings the YOLO labeling tools into one workflow: draw bounding boxes manually, generate them with Auto Label, review and correct the results, and create a versioned dataset for training. In this guide, we’ll label a warehouse dataset step by step and show how to use the finished annotations to train a YOLO model.
Get Started with YOLO Labeling
Create a new Roboflow project, then select Object Detection as the project type. This matters because the project type controls how images are labeled in the Annotate tab.
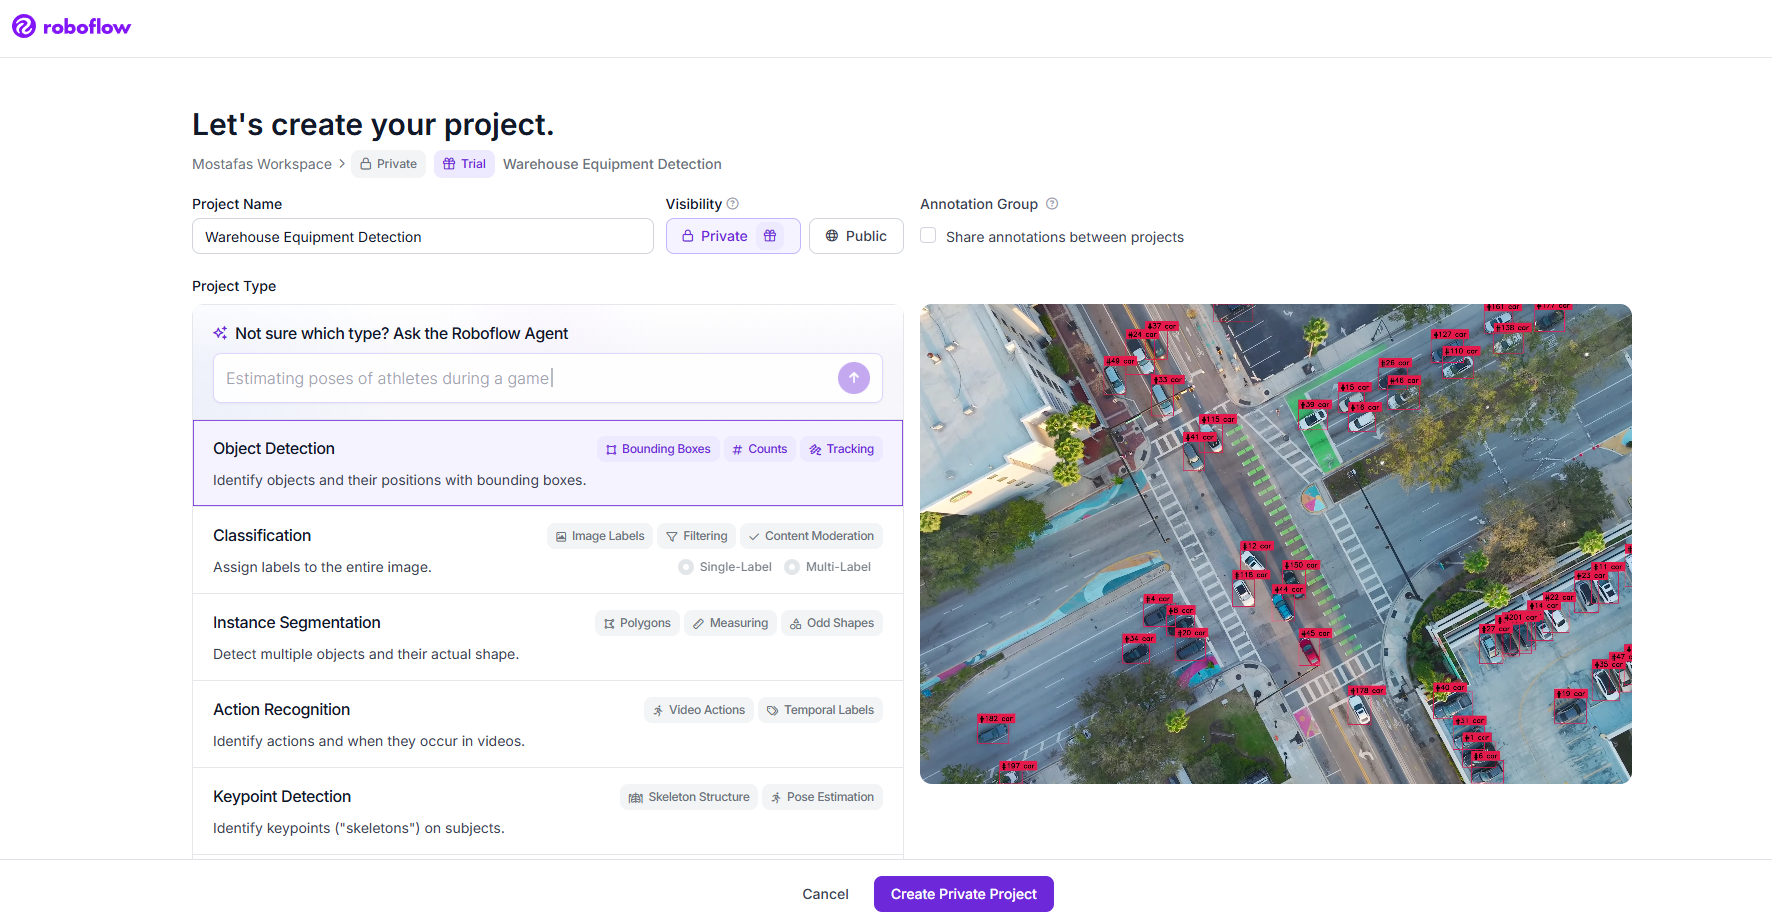
For this warehouse project, we’ll label four classes: forklift, pallet, pallet_truck, and person. Before annotation begins, decide how each class should be identified and keep a few representative examples for reference.
This gives annotators and reviewers a shared reference when an object is difficult to classify or appears only partially in the frame. This also helps keep class assignments consistent when several people are labeling or reviewing the dataset.
Upload the images you want to label. Roboflow can also import images that already include annotations, which is useful if you’re continuing work on a partially labeled dataset rather than starting with raw images.
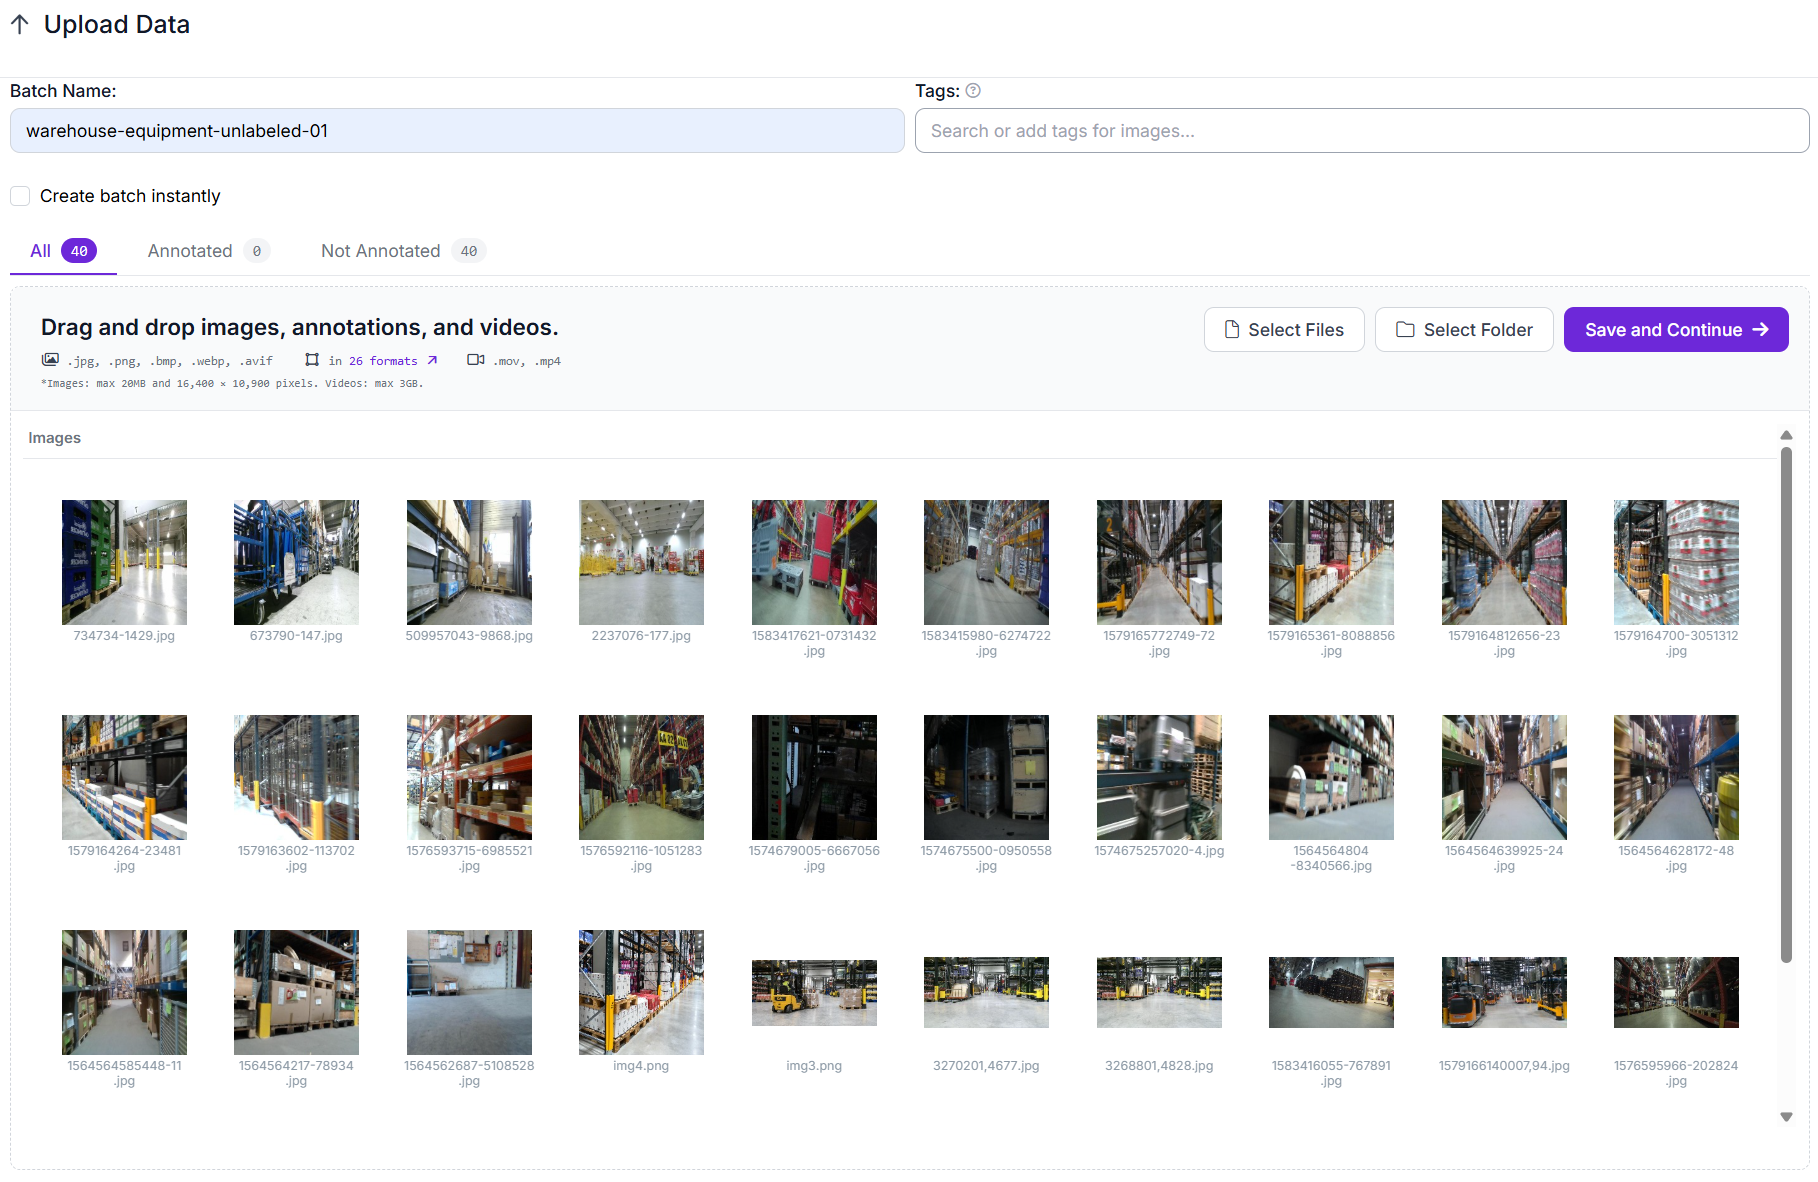
Once the upload is complete, Roboflow groups the images into a batch. We named ours warehouse-equipment-unlabeled-01 to make it clear that these are the raw images before annotation. Save the batch, then open Annotate to choose a labeling method.
Choose How to Label Your Dataset in Roboflow
Once the batch reaches the Annotate tab, Roboflow gives you four ways to handle the labeling work:
- Auto Label: generate labels with foundation models, your trained models, or Roboflow Workflows.
- Label manually: create labels one image at a time in Roboflow Annotate.
- Label with your team: split the labeling work across members of your team.
- Label with a professional team: send the labeling work to Roboflow’s professional labeling team.
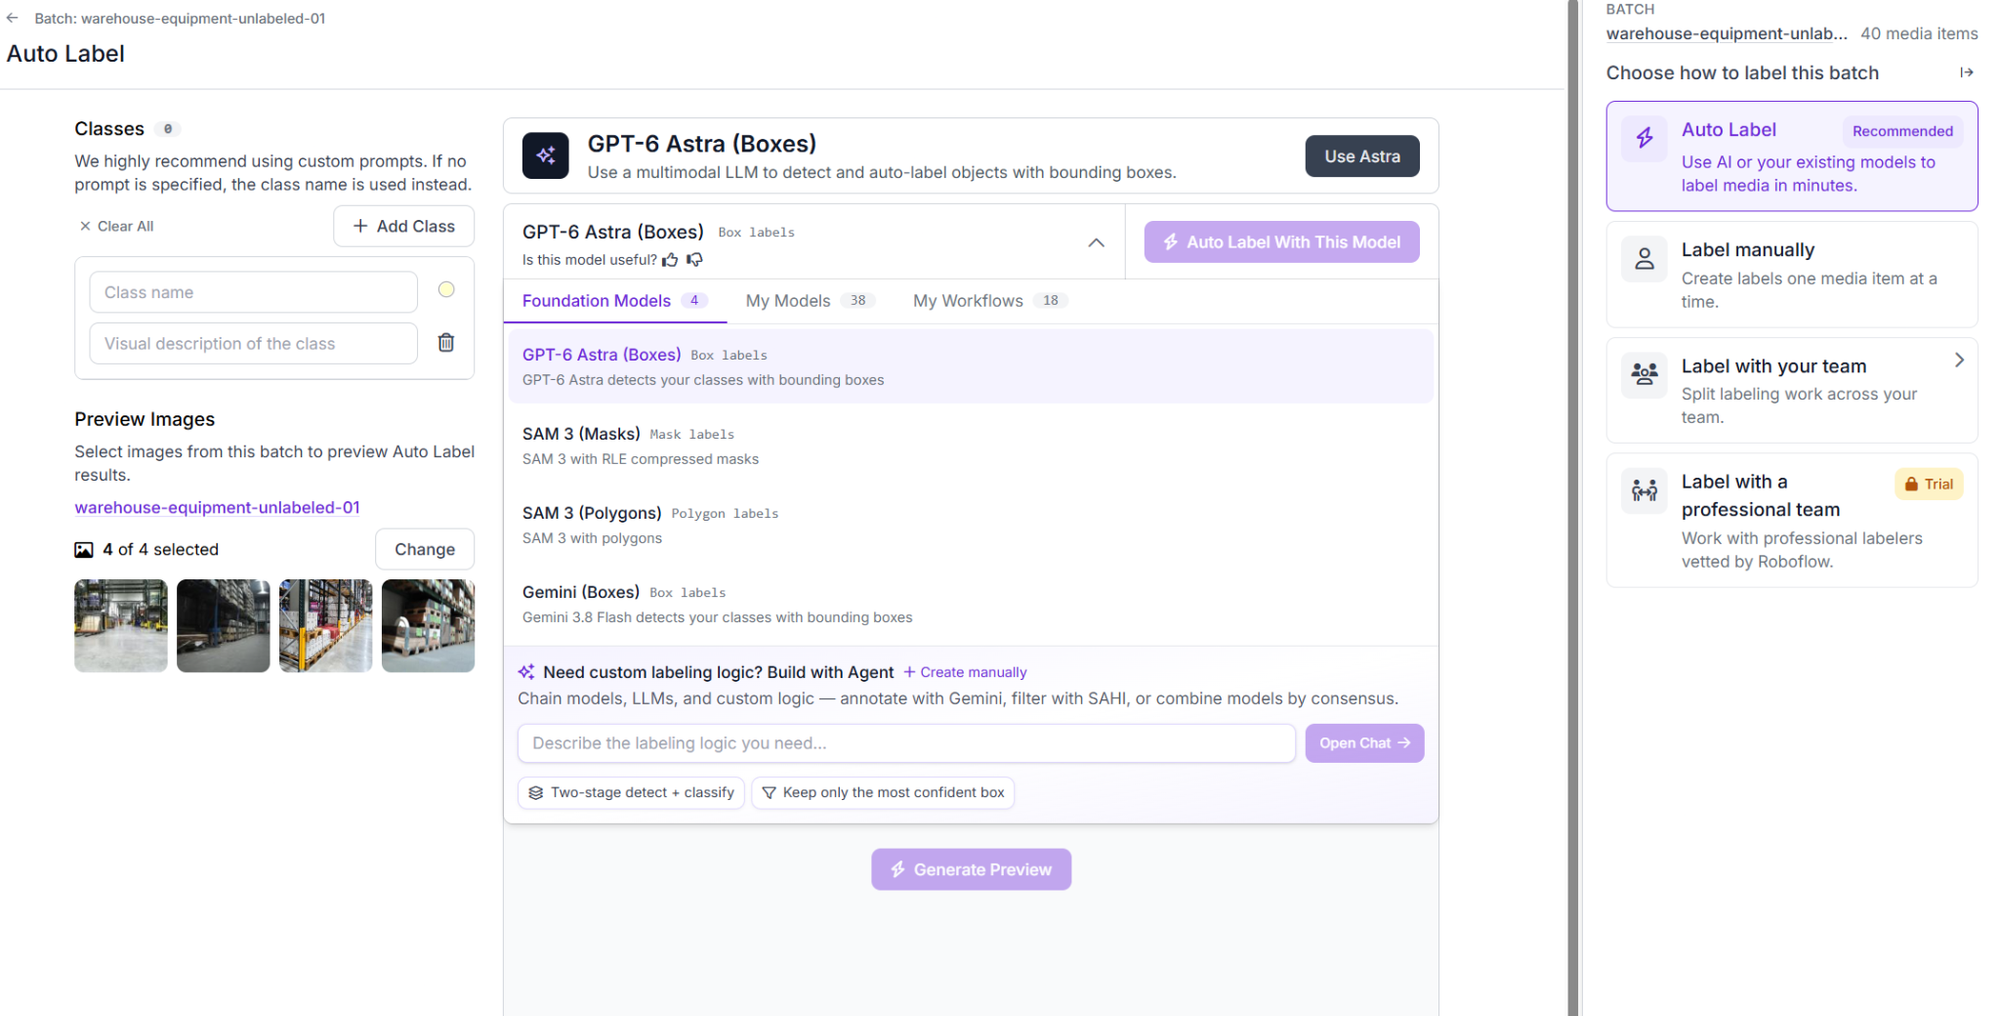
These options all lead to the same goal: a labeled object detection dataset. The difference is how the annotations are created and who does the work.
Manual labeling gives you the most control over each annotation and works well for smaller batches. Auto Label can speed up repetitive labeling across larger datasets. If several people are working on the project, team labeling lets you divide the batch between annotators. If you are a Roboflow customer, you can also send the batch to Roboflow’s professional labeling team if you want to outsource the work.
For this warehouse dataset, we’ll use both manual labeling and Auto Label. Manual labeling shows how to create bounding boxes directly in Annotate, while Auto Label shows how models can generate labels that you can review and correct.
Label YOLO Training Images Manually with Bounding Boxes
Select Label manually to open the images in Roboflow Annotate. Choose the bounding box tool from the right sidebar, or press B, then draw a box around the object you want to label. Roboflow recommends drawing the box tightly around the object so the annotation captures as little surrounding background as possible.
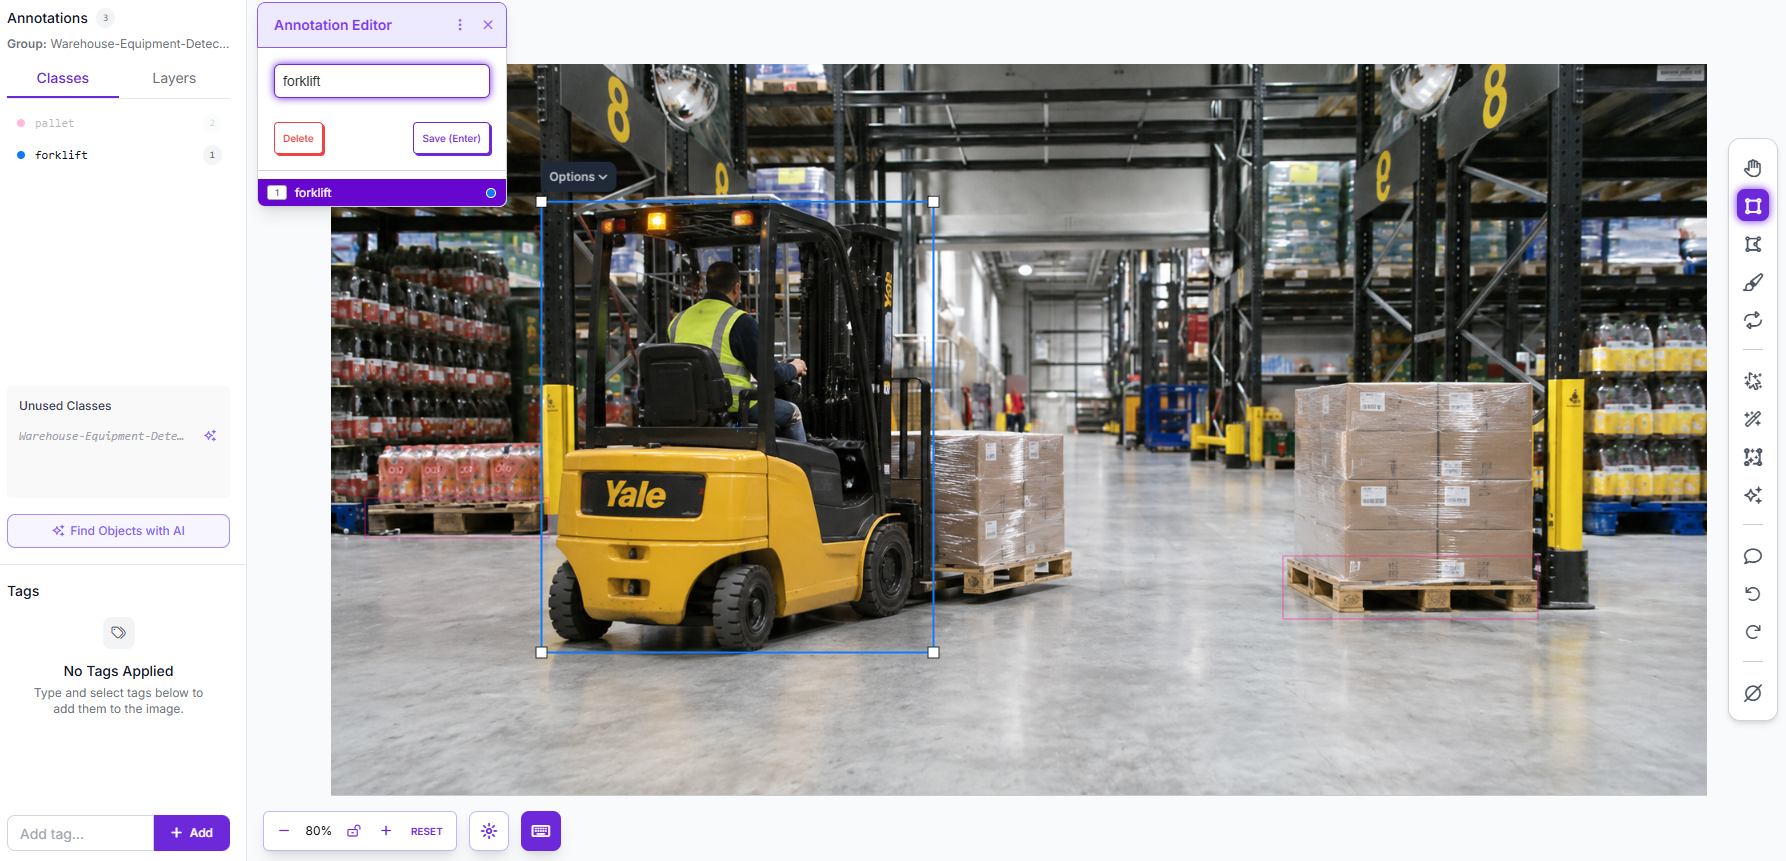
In the warehouse example, start with the forklift. Draw a tight box around its visible edges, enter forklift as the class name in the Annotation Editor, then save the annotation. Repeat the same process for other objects in the image, such as pallets or people.
Keep the labeling rules consistent across the dataset. A few simple rules help:
- Keep boxes tight around the visible object. Avoid including unnecessary background or cutting off part of the object.
- Label every visible instance of a target class. If an image contains several pallets or people, annotate each one rather than only the most obvious object.
- Keep box placement consistent. Label the same object type the same way across images.
Speed Up YOLO Labeling with Roboflow Auto Label
For a larger batch, Auto Label can generate annotations across multiple images at once. Return to the batch labeling screen and select Auto Label to open the model and class settings.
Start by defining the classes you want the model to find. For this warehouse dataset, add forklift, pallet, pallet_truck, and person. The Auto Label interface also includes a description field, but GPT-6 Astra uses the class name as its prompt, so the description does not affect Astra’s result.
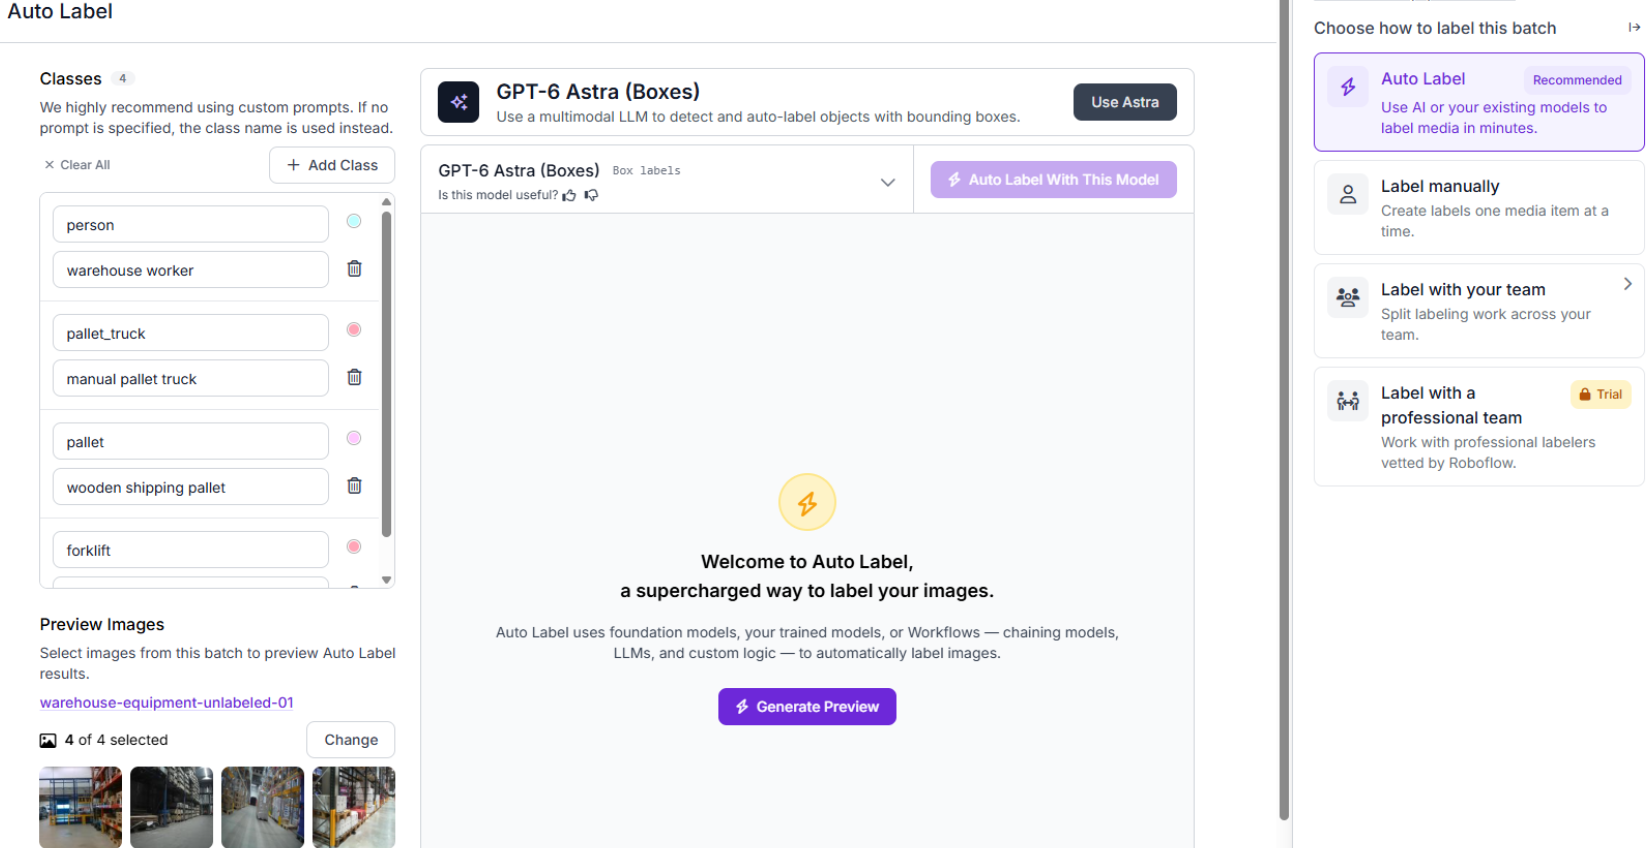
The Auto Label panel lets you choose the model that will generate the labels.
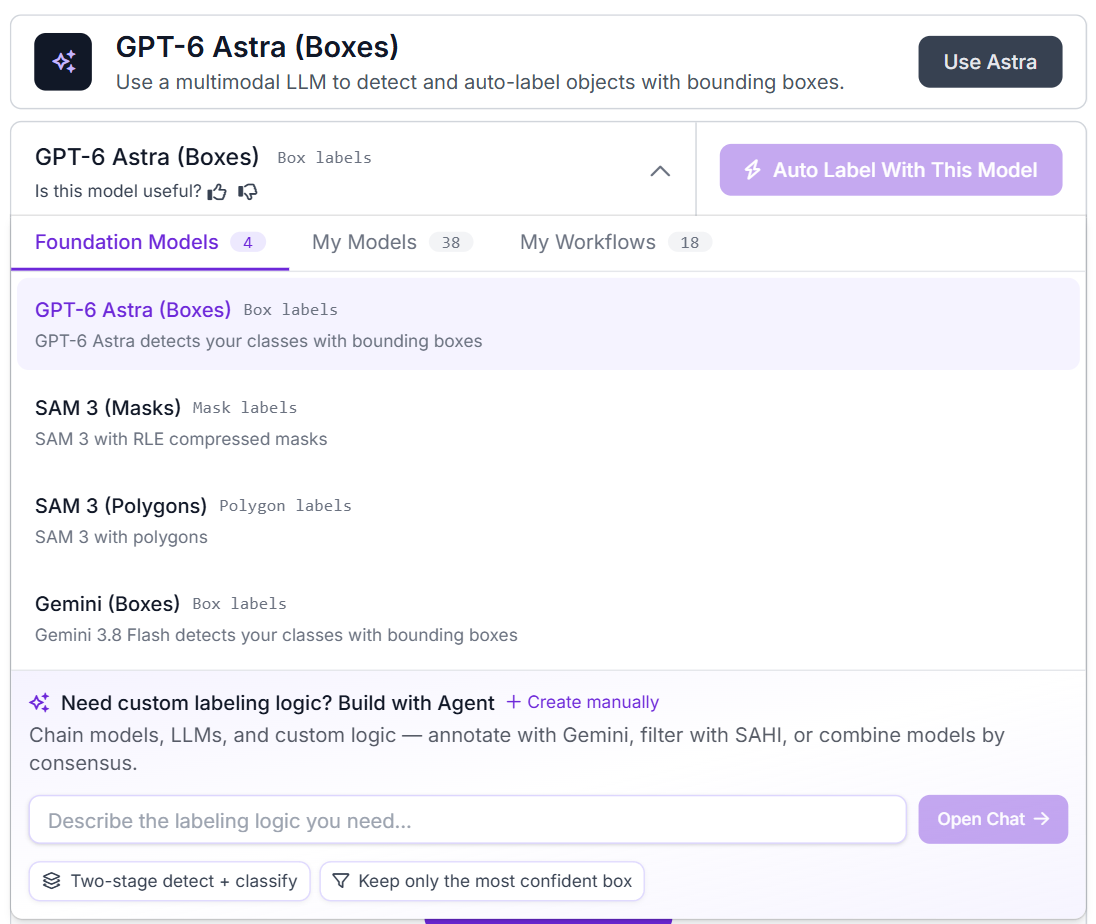
For this object detection project, GPT-6 Astra (Boxes) and Gemini (Boxes) are the most relevant foundation models because both return bounding-box annotations. SAM 3 is also available for mask or polygon labels, which makes it more relevant to segmentation tasks. You can also choose one of your own models under My Models or use a saved Workflow under My Workflows.
For the warehouse dataset, choose a box-labeling model such as GPT-6 Astra or Gemini, then generate a preview. Check that the model is detecting the intended classes before running Auto Label across the batch. If a class is being missed or confused with another object, make the class name more specific and generate the preview again.
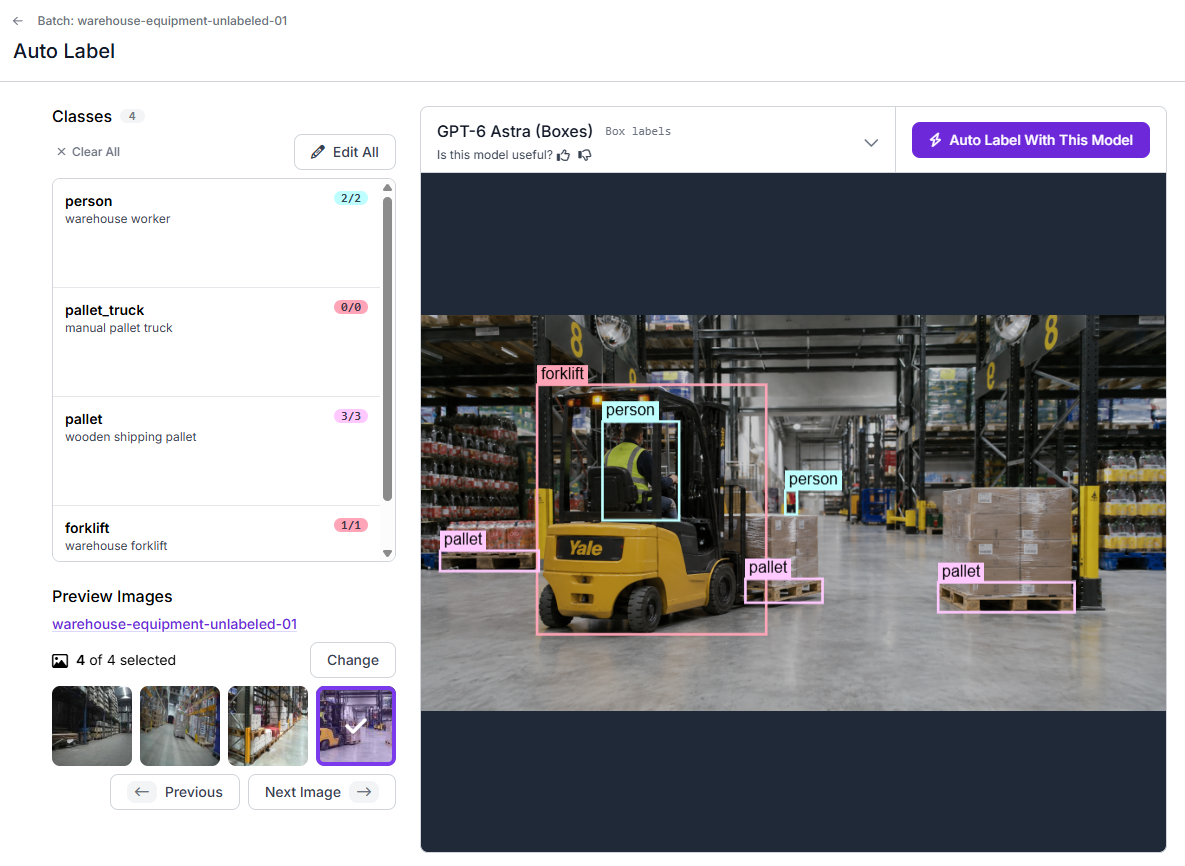
Review and Fix Your YOLO Annotations
After Auto Label processes the batch, review the generated annotations across the images. This makes it easier to catch errors before you create the dataset version.
Open the labeled images in Roboflow and look for problems such as:
- Missed objects that should have been labeled.
- Similar objects assigned to different classes.
- Inconsistent box placement around similar objects.
- Duplicate boxes on the same object.
- Partially visible objects handled differently across images.
This Auto Label result needs review because several pallet boxes overlap with nearby objects, and some capture only part of the pallet.
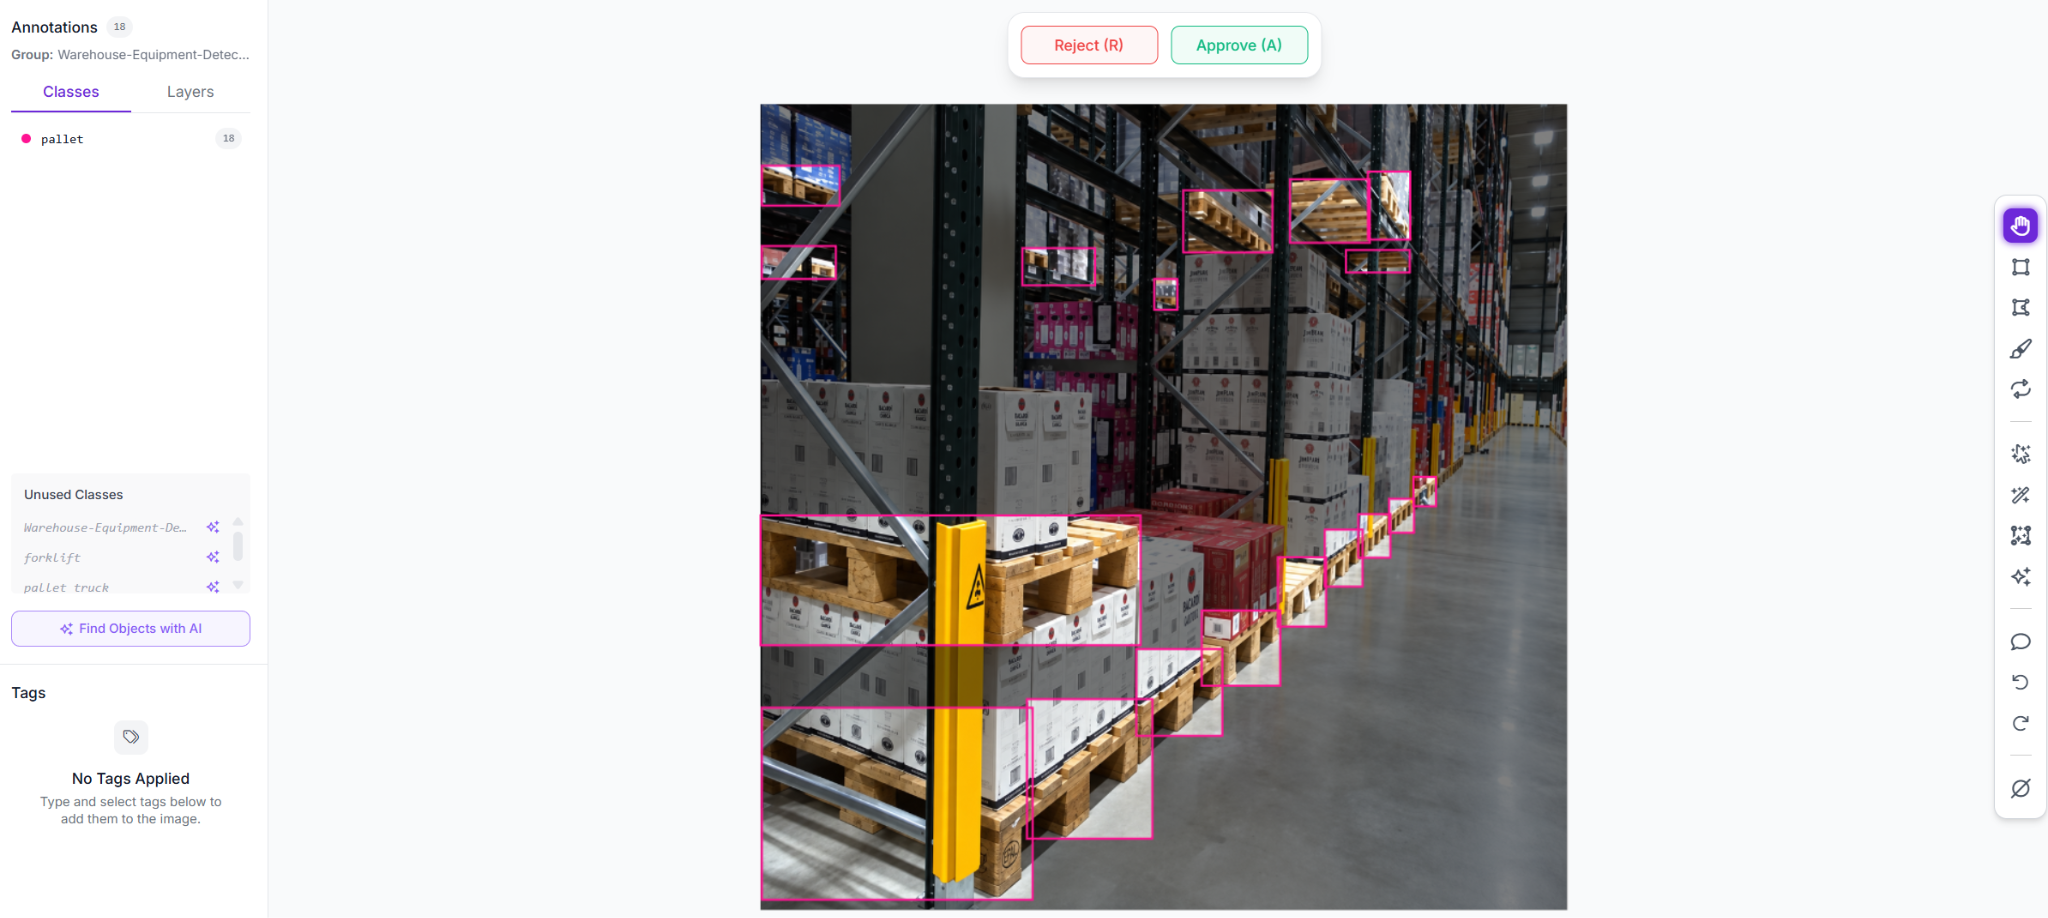
In Annotate, adjust the bounding boxes so each one follows the visible pallet more closely, then continue reviewing the rest of the batch. The dataset is ready for versioning once annotations are consistent across each class and every target object is labeled.
Generate and Export the Dataset for YOLO
Once the reviewed images are approved, click Add Approved To Dataset. Confirm the train, validation, and test split, then add the images to the project dataset. From there, open Versions and create a new dataset version. Give it a clear name or version number so you can identify which set of annotations was used.
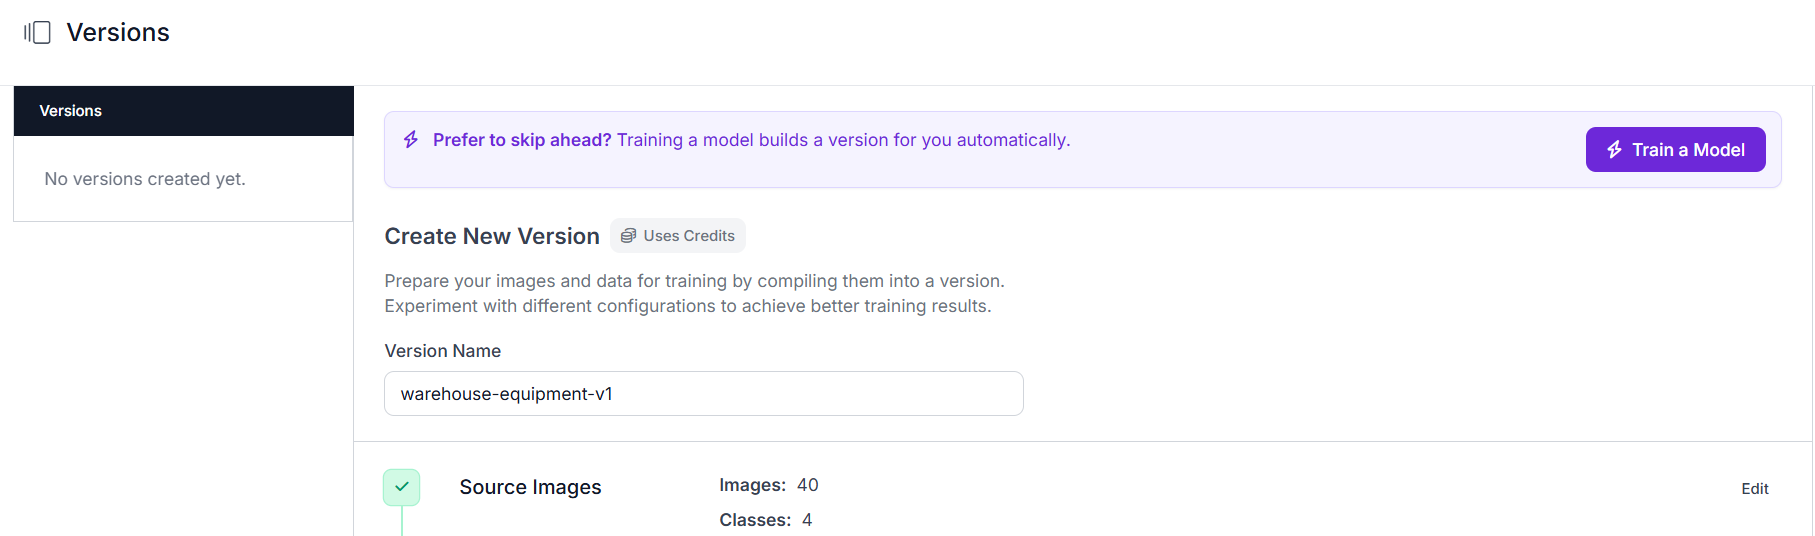
When the version is ready, click Download Dataset and select the YOLO format that matches your training setup. Roboflow automatically converts your annotations into the files required by the selected YOLO format, including the class labels and bounding-box data.
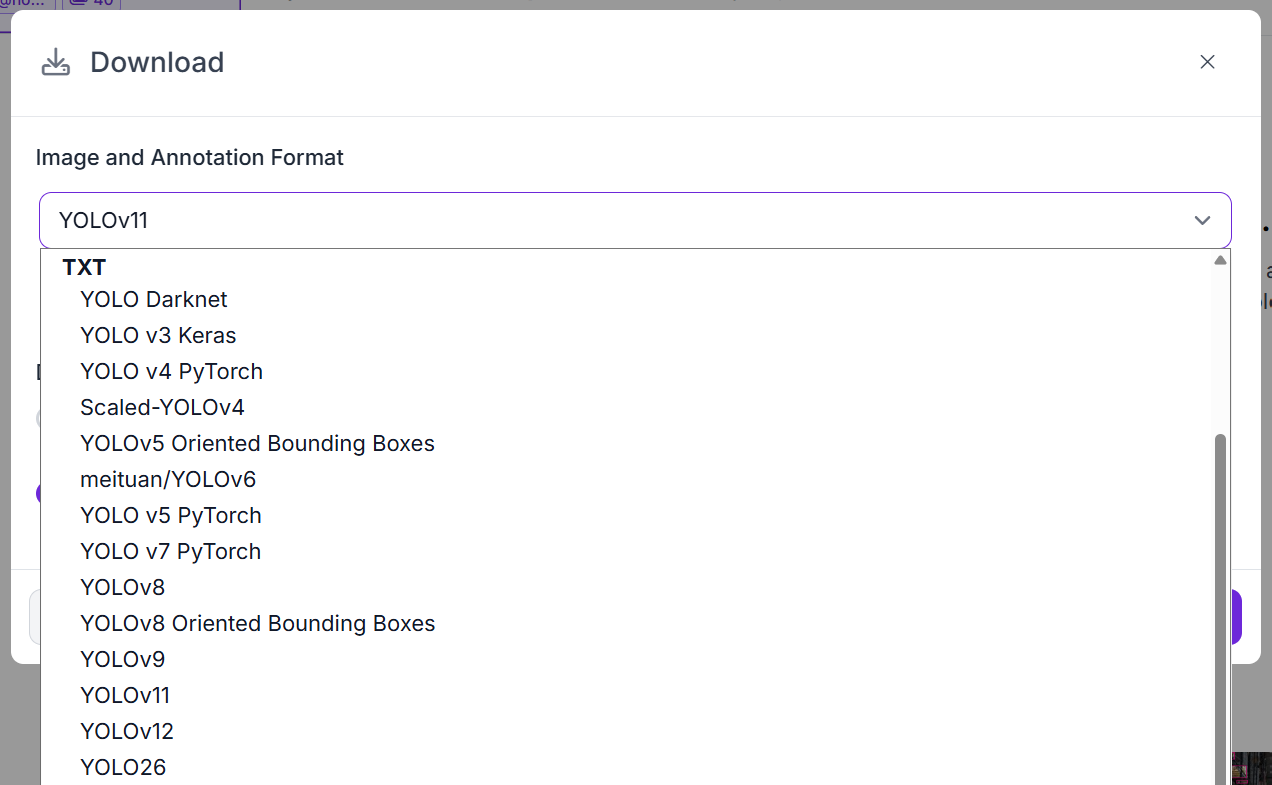
You can download the dataset for local training or continue working with it in Roboflow. If you change the labels later, create a new version so each experiment stays tied to the exact dataset used.
Train YOLO in Roboflow
You can also train your YOLO model directly in Roboflow from the dataset version you just created. Keeping labeling and training in the same project saves you from downloading files, checking that you selected the right YOLO format, and moving the dataset into a separate training environment. When evaluation reveals missed objects or a class that needs more examples, you can correct the annotations, create a new version, and train again with a clear record of which data produced each model.
Conclusion
At this point, you have a labeled object detection dataset that is ready for YOLO training. In Roboflow, you can create annotations manually, use Auto Label to speed up larger batches, review and correct the results, then save the approved data as a version. Exporting that version in the YOLO format gives you the files needed for your training setup. From there, you can train the model, evaluate its performance on the warehouse classes, and return to the dataset if the results reveal labeling gaps or classes that need more examples.
Further reading:


Cite this Post
Use the following entry to cite this post in your research:
Mostafa Ibrahim. (Jul 1, 2026). YOLO Labeling Tools. Roboflow Blog: https://blog.roboflow.com/yolo-labeling-tools/