
PASCAL VOC stores bounding box annotations as XML files with absolute pixel coordinates, while YOLO Darknet uses plain text files with class index and normalized center coordinates. Converting between them means restructuring both the file format and the coordinate representation. This post walks through both formats with concrete examples and shows how Roboflow can automate the conversion in a few clicks, exporting to Darknet, COCO JSON, TFRecord, and other formats from a single uploaded dataset.
A bedrock of computer vision is having labeled data. In object detection problems, those labels define bounding box positions in a given image.
As computer vision rapidly evolves, so, too, do the various file formats available to describe the location of bounding boxes: PASCAL VOC XML, COCO JSON, various CSV annotation formats, Darknet .txt files, and that's just the beginning. There are many, many more annotation formats.
Keeping track of the various computer vision file formats is cumbersome and time-consuming. Converting between file formats even distracts from the core vision task – creating a high quality, functioning model. As we've said and will repeat:
A developer spending time converting between annotation formats is like to an author spending time converting Word documents to PDFs.
In this post, we'll walkthrough two commons annotation formats – PASCAL VOC XML and YOLO Darknet – and how to convert from one to the other. But you can use similar steps to convert between any pair of computer vision annotation formats.
Convert your annotations in minutes
Roboflow generates YOLO Darknet, COCO JSON, and others from any annotation format in three clicks. Jump to the bottom of this post to see how.Automatically Convert Annotation Formats
The PASCAL VOC XML Format
PASCAL (Pattern Analysis, Statistical Modelling and Computational Learning) is a Network of Excellence funded by the European Union. From 2005 - 2012, PASCAL ran the Visual Object Challenge (VOC).
PASCAL annually released object detection datasets and reported benchmarks. (An aggregated PASCAL VOC dataset is available here.)
PASCAL VOC annotations were released in an XML format, where each image has an accompanying XML file describing the bounding box(es) contained in frame.
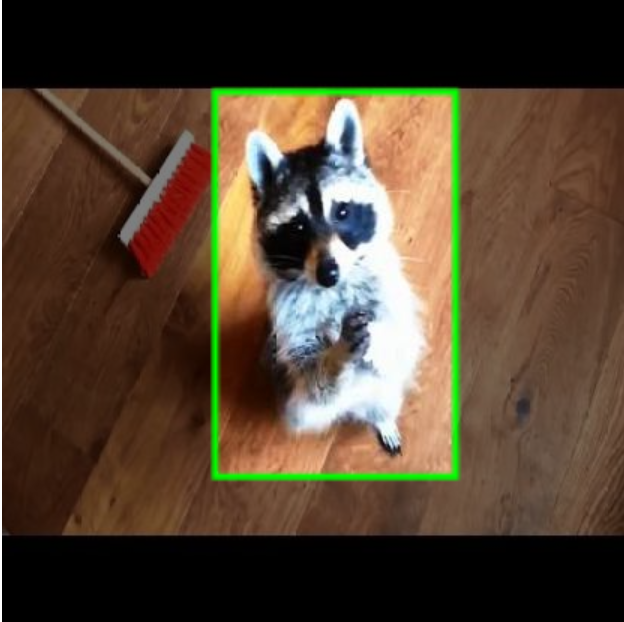
For example, in the raccoon dataset for raccoon detection, a single XML annotation example looks like as follows:
<annotation>
	<folder></folder>
	<filename>raccoon-40.jpg</filename>
	<path>raccoon-40.jpg</path>
	<source>
		<database>roboflow.ai</database>
	</source>
	<size>
		<width>416</width>
		<height>416</height>
		<depth>3</depth>
	</size>
	<segmented>0</segmented>
	<object>
		<name>raccoon</name>
		<pose>Unspecified</pose>
		<truncated>0</truncated>
		<difficult>0</difficult>
		<occluded>0</occluded>
		<bndbox>
			<xmin>142</xmin>
			<xmax>302</xmax>
			<ymin>61</ymin>
			<ymax>318</ymax>
		</bndbox>
	</object>
</annotation>
Note a few key things (1) the image file that is being annotated is mentioned as a relative path (2) the image metadata is included as width, height, and depth (3) bounding box pixels positions are denoted by the top left-hand corner and bottom right-hand corner as xmin, ymin, xmax, and ymax.
The YOLO Darknet Format
The YOLO Darknet format has grown in prominence as the YOLO family of models has increased in popularity. The most recent YOLO model, YOLOv5, has made developing high performing, fast inference models extremely quickly. YOLOv4 continues to be exceptionally performant and slightly more accurate in mAP on the COCO benchmark.
YOLO Darknet annotations are stored in text files. Similar to VOC XML, there is one annotation per image. Unlike the VOC format, a YOLO annotation has only a text file defining each object in an image, one per plain text file line. Let's have a look at the same image annotation as the raccoon image above, but in YOLO:
0 0.534375 0.4555555555555555 0.3854166666666667 0.6166666666666666
YOLO annotation positions are also written in relative ranges. That is, each bounding box coordinate is scaled from zero to one to determine where in the image a given point is located. Lastly, because the text files defining annotations contains an ID for the object we're annotating, we see the the object ID declared first.
In our above example, we see class ID 0, and two points – bottom-hand position (0.534375, 0.4555555555555555) and upper left-hand position (0.3854166666666667, 0.6166666666666666).
Thus, YOLO Darknet formats must also contain what is known as a "labelmap," which is a file that maps the class IDs to classnames. In our example, we only have a single class (raccoons), so our class ID of zero maps to a raccoon.
raccoon
By the way, have you been wondering what image our annotations belong to?
Converting from PASCAL VOC to YOLO Darknet
To convert annotations, we can write a script that maps each of the above input and positions to their relative output positions.
Separately, we can use Roboflow, which does this for us in a few clicks.
First, we create a new dataset.
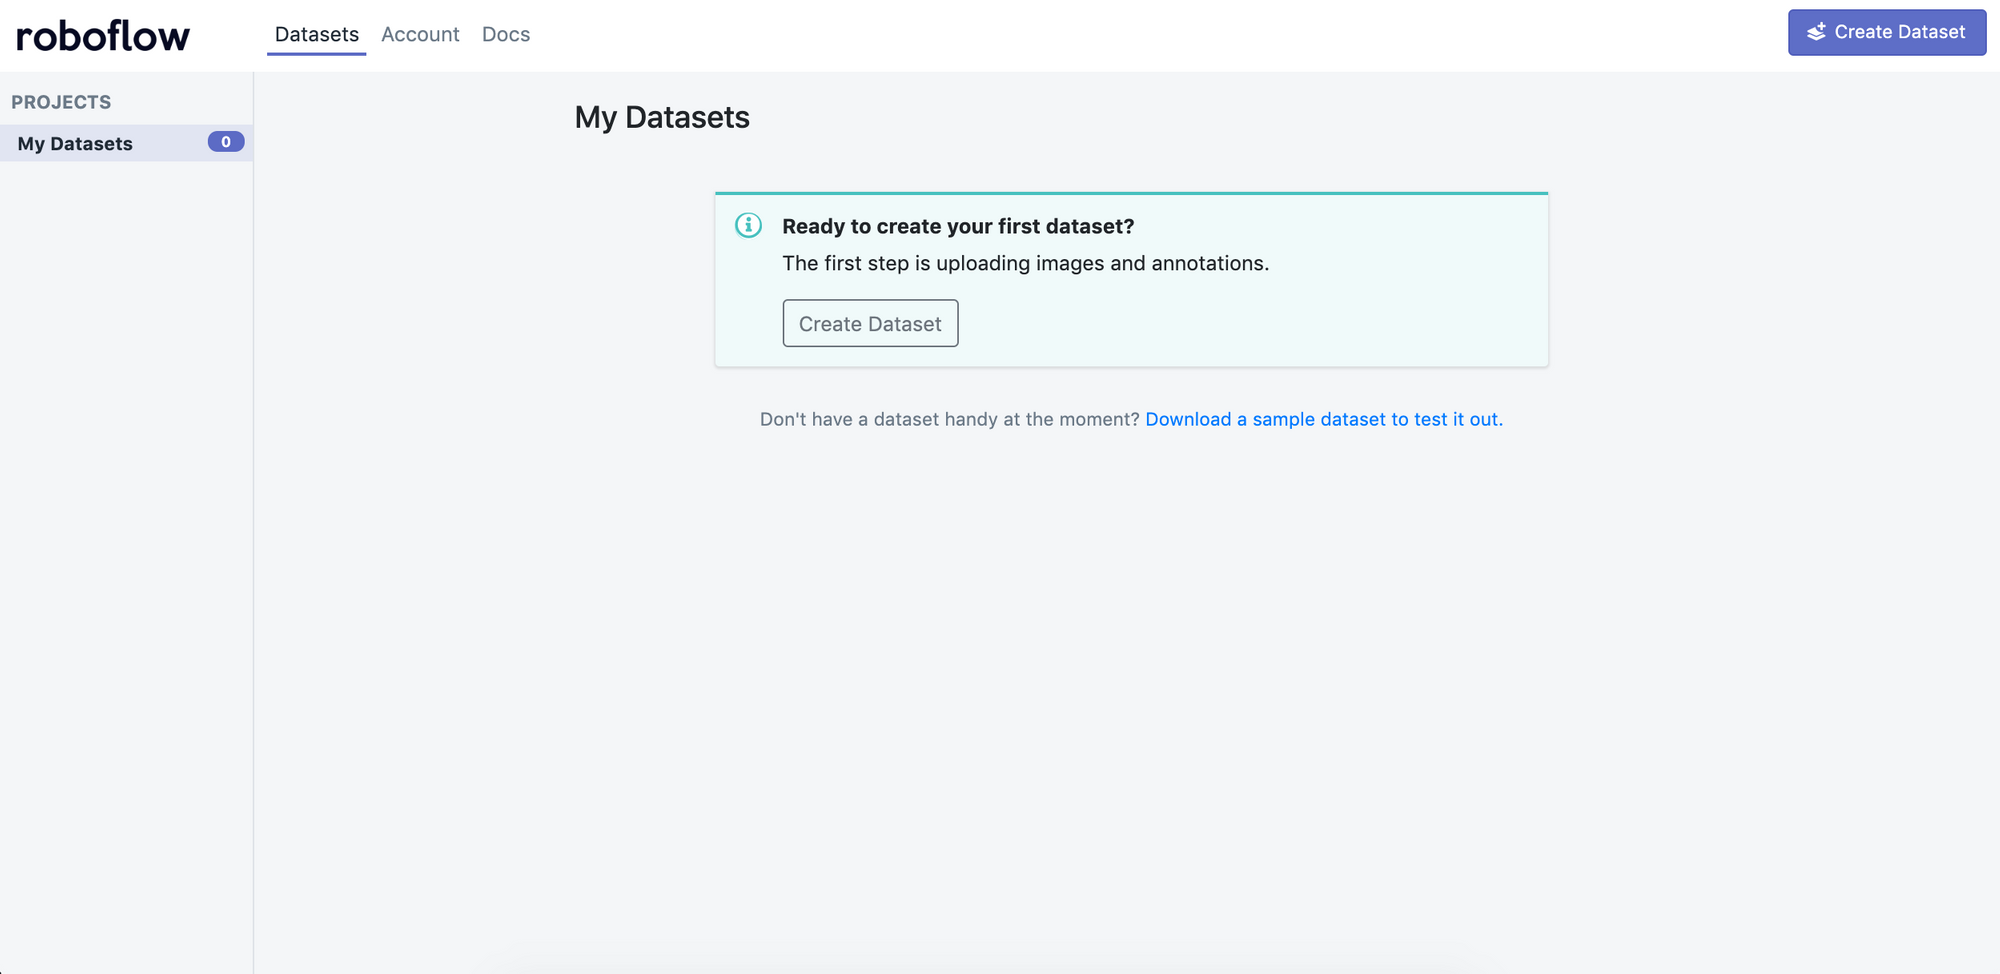
Click "Create Dataset" and give your dataset a name and describe all your annotation groups (for example, the BCCD dataset would be "cells").
Drag and drop your images and annotations into the upload area. Roboflow then checks your annotations to be sure they're logical (e.g. no bounding boxes are out-of-frame).
Once your dataset is checked and processed, click "Start Uploading" in the upper right-hand corner.
Once your dataset is uploaded, you're directed to the main "Modify Dataset" page. Here, you can apply preprocessing and/or augmentation steps if you like. Note that "auto-orient" and "resize" are on by default. To convert our raw images as-is, turn these off and generate an export.
Our images are ready to be downloaded. You can download a zip locally to your computer, or you can create a code snippet to download them into your Jupyter notebook with wget.
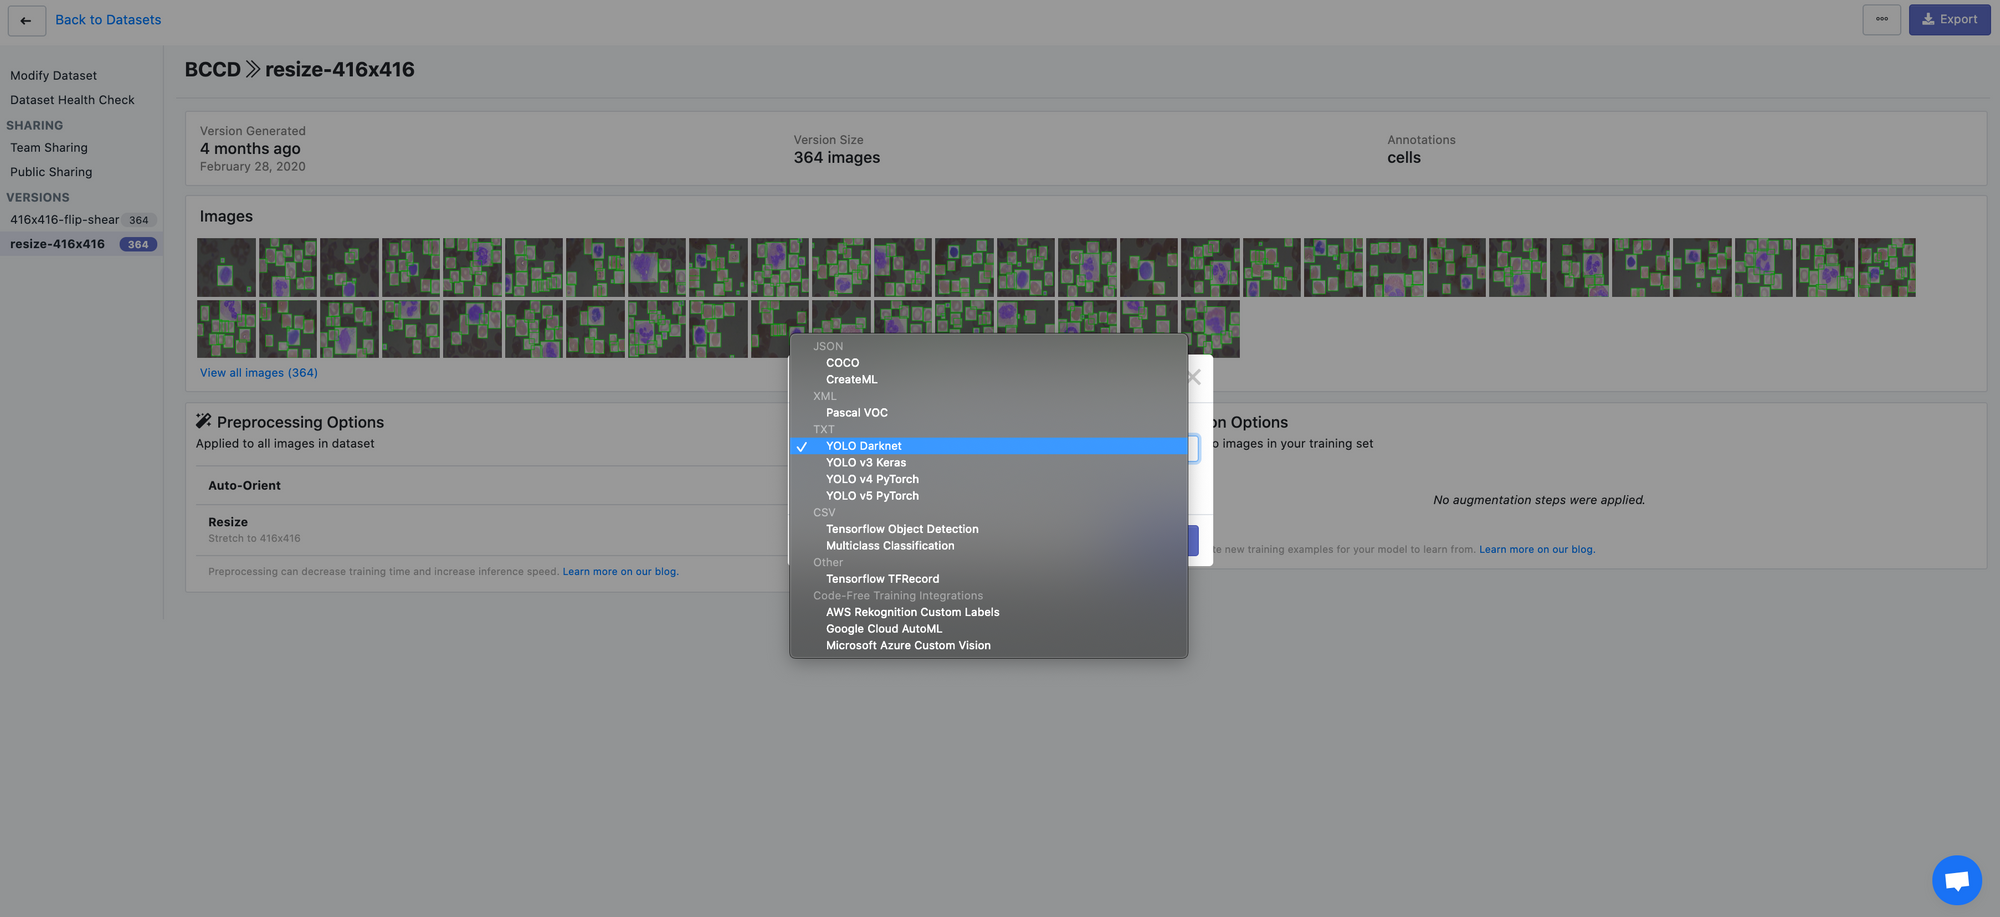
Roboflow supports a wide array of export formats:
- PASCAL VOC XML
- CreateML JSON
- TuriCreate JSON
- COCO JSON
- Tensorflow Object Detection TFRecord
- YOLO Darknet
- YOLOv3 Keras
- And many, many more.
With Roboflow, you can even create your train, validations, and test sets – and generate COCO JSON annotations for each. It makes it super easy to experiment with different computer vision frameworks and models.
Happy building!
Cite this Post
Use the following entry to cite this post in your research:
Joseph Nelson. (Jun 19, 2020). How to Convert Annotations from PASCAL VOC to YOLO Darknet. Roboflow Blog: https://blog.roboflow.com/how-to-convert-annotations-from-pascal-voc-to-yolo-darknet/