
This tutorial walks through training a license plate detector and deploying it to a Luxonis OAK edge device for real-time on-device detection. The workflow covers pulling labeled images from Open Images, processing the dataset in Roboflow, training in a Colab notebook, exporting to the DepthAI format, and running inference on-device, with the license plate crops available for downstream OCR or other processing. The same pipeline applies to any custom object class, making it a reusable template for OAK edge deployments.
Luxonis OAK devices is making it easier than ever to deploy computer vision models to the edge. Roboflow makes it easy to transform image and video data into a trained computer vision model. In this post, we will leverage both technologies to train and deploy a custom license plate model to your OAK device.

If you have already received your OAK device and want to customize models on your OAK, this post is for you. If you are just exploring what you can do on the OAK device, this is also a good place to start - as you can work through the custom training tutorial all the way up until the step where we will deploy on device.
The Task
We want an edge device to tag license plates in realtime. The license plate cutouts can then be sent downstream to an OCR prediction, or used otherwise.
The Path
To train and deploy our license plate detection model we will:
- Gather a license plate training dataset
- Process our dataset in Roboflow
- Export data to the license plate training notebook to fit our model (code included)
- Export our model to be used in DepthAI
- Deploy our DepthAI model on device
The best part about the path is that although our tutorial is specific to the license plates we input here, the path is flexible to the data and you can bring any object you want to detect and follow the same steps.
Gathering a License Plate Training Dataset
In order to train our license plate detector we must first gather a dataset of representative images with the license plates annotated. We will show these images and annotations to our model in training to construct a map from the raw pixel data to the license plate bounding box prediction.
We publish the dataset we use in this post publicly as a public license plate detection dataset, and also walk through the datasets construction so you can replicate, tweak, and expand upon this process.
Drawing License Plate Images from OpenImages
To assemble our license plate dataset, we drew iteratively from the Open Images database, where images of license plates have already been captured and labeled. This blog has information on how to use OpenImages and how to load OpenImages data into Roboflow.
***Using Your Own Data***
To export your own data for this tutorial, sign up for Roboflow and make a public workspace, or make a new public workspace in your existing account. If your data is private, you can upgrade to a paid plan for export to use external training routines like this one or experiment with using Roboflow's internal training solution.
Processing our Data in Roboflow
Once we've gathered a dataset we need to process it to prepare for training. Processing our images consists of two key steps:
- Preprocessing - image standardization like resize that applies to our whole dataset.
- Augmentation - image transformations to expose our model to image variation, making it more robust at deployment time.
In the public license plate dataset, you will see that we have already chosen preset preprocessing and augmentations in the example version. We encourage you to fork this dataset and explore other options.
If you are bringing your own dataset, you need to upload your data to Roboflow and within Roboflow, annotate the boxes in your images that you want to detect.
Exporting our Data for Training
To prepare our data for training, we will export the data from Roboflow in the TFRecord format, as our destination will be the TensorFlow object detection library. On export, click Get Link and save the curl link that you receive for import into the colab notebook.
Training Our Custom License Plate Detector
Note this section is heavily based on our tutorial on How to Train a Custom Model and Deploy to the OAK-D and we will be using the Notebook to Deploy a Custom License Plate Detector to the OAK-D.
Heading into the notebook, we recommend having this post up alongside the code as you're training your model.
In this notebook, we will be training a Mobilenet SSDv2 model. Other models, such as YOLOv3-tiny are also possible, but require more careful deployment.
Install Training Environment Dependencies and Configs
For training, we will be using Google Colab which offers a free GPU. Colab also comes pre-built with a lot of python dependencies that we might need. In addition to the pre-built dependencies, we will install the TensorFlow Object Detection API and write the configs that we will need for training, such as model type, batch size, number of iterations num_steps. The more num_steps you train for, the better your model will generally do, but training will take longer.
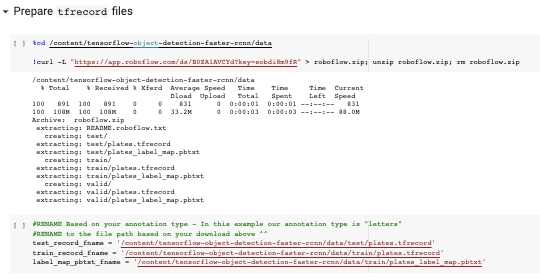
Preparing Training Data
Next, we'll download our dataset with the curl link from above, which provides our data in the TFRecord format. In the next section of code, we define variables that point to these data files - be sure to redefine these fields based on your data download.
Downloading the Model and Configuring Our Training Pipeline
Once our data is set up, we can begin to prepare the training procedures. We download the Mobilenet V2 model (the model has been pretrained and we will be using transfer learning to tune it to recognize license plates).
To adapt the models training to our new dataset, we need to point the training configuration to our data files and edit the number of training steps.
With the model weights and training configuration in place, we are ready to train!
Training
To kick off training, we run the model_main.py script with our custom model configuration.
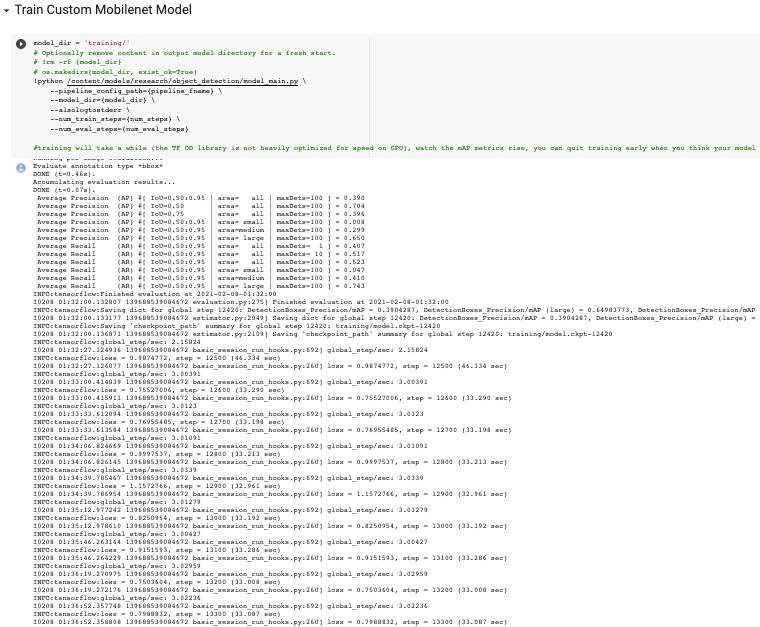
Training will take a while to complete. After each set of num_eval_steps, the training procedure will run a measure of performance (mean average precision) on the validation set. If training is working correctly, you will see this mAP metric rise as training progresses.
⏰ Note: Training will take a while to fully complete. If you want to speed up the process, you can adjust the num_steps down, or abort training early.
Validating Model's Performance
In addition to monitoring our models performance with validation metrics in training, we can also run our license plat detector on test images that the model has never seen - this gives us an idea if the model is working to specification, before we embark on converting and deploying it to our OAK device.
Export License Plate Model and Deploy to Your OAK
When you're satisfied with training, it is time to take your model out of the Colab notebook and onto the OAK device.
Export to Tensorflow Saved Graph
We first export our model as a TensorFlow saved graph - running this script will yield a .pb model file.
Export to OpenVino
Next, we will install OpenVino (5-10min) and convert the model to OpenVino IR format. We make a few small tweaks to the model configuration to insure that our model is compatible with the OpenVino tool chain. After this step, you will have your model in .bin and .xml files.
Export to DepthAI MyriadX .blob
The last step is to take our model in Open Vino format and convert to the Luxonis DepthAI model format. The DepthAI model format is compatible with and optimized for your OAK device.
To make the final conversion, we will post our OpenVino model to http://69.164.214.171:8080 - Luxonis's conversion station and in return, receive the model in .blob format. Save this .blob file down to your local or store other wise to take to your OAK device.
Implementing the License Plate Model on DepthAI
Moving over to your OAK device, the first step is to clone and install DepthAI - DepthAI setup documentation.
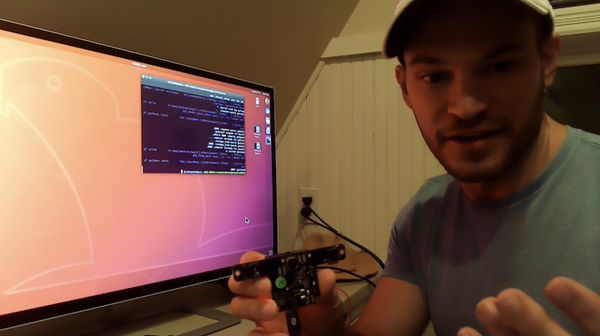
Then, you can click in your OAK device and test the following command to see if your installs worked:
python3 depthai_demo.py -dd -cnn mobilenet-ssd
This runs the base mobilenet-sdd model that has been trained on the COCO dataset. To run our model, we'll leverage all the infra around this base model with our own twist.
Within the DepthAI repo, you will see a folder called resources/nn/. To bring in our own model, we'll copy that folder to mobilenet-sddresources/nn/[your_model] and rename the three files to [your_model] in place of mobilenet-ssd.
Then we copy over our custom models weights in place of what once was mobilenet-sdd.blob. Then we edit the two JSON files, to replace the default class names with our own class list. If you need to double-check the order of your custom class lists, you can check the printout in the Colab notebook when we imported our data. After rewriting these files, we are ready to launch our custom model!
python3 depthai_demo.py -dd -cnn [your-model]
Deploying with roboflowoak
Alternatively, you can deploy models trained with Roboflow Train to OAK devices with our Python package (roboflowoak): Step-by-Step Deploy Guide. DepthAI and OpenVINO are required on your host device for the package to work.
- roboflowoak (PyPi)
Next Steps
Once you've got the model working on the device, the next step is to look at how the predictions are handled in depthai_demo.py and to begin to integrate the functionality into your application.
As you move towards production, you can improve your model by capturing additional data and retraining your model, a process known as active learning.
Conclusion
Congratulations! By following this tutorial, you have learned how to train a custom license plate model and deploy it to your OAK device.
We are always excited to hear what you're working on - happy training!
Cite this Post
Use the following entry to cite this post in your research:
Jacob Solawetz, Joseph Nelson. (Feb 8, 2021). How to Train and Deploy a License Plate Detector to the Luxonis OAK. Roboflow Blog: https://blog.roboflow.com/oak-deploy-license-plate/