

Live RTSP streams present three concrete problems that naive pipelines fail on: lag accumulation from OpenCV's internal buffer, silent stream drops when cameras reboot, and thread contention when frame reads and inference share the same thread. This tutorial builds a fault-tolerant wildfire smoke detection pipeline using a threaded StreamReader, reconnect logic, and a watchdog, running against the Roboflow Inference Docker container at the edge with a smoke detection model from Roboflow Universe. Swapping the model ID and RTSP URL in a single config file is all it takes to repurpose the pipeline for a different detection task.
In 2025, wildfires burned over 5 million acres across the United States, and research shows that a 15-minute reduction in response time could generate up to $8.2 billion in economic benefits annually in California alone. Networks like ALERTWildfire already have over 1,000 cameras watching for smoke around the clock, so the hardware side of early wildfire detection is largely figured out.
The software side is harder. A live RTSP stream does not behave like a video file; frames arrive continuously whether your pipeline is ready or not, and cameras drop off the network without warning. A pipeline that is not built to handle any of this will fall behind or die silently.
This guide walks you through building a wildfire smoke detection pipeline that handles all of this correctly, using the Roboflow Inference Docker container running on any edge device.
Process RTSP Streams for Real-Time Video Analytics
What is an RTSP stream and why is it hard?
RTSP is the protocol that controls how multimedia streams are delivered from a source to a client. The actual video travels over RTP underneath. Most IP cameras expose an RTSP endpoint that looks like this:
rtsp://username:password@192.168.1.100:554/streamConnecting to a real camera feed introduces three problems that you need to handle explicitly:
- Lag accumulation: OpenCV maintains an internal buffer. If inference falls behind the incoming frame rate, you end up processing footage that is already several seconds old.
- Stream drops: Cameras reboot and networks hiccup. A read() loop will silently stop detecting with no indication that anything went wrong.
- Threading: Reading frames and running inference in the same thread means one always blocks the other.
The rest of this guide addresses all three.
Live RTSP Wildfire Smoke Detection Pipeline with Roboflow Inference Project Setup
Start by creating the project folder with the following structure:
rtsp-fire-smoke-detection/
│
├── requirements.txt
├── config.py
├── main.py
│
└── pipeline/
    ├── __init__.py
    ├── stream_reader.py
    ├── inference_client.py
    └── annotator.py
The stream reader handles RTSP ingestion, the inference client sends frames to the Docker container, the annotator draws detections, and the config file holds all settings.
Install dependencies
Add the following to requirements.txt and run pip install -r requirements.txt inside a virtual environment:
supervision
opencv-python
inference
Note: The Roboflow Inference SDK requires Python 3.9 to 3.12. If you are on Python 3.13, replace inference-sdk with requests in requirements.txt and update inference_client.py to use raw HTTP calls instead.
Get the model from Roboflow Universe
Go to Roboflow Universe and search for "wildfire detection".
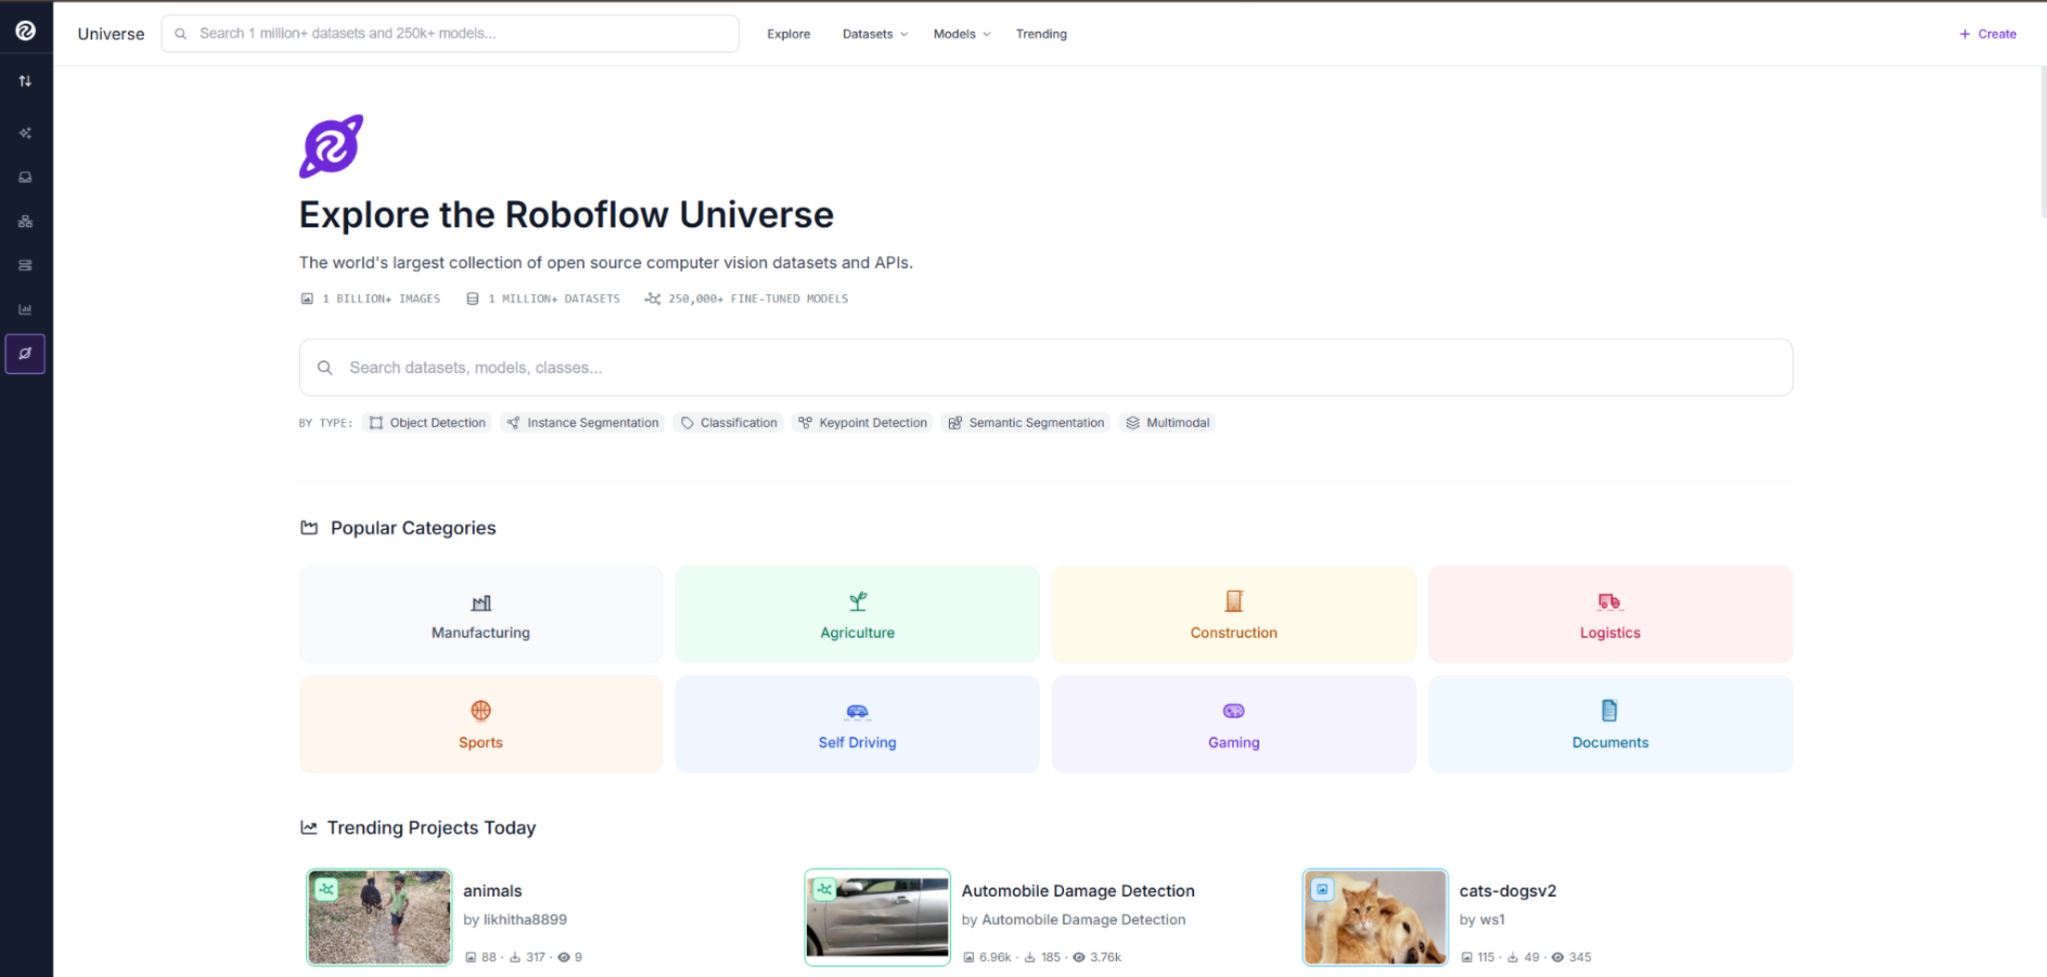
Select this Wildfire Detection model. It covers two classes: fire and SMOKE, trained on 2,024 images, and licensed under CC BY 4.0.
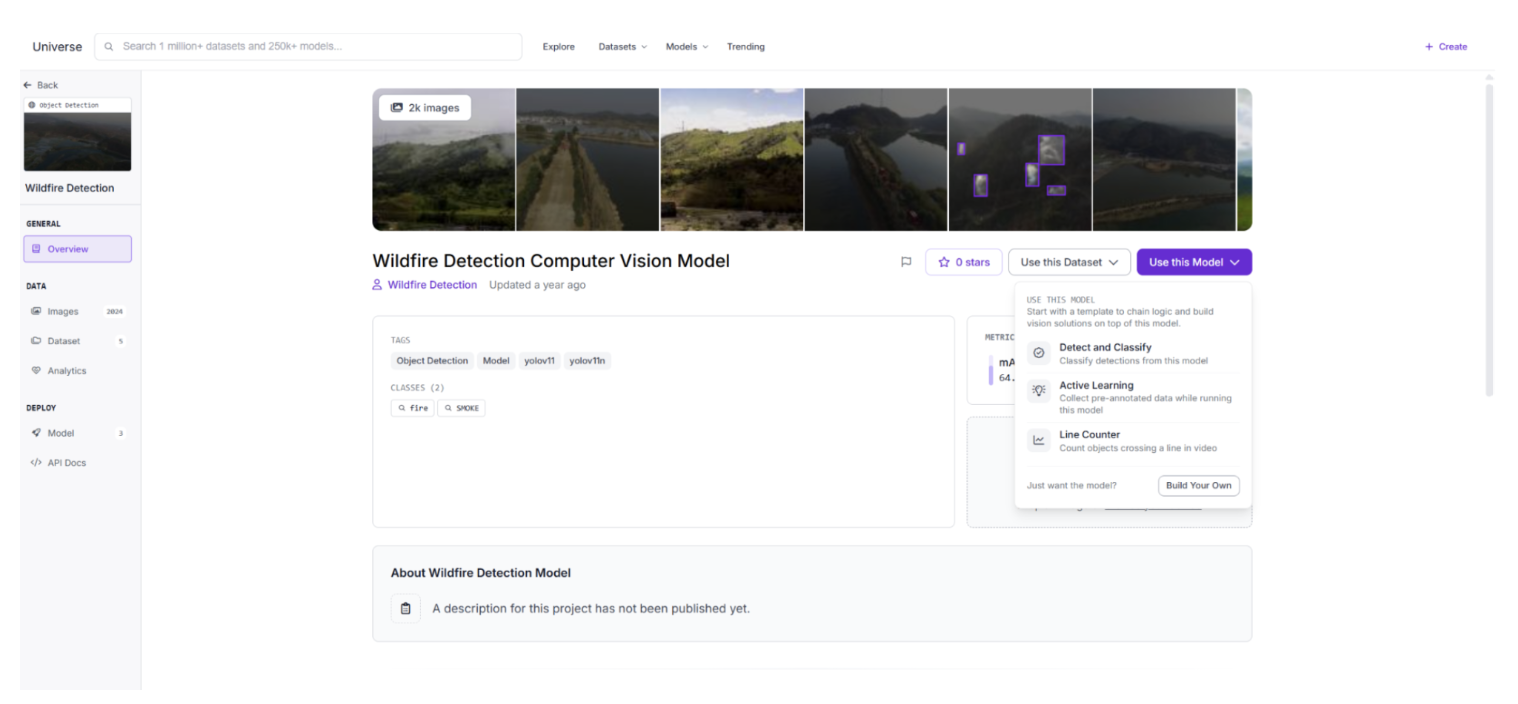
Click "Use this Model", then select "Detect and Classify" from the dropdown.
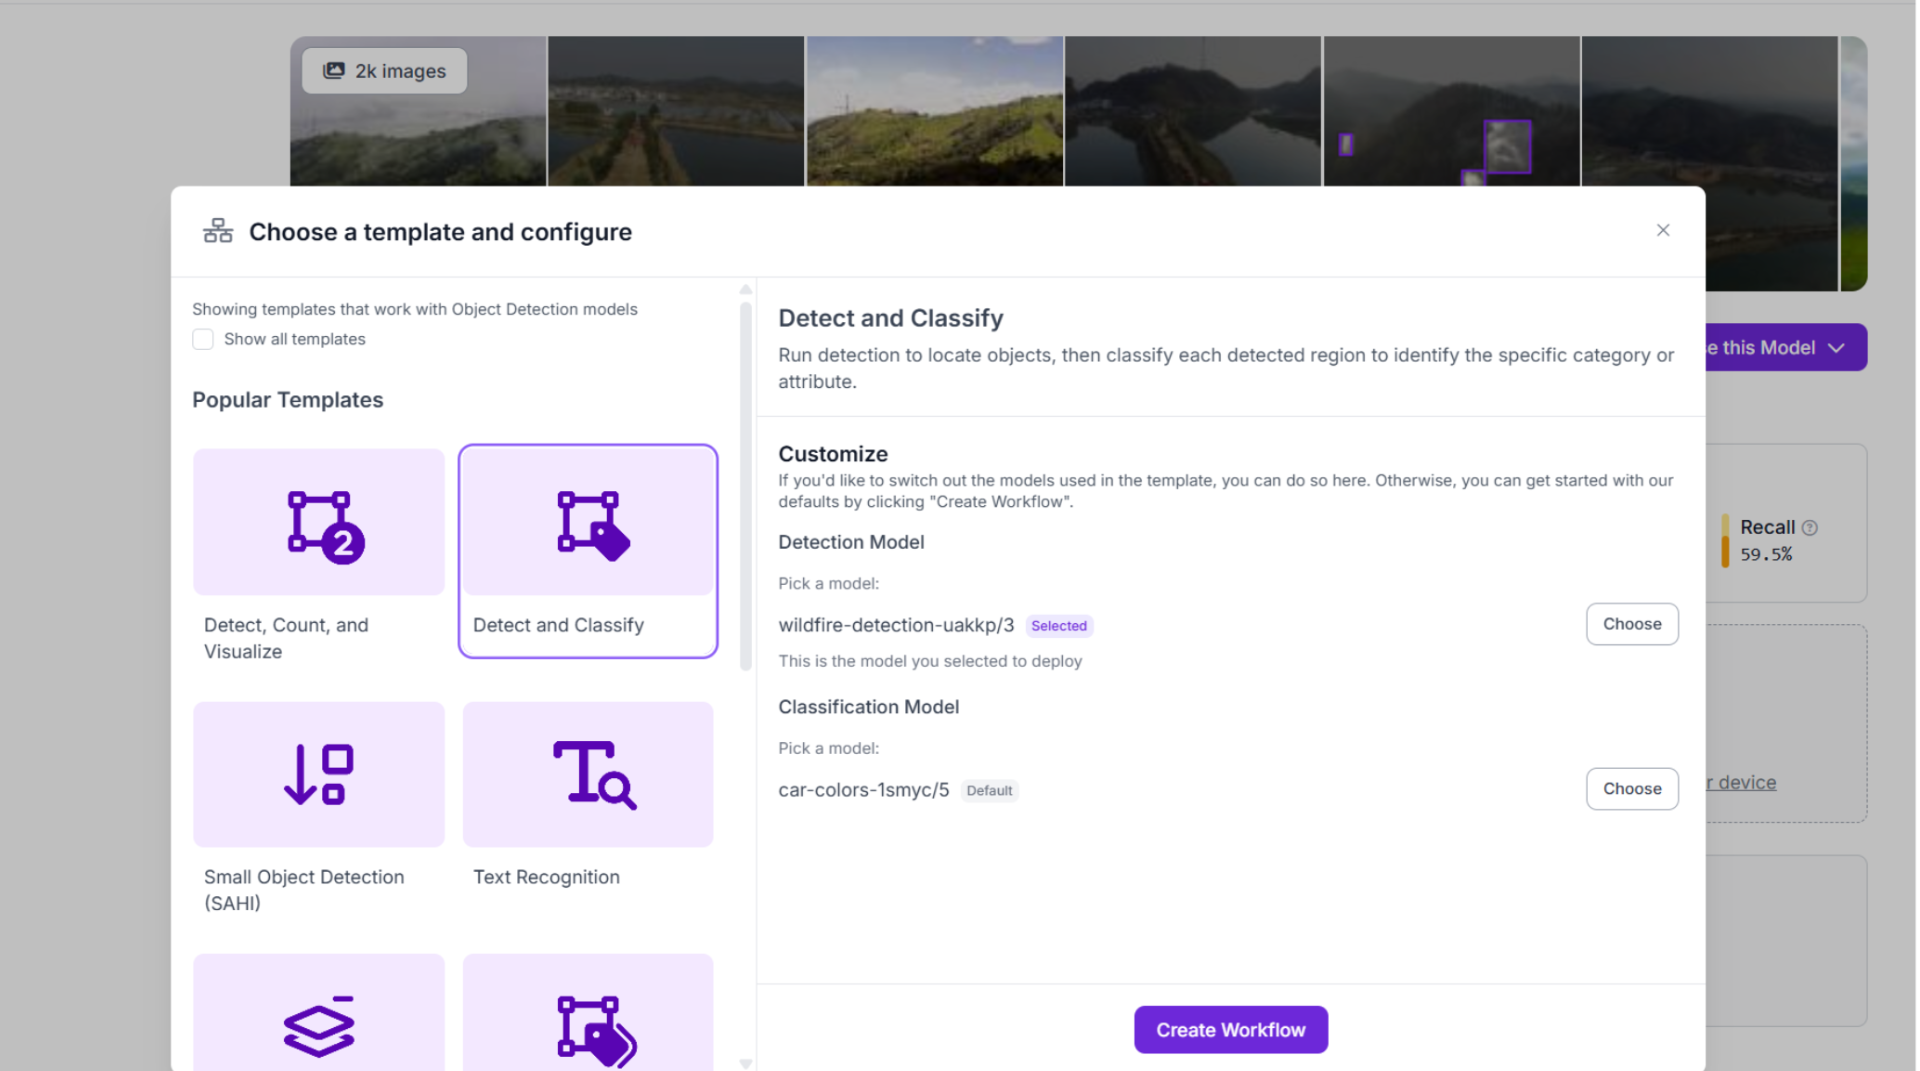
This opens the deploy panel, where the model ID is shown. Copy it:
wildfire-detection-uakkp/3The deploy panel also shows the model's current recall of 59.5%. If you want to improve detection performance over time, Roboflow's Active Learning feature can automatically collect and label frames where the model is uncertain, helping you retrain on real-world data from your own cameras.
Then open config.py and fill in your values:
API_KEY = "YOUR_ROBOFLOW_API_KEY"
MODEL_ID = "wildfire-detection-uakkp/3"
INFERENCE_SERVER_URL = "http://localhost:9001"
RTSP_URL = "rtsp://localhost:8554/stream"
CONFIDENCE_THRESHOLD = 0.4
WATCHDOG_TIMEOUT = 10
RECONNECT_DELAY = 5
Replace YOUR_ROBOFLOW_API_KEY with your private key from app.roboflow.com/settings/api.
Setting Up the Roboflow Inference Docker Container
The Roboflow Inference Docker container runs a local inference server on port 9001. Your pipeline sends frames to it and gets predictions back. The model downloads automatically on the first call.
Make sure Docker is installed and running, then start the container:
docker run -d --name roboflow-inference -p 9001:9001 roboflow/roboflow-inference-server-cpu:latest-d runs it in the background and -p 9001:9001 maps the port. For GPU acceleration, swap the image:
docker run -d --name roboflow-inference -p 9001:9001 roboflow/roboflow-inference-server-gpu:latestConfirm the container is running:
docker ps
Then verify the server is live by opening http://localhost:9001 in your browser. You should see the Roboflow Inference landing page.
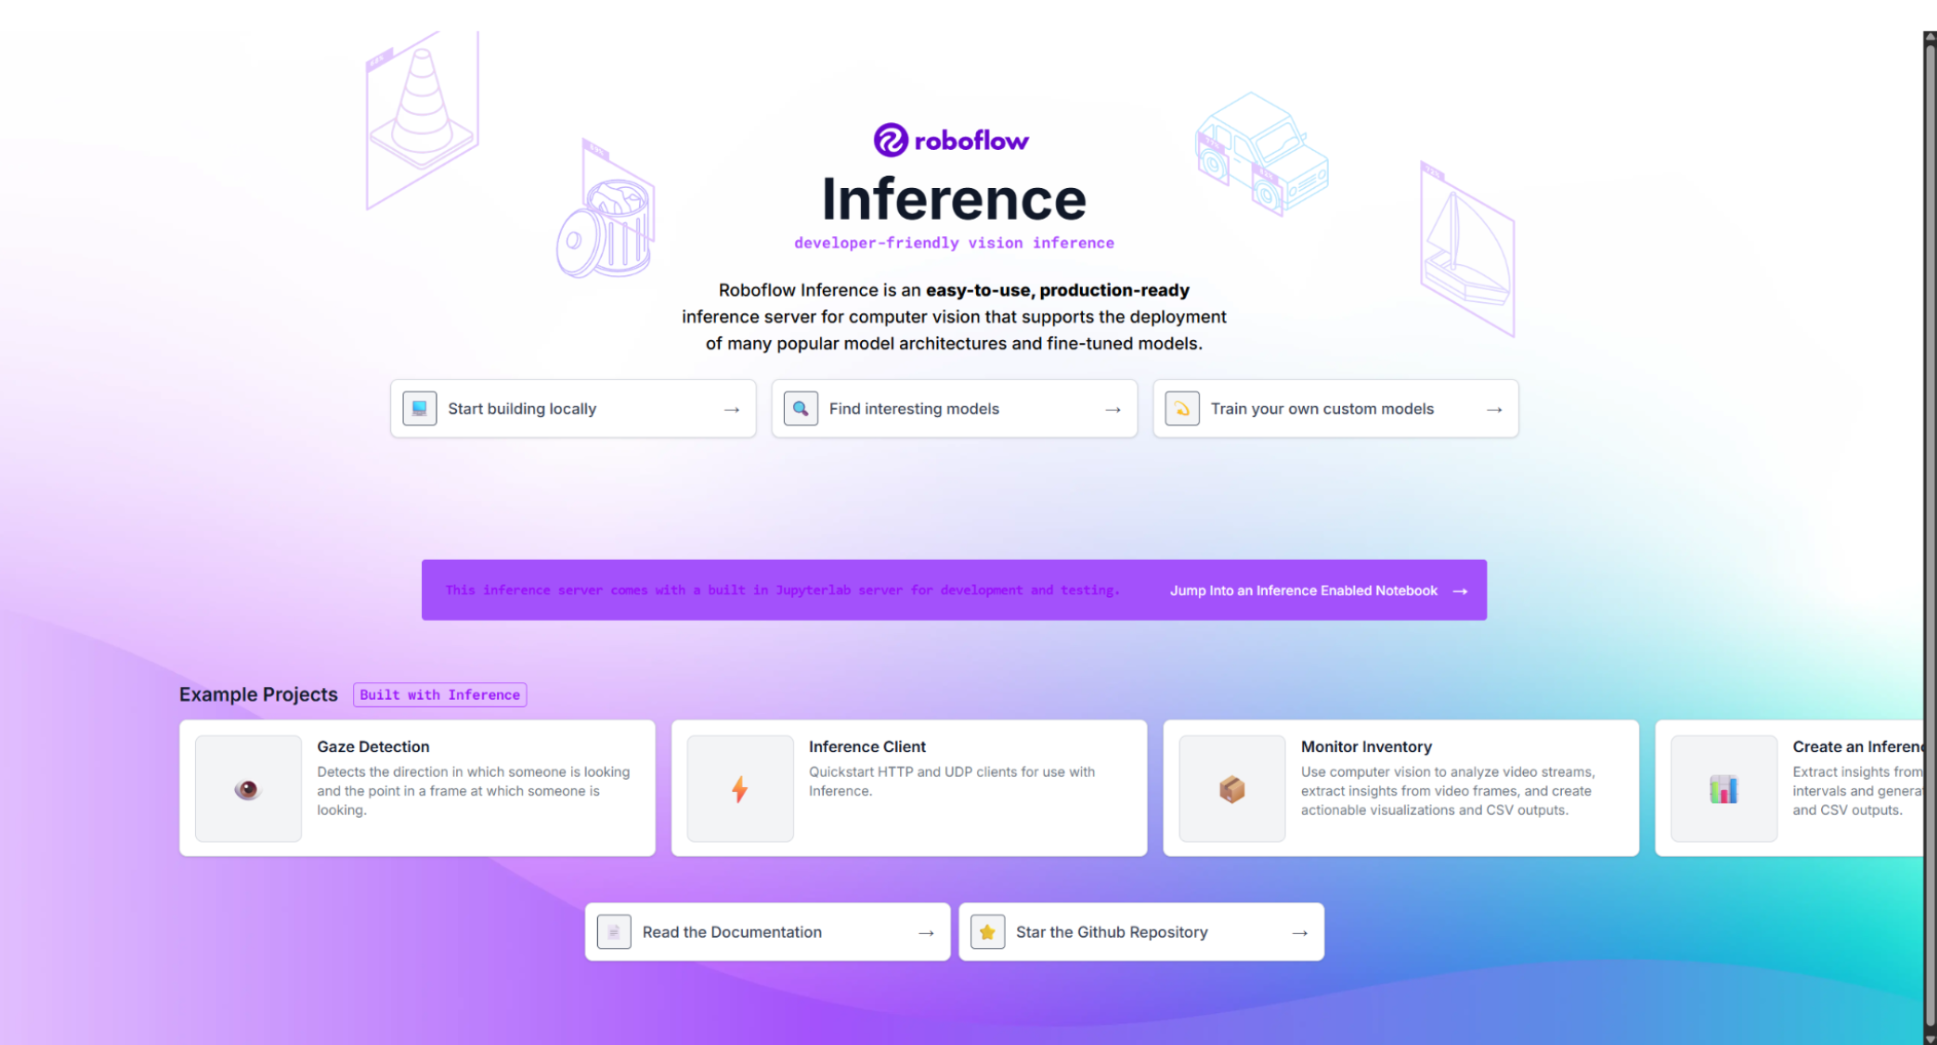
The inference server is now running and ready to receive frames.
To keep the container running automatically after a reboot or crash.
docker run -d --name roboflow-inference -p 9001:9001 \
  --restart unless-stopped \
  roboflow/roboflow-inference-server-cpu:latest
This is what makes the pipeline production-ready on an edge device like an NVIDIA Jetson. The inference server comes back up automatically without any manual intervention.
If you prefer not to manage the Docker container yourself, you can swap INFERENCE_SERVER_URL in config.py to use Roboflow's hosted inference API instead:
INFERENCE_SERVER_URL = "https://serverless.roboflow.com"Everything else in the pipeline stays identical. The hosted API handles scaling, uptime, and model serving automatically.
Simulating an RTSP Stream with FFmpeg
Before connecting a real IP camera, you need a way to test the pipeline locally. The approach here uses two tools: MediaMTX as a lightweight RTSP server and FFmpeg to push a video file into it as a looping stream.
Start MediaMTX
Download MediaMTX and run it:
mediamtx mediamtx.yml
MediaMTX opens an RTSP listener on port 8554. Any client that connects to rtsp://localhost:8554/stream will receive the stream.
Push the video with FFmpeg
Push your video file into MediaMTX as a looping RTSP stream:
ffmpeg -re -stream_loop -1 -i fire_smoke.mp4 \
  -c:v libx264 -preset ultrafast -tune zerolatency \
  -c:a aac -f rtsp rtsp://localhost:8554/stream
-stream_loop -1 loops the video indefinitely. When you are ready to deploy against a real camera, replace the RTSP URL in config.py:
RTSP_URL = "rtsp://username:password@camera-ip:554/stream"Nothing else in the pipeline changes.
The Frame Buffering Problem
When you call cap.read() in a loop, OpenCV reads from an internal buffer that fills continuously. On a live RTSP stream, the camera sends frames at 25 to 30 FPS regardless of what your code is doing. If inference falls behind, that buffer grows faster than you drain it.
The fix is a producer-consumer pattern. A background thread keeps only the most recent frame while the main thread picks it up when ready. The two never block each other.

This is what StreamReader implements. The background thread drains the buffer continuously while the main thread always gets the freshest frame available.
Building a Threaded Stream Reader
stream_reader.py solves the buffering problem with a background thread that runs independently of inference.
Start with the class initialization:
import cv2
import threading
import time
import logging

logger = logging.getLogger(__name__)

class StreamReader:
    def __init__(self, rtsp_url: str, reconnect_delay: int = 5, watchdog_timeout: int = 10):
        self.rtsp_url = rtsp_url
        self.reconnect_delay = reconnect_delay
        self.watchdog_timeout = watchdog_timeout
        self.frame = None
        self.last_frame_time = None
        self.running = False
        self.cap = None
        self.fps = 30.0
        self._lock = threading.Lock()
        self._thread = None
start() launches the background thread. get_frame() uses a lock to share the latest frame safely.
def start(self):
        self.running = True
        self._thread = threading.Thread(target=self._read_loop, daemon=True)
        self._thread.start()
        return self

    def get_frame(self):
        with self._lock:
            return self.frame
is_alive() is the watchdog. No frame within watchdog_timeout seconds means the stream is down.
 def is_alive(self):
        if self.last_frame_time is None:
            return False
        return (time.time() - self.last_frame_time) < self.watchdog_timeout
_connect() opens the RTSP URL. _read_loop() reconnects automatically after any drop.
def _connect(self):
        if self.cap:
            self.cap.release()
        self.cap = cv2.VideoCapture(self.rtsp_url, cv2.CAP_FFMPEG)
        if not self.cap.isOpened():
            return False
        self.fps = self.cap.get(cv2.CAP_PROP_FPS) or 30.0
        return True

    def _read_loop(self):
        while self.running:
            if not self._connect():
                time.sleep(self.reconnect_delay)
                continue
            frame_interval = 1.0 / self.fps
            while self.running:
                start = time.time()
                ret, frame = self.cap.read()
                if not ret:
                    self.cap.set(cv2.CAP_PROP_POS_FRAMES, 0)
                    ret, frame = self.cap.read()
                    if not ret:
                        break
                with self._lock:
                    self.frame = frame
                    self.last_frame_time = time.time()
                elapsed = time.time() - start
                sleep_time = frame_interval - elapsed
                if sleep_time > 0:
                    time.sleep(sleep_time)
            time.sleep(self.reconnect_delay)
With StreamReader running, your pipeline always processes the latest frame from the stream, regardless of how long inference takes. If you prefer a managed alternative, Roboflow's InferencePipeline handles the threading, buffer management, and reconnect logic automatically with a few lines of code.
Running Inference on Live Frames
The inference client connects to the Roboflow Inference Docker container and downloads the model automatically on the first call.
from inference_sdk import InferenceHTTPClient
import numpy as np
import logging

logger = logging.getLogger(__name__)


class FireSmokeDetector:
    def __init__(self, api_url: str, api_key: str, model_id: str, confidence: float = 0.4):
        self.model_id = model_id
        self.confidence = confidence
        self.client = InferenceHTTPClient(
            api_url=api_url,
            api_key=api_key,
        )

    def predict(self, frame: np.ndarray) -> dict:
        try:
            result = self.client.infer(frame, model_id=self.model_id)
            result["predictions"] = [
                p for p in result.get("predictions", [])
                if p["confidence"] >= self.confidence
            ]
            return result
        except Exception as e:
            logger.error(f"Inference error: {e}")
            return {"predictions": []}
The predict method accepts a NumPy frame directly, and the SDK handles encoding and the HTTP call to the inference server.
The annotator takes those predictions and draws bounding boxes on the frame using Roboflow Supervision.
import supervision as sv
import numpy as np


class Annotator:
    def __init__(self):
        self.box_annotator = sv.BoxAnnotator(thickness=1)
        self.label_annotator = sv.LabelAnnotator(
            text_position=sv.Position.BOTTOM_LEFT
        )

    def annotate(self, frame: np.ndarray, predictions: dict) -> np.ndarray:
        detections, valid_preds = self._parse_predictions(predictions, frame.shape)
        if len(detections) == 0:
            return frame
        labels = [f"{p['class']} {p['confidence']:.0%}" for p in valid_preds]
        annotated = self.box_annotator.annotate(scene=frame.copy(), detections=detections)
        return self.label_annotator.annotate(scene=annotated, detections=detections, labels=labels)
Expected response from the inference container:
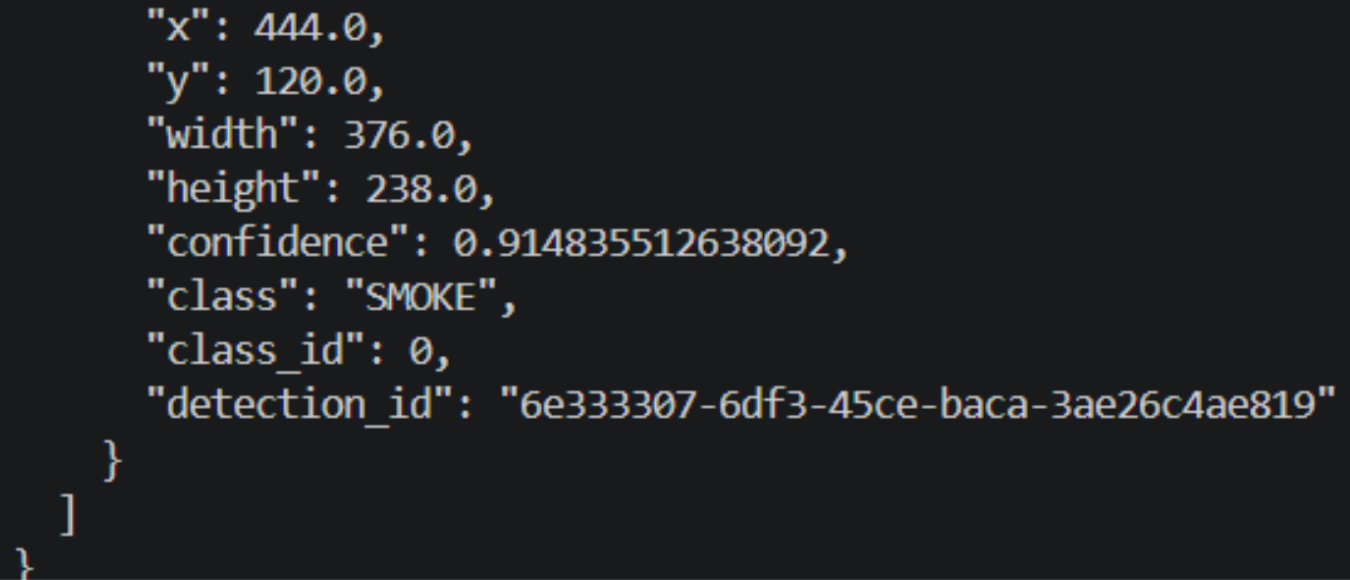
The inference container returns a JSON object per frame with the class label, confidence score, and bounding box coordinates. Predictions below CONFIDENCE_THRESHOLD are filtered out before reaching the annotator.
Running the Full Pipeline
main.py wires all three components together into a single loop.
Start with the imports and logging setup:
import cv2
import time
import logging
import config
from pipeline.stream_reader import StreamReader
from pipeline.inference_client import FireSmokeDetector
from pipeline.annotator import Annotator

logging.basicConfig(
    level=logging.INFO,
    format="%(asctime)s [%(levelname)s] %(name)s: %(message)s"
)
logger = logging.getLogger(__name__)

TARGET_FPS = 10
FRAME_INTERVAL = 1.0 / TARGET_FPS
Initialize all three components:
def main():
    reader = StreamReader(
        rtsp_url=config.RTSP_URL,
        reconnect_delay=config.RECONNECT_DELAY,
        watchdog_timeout=config.WATCHDOG_TIMEOUT,
    ).start()

    detector = FireSmokeDetector(
        api_url=config.INFERENCE_SERVER_URL,
        api_key=config.API_KEY,
        model_id=config.MODEL_ID,
        confidence=config.CONFIDENCE_THRESHOLD,
    )

    annotator = Annotator()
    last_inference_time = 0
    last_annotated_frame = None
The main loop checks the watchdog first and waits without crashing if no frames have arrived:
try:
        while True:
            if not reader.is_alive():
                time.sleep(1)
                continue

            frame = reader.get_frame()
            if frame is None:
                time.sleep(0.01)
                continue
FRAME_INTERVAL decouples inference from the display rate. The last annotated frame is cached between inference calls to keep the display smooth.
  now = time.time()
            if now - last_inference_time >= FRAME_INTERVAL:
                last_inference_time = now
                predictions = detector.predict(frame)

                detected = predictions.get("predictions", [])
                if detected:
                    for d in detected:
                        logger.info(
                            f"Detected: {d['class']} | Confidence: {d['confidence']:.0%} | "
                            f"Box: ({d['x']:.0f}, {d['y']:.0f})"
                        )

                last_annotated_frame = annotator.annotate(frame, predictions)

            display_frame = last_annotated_frame if last_annotated_frame is not None else frame
            cv2.imshow("Wildfire Smoke Detection", display_frame)

            if cv2.waitKey(1) & 0xFF == ord("q"):
                break
The finally block ensures a clean shutdown regardless of how the loop exits:
except KeyboardInterrupt:
        logger.info("Interrupted by user")
    finally:
        reader.stop()
        cv2.destroyAllWindows()


if __name__ == "__main__":
    main()
Run the full pipeline with all three components active:
# Terminal 1
mediamtx mediamtx.yml

# Terminal 2
ffmpeg -re -stream_loop -1 -i fire_smoke.mp4 \
  -c:v libx264 -preset ultrafast -tune zerolatency \
  -c:a aac -f rtsp rtsp://localhost:8554/stream

# Terminal 3
python main.py
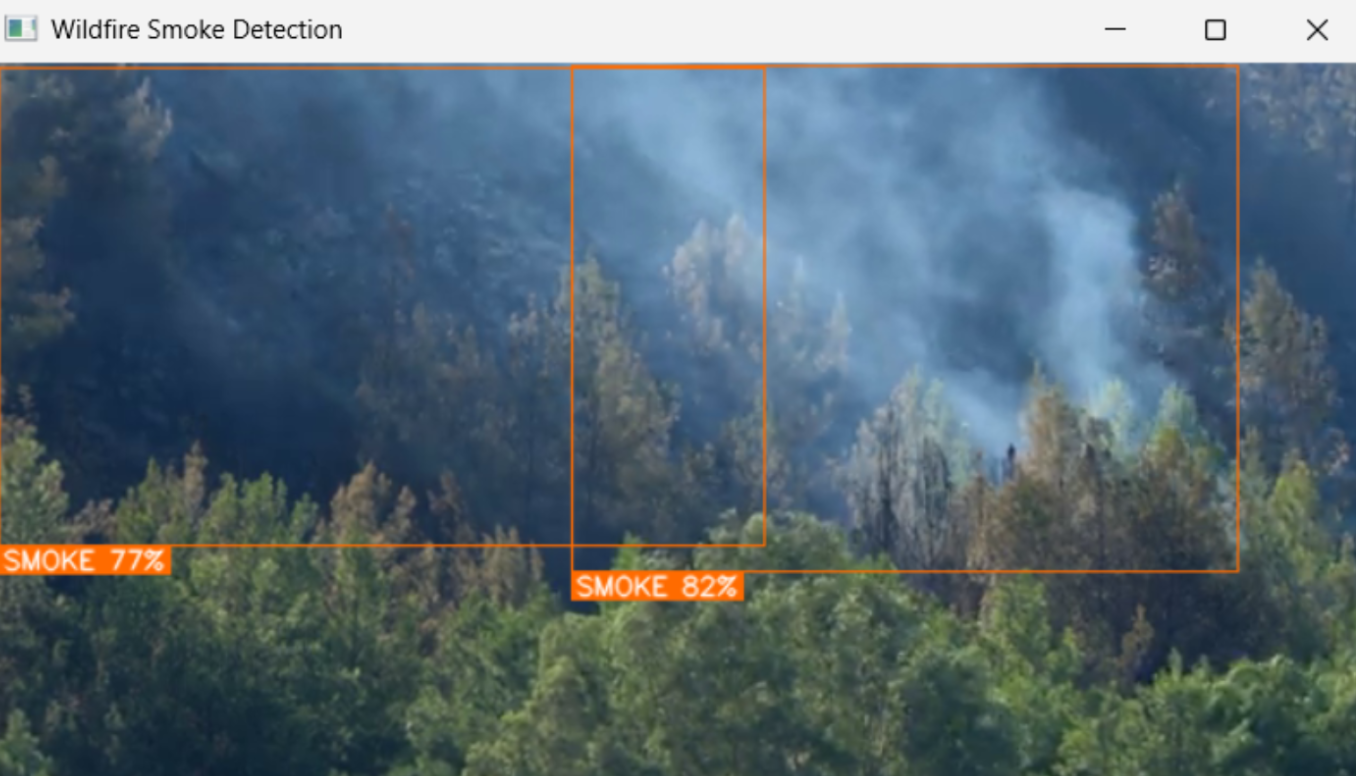
To deploy against a real IP camera, change one line in config.py:
RTSP_URL = "rtsp://username:password@camera-ip:554/stream"To switch the use case entirely, change MODEL_ID to any model on Roboflow Universe. The pipeline code does not change.
Process RTSP Streams for Real-Time Video Analytics Conclusion
You now have a fault-tolerant RTSP pipeline that ingests a live camera feed, handles frame buffering, and runs wildfire smoke detection on the Roboflow Inference Docker container at the edge.
The threaded StreamReader eliminates lag, the reconnect logic handles stream drops, and the watchdog catches silent failures.
Swap MODEL_ID in config.py for any model on Roboflow Universe and point RTSP_URL at a different camera, and you have a completely different detection system without touching a single line of pipeline code.
Further reading


Cite this Post
Use the following entry to cite this post in your research:
Mostafa Ibrahim. (May 28, 2026). Process RTSP Streams for Real-Time Video Analytics. Roboflow Blog: https://blog.roboflow.com/process-rtsp-streams/