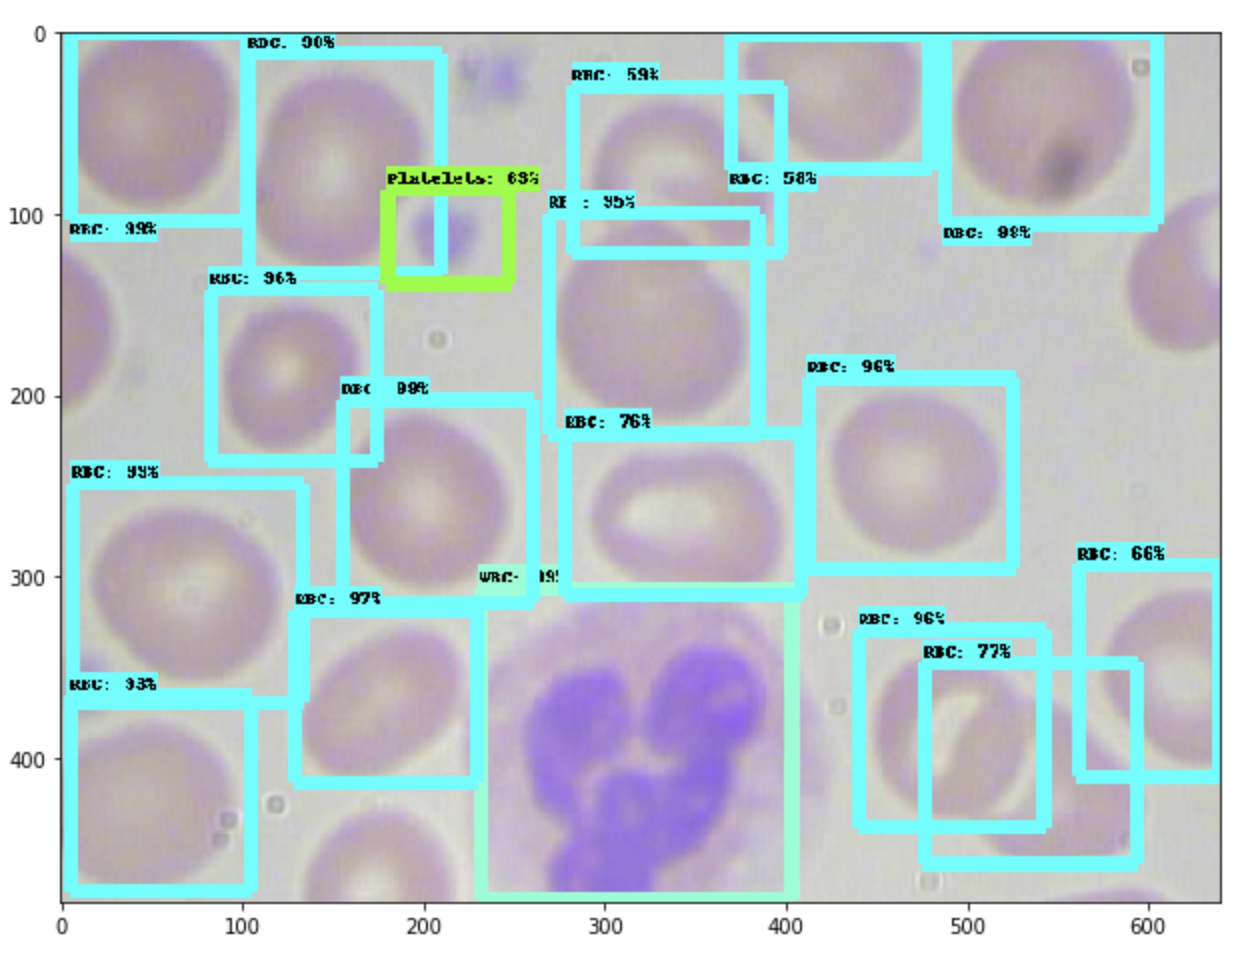
Following this tutorial, you only need to change a two lines of code to train an object detection computer vision model to your own dataset.
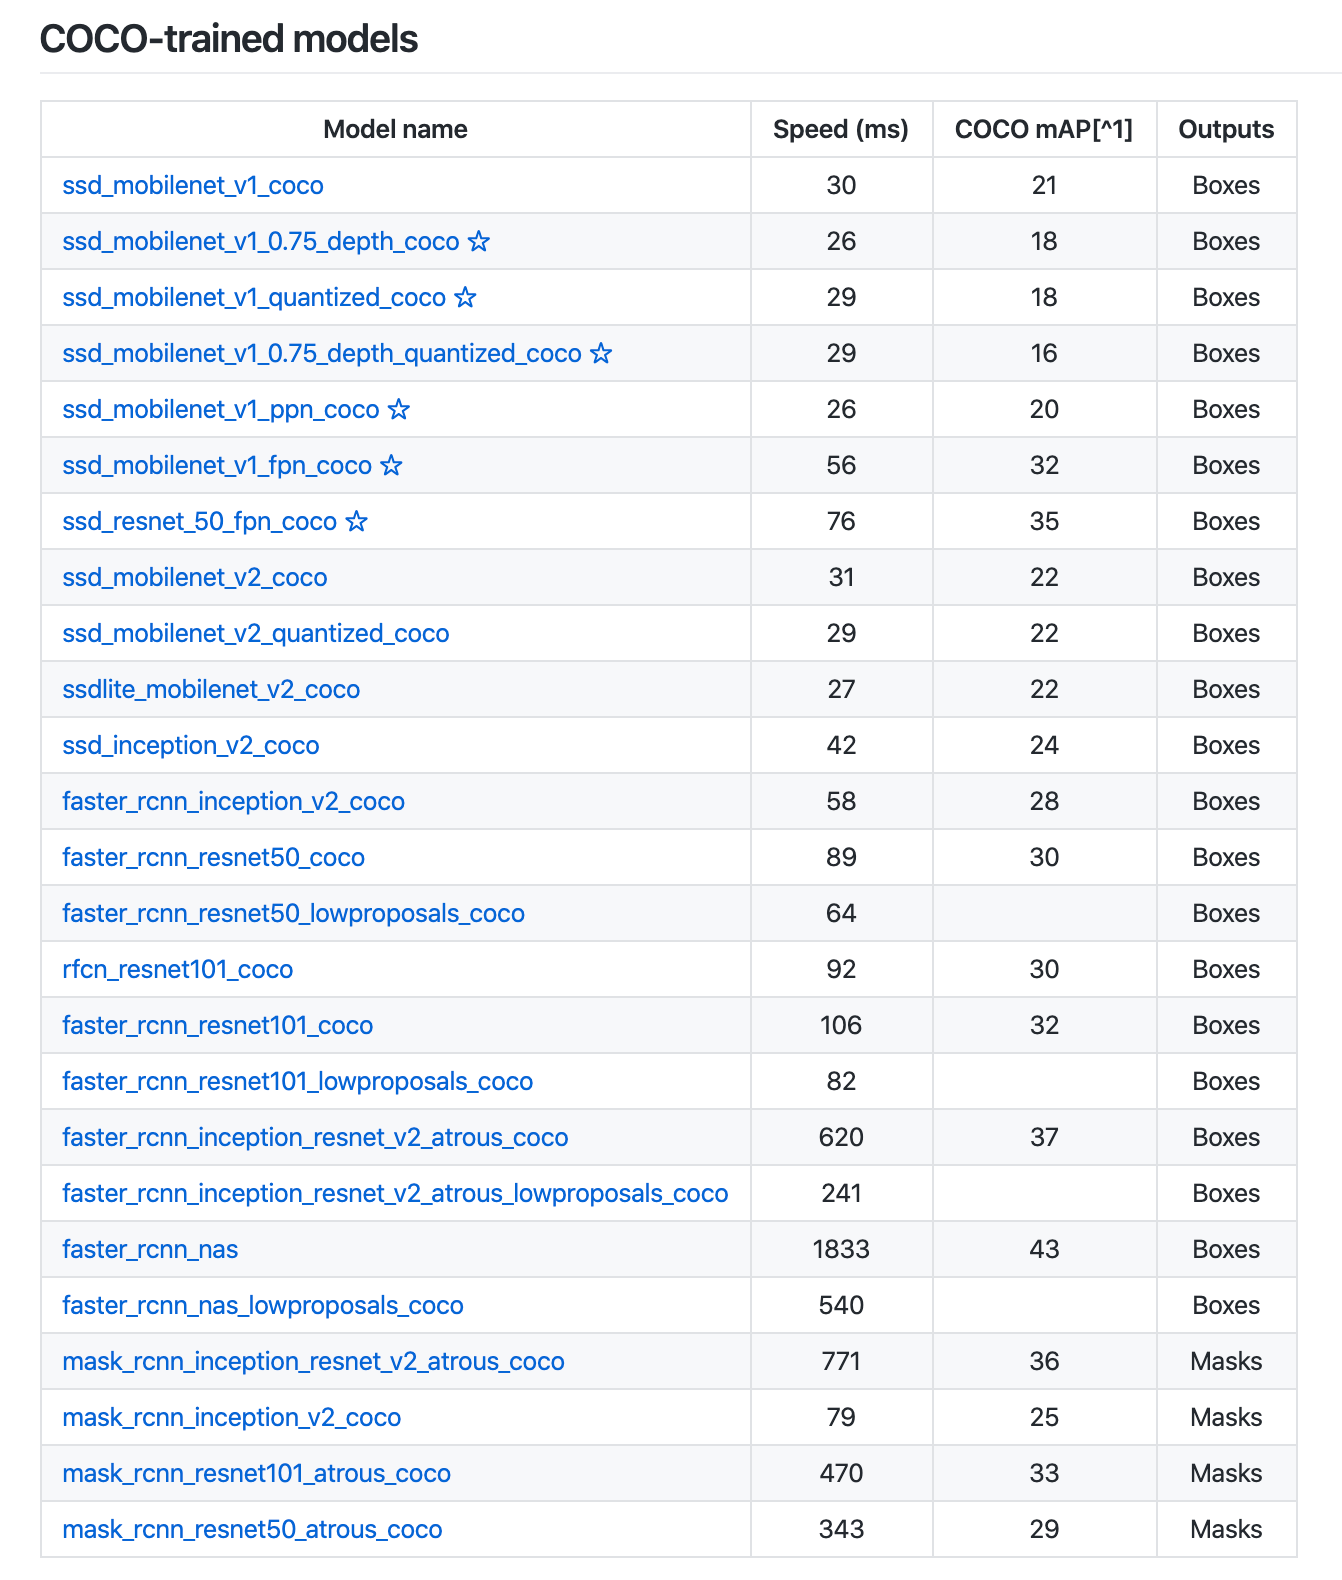
The TensorFlow Object Detection API enables powerful deep learning powered object detection model performance out-of-the-box. TensorFlow even provides dozens of pre-trained model architectures with included weights trained on the COCO dataset.
If you want to train a model leveraging existing architecture on custom objects, a bit of work is required. This guide walks you through using the TensorFlow 1.5 object detection API to train a MobileNet Single Shot Detector (v2) to your own dataset.
Because Roboflow handles your images, annotations, TFRecord file and label_map generation, you only need to change two lines of code to train a TensorFlow Object Detector based on a MobileNetSSDv2 architecture.
Impatient? Jump straight to the Colab Notebook.
Update: YOLO v5 has been released
If you're Ok with using PyTorch instead of Tensorflow, we recommend jumping to the YOLOv5 tutorial. You'll have a trained YOLOv5 model on your custom data in minutes.
Our Example Dataset: Blood Cell Count and Detection (BCCD)
Computer vision is revolutionizing medical imaging. In early 2020, Google published results indicating doctors can provide more accurate mammogram diagnoses for one in ten women (a 9.7% reduction in false negatives!)
To that end, our example dataset is 364 images of cell populations and 4888 labels identifying red blood cells, white blood cells, and platelets. Originally open-sourced two years ago by comicad and akshaymaba, and available on Roboflow Public Datasets.
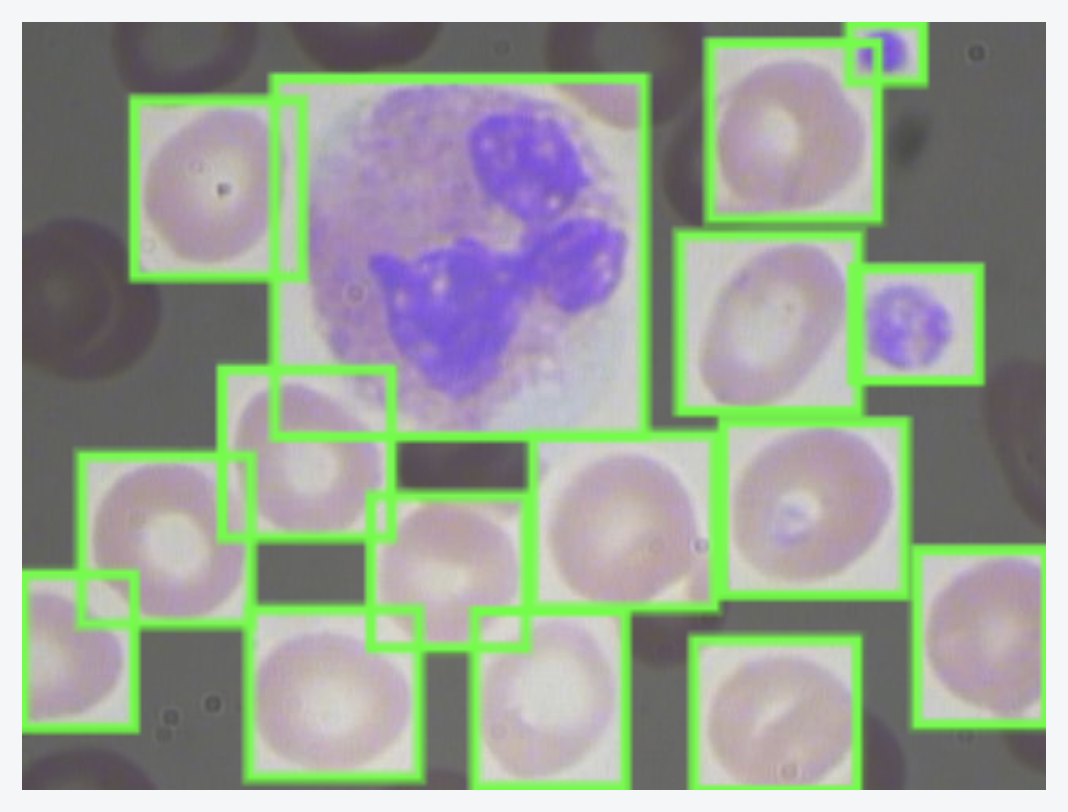
Fortunately, this dataset comes pre-labeled, so we can jump right into preparing our images and annotations for our model.
For your custom data, consider collecting images from Google Image search in an automated fashion and labelling them using a free tool like LabelImg.
Preparing Our Images and Annotations
Going straight from data collection to model training leads to suboptimal results. There may be problems with the data. Even if there aren’t, applying image augmentation expands your dataset and reduces overfitting.
Preparing images for object detection includes, but is not limited to:
- Verifying your annotations are correct (e.g. none of the annotations are out of frame in the images)
- Ensuring the EXIF orientation of your images is correct (i.e. your images are stored on disk differently than how you view them in applications, see more)
- Resizing images and updating image annotations to match the newly sized images
- Checking the health of our dataset, like its class balance, images sizes, and aspect ratios – and determining how these might impact preprocessing and augmentations we want to perform
- Various color corrections that may improve model performance like grayscale and contrast adjustments
Similar to tabular data, cleaning and augmenting image data can improve your ultimate model’s performance more than architectural changes in your model.
Roboflow Organize is purpose-built to seamlessly solve these challenges. In fact, Roboflow Organize cuts the code you need to write roughly in half while giving you access to more preprocessing and augmentation options. It's free for datasets less than 1000 images.
For our BCCD problem, the full BCCD microscopy dataset is available here. (Note: see below for forking train and test splits rather than this full dataset initially.)
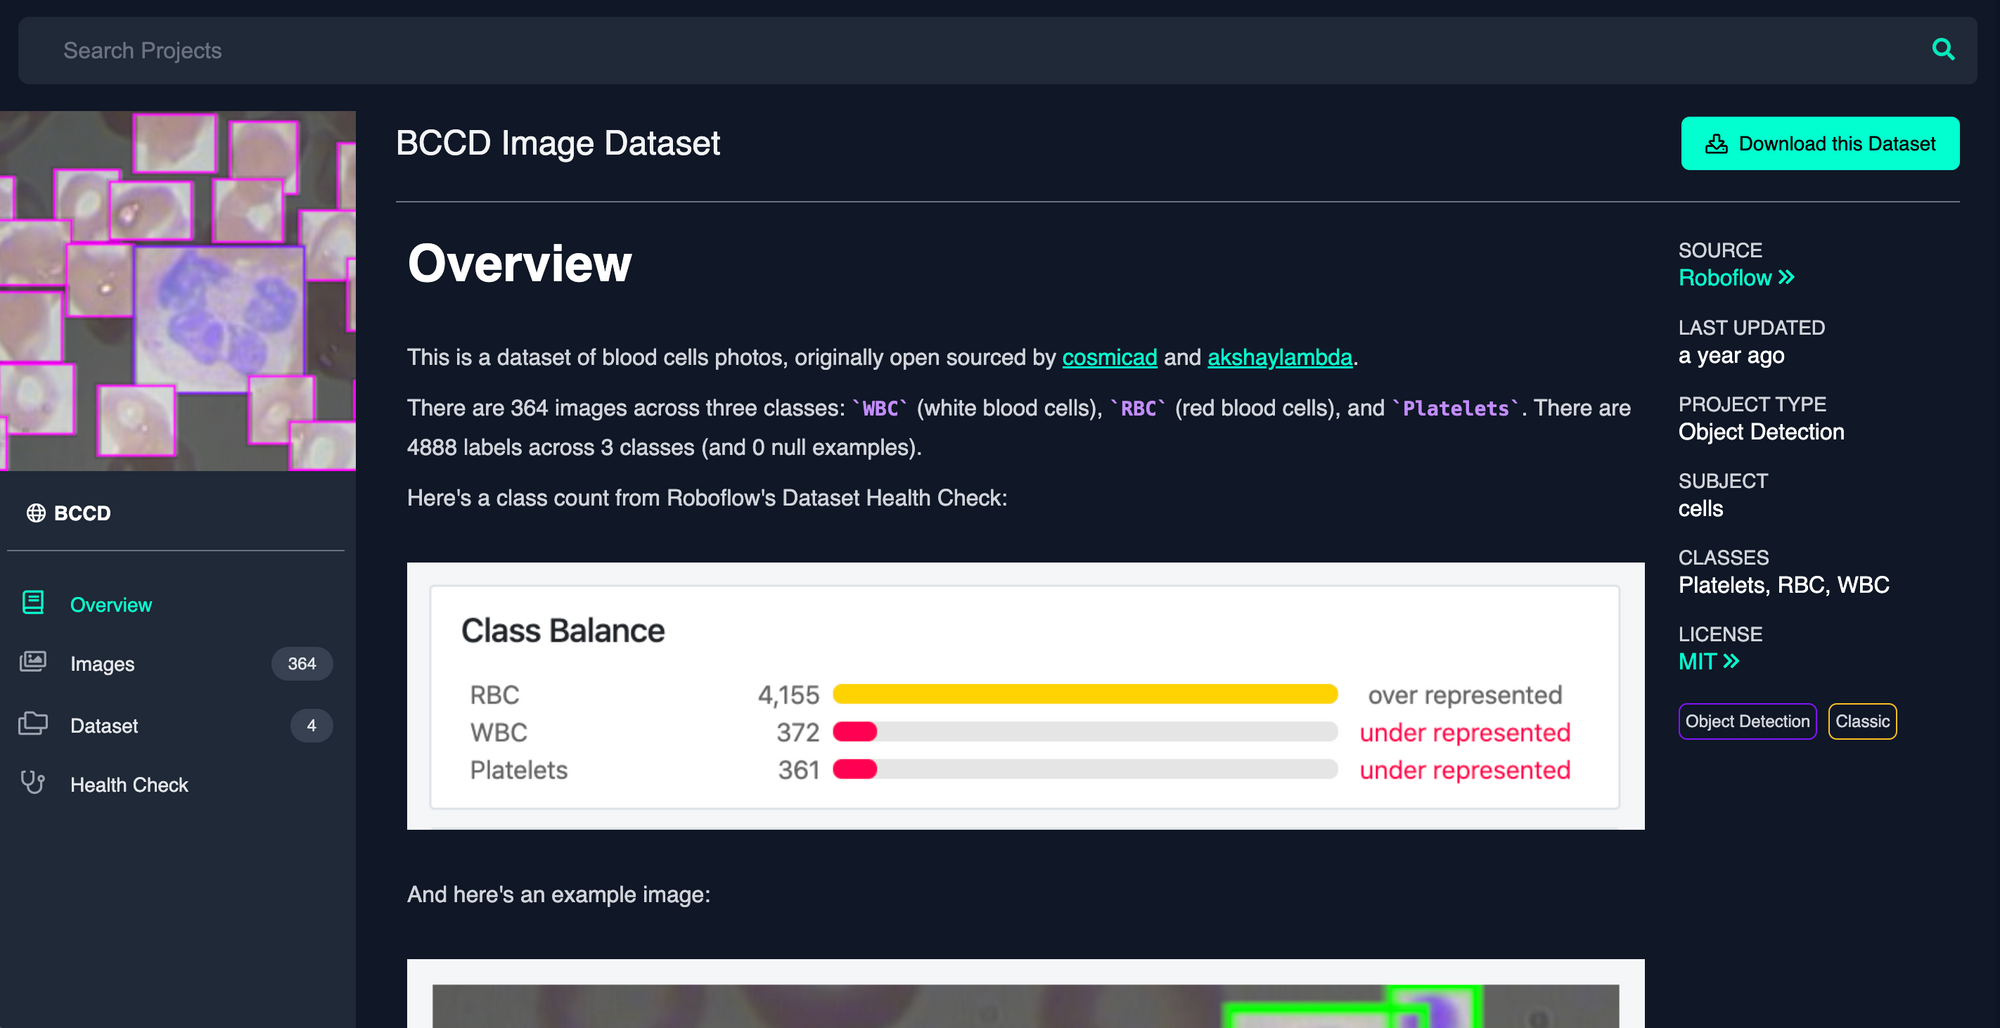
For your custom dataset, upload your images and their annotations to Roboflow following this simple step-by-step guide.
Creating TFRecords and Label Maps
For TensorFlow to read our images and their labels in a format for training, we must generate TFRecords and a dictionary that maps labels to numbers (appropriately called a label map).
Frankly, this is tedious and relies on writing redundant code for every dataset.
Roboflow generates TFRecords and label_maps for you.
Because we need one set of TFRecords for training and one set for testing, we'll need to create a training set and a testing set on Roboflow.
Conveniently, your dataset export will already be configured with the proper dataset splits when you export in TensorFlow TFRecord or any of our available formats.
Visit the BCCD dataset on Roboflow Universe, and click "Download" in the upper-right hand corner to add them to your Roboflow account.
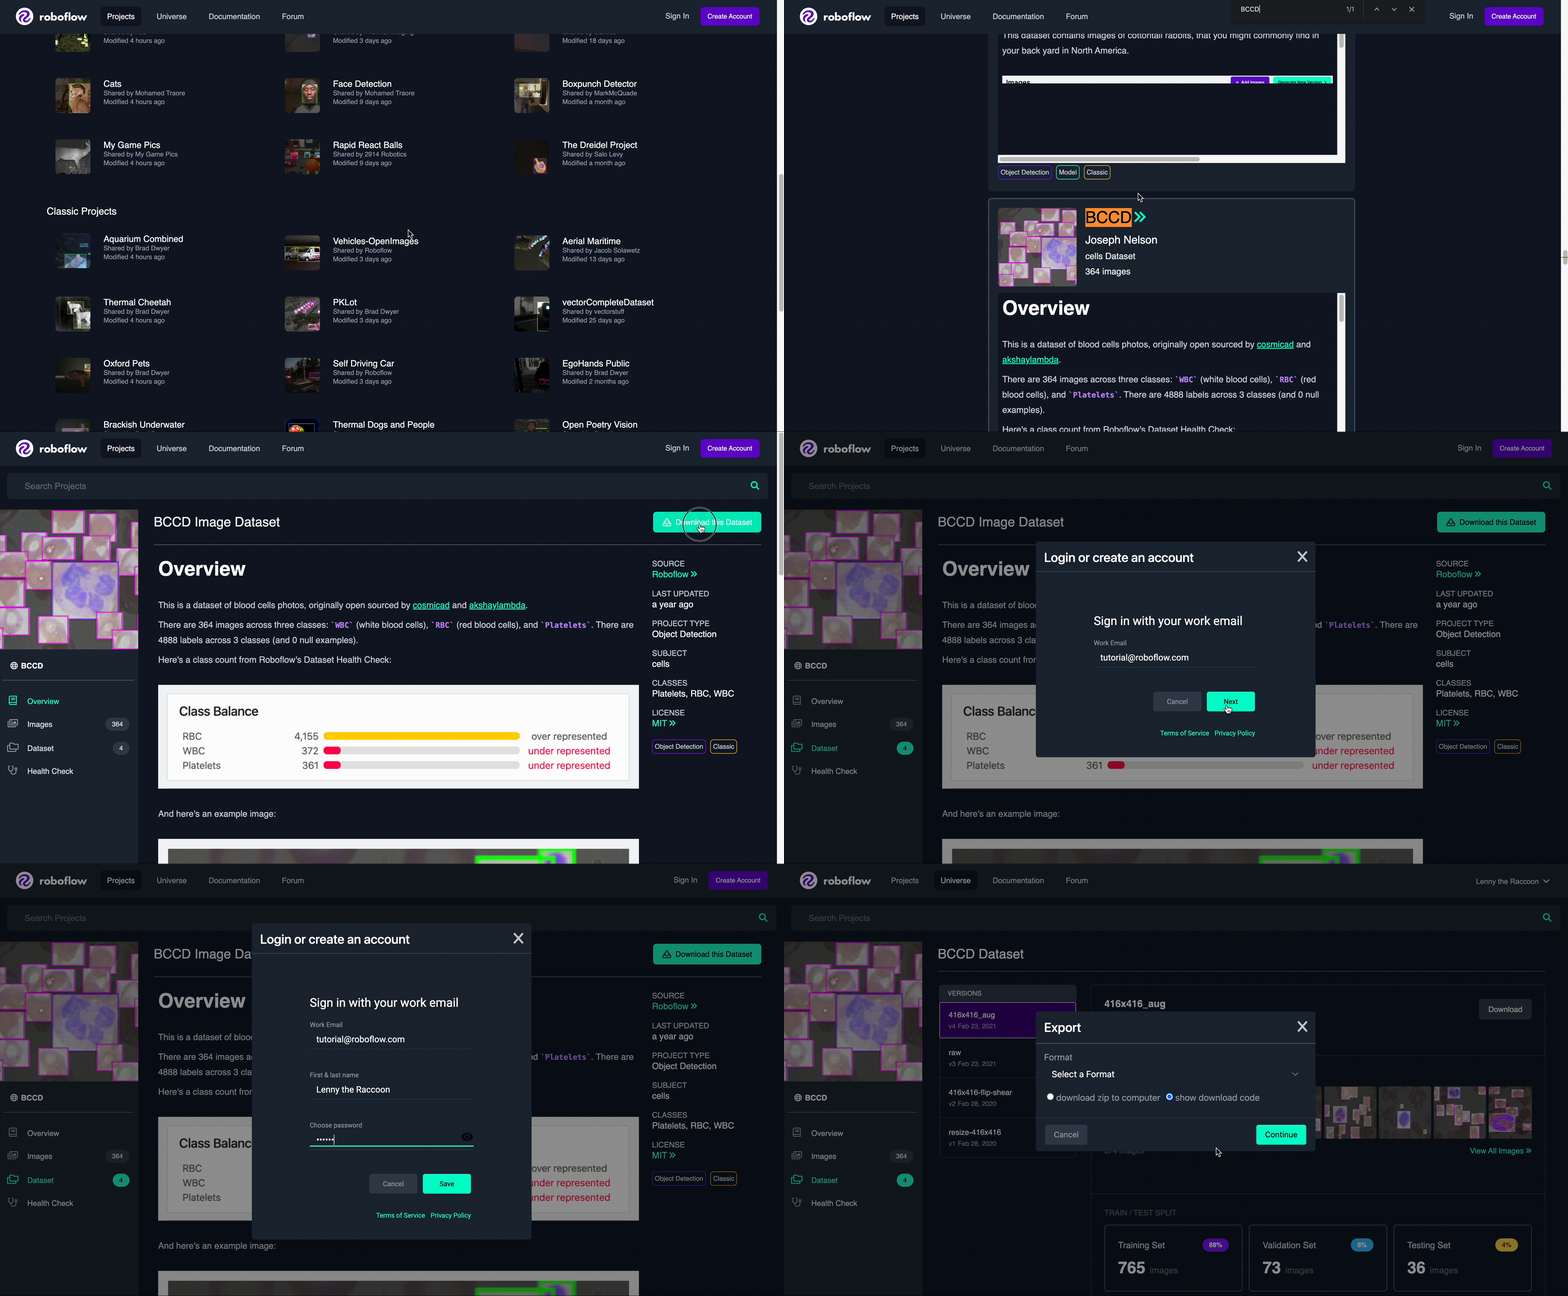
Create an export of this dataset. (You can opt to try any of these preprocessing or augmentation steps. For the first pass, leave settings as-are.)
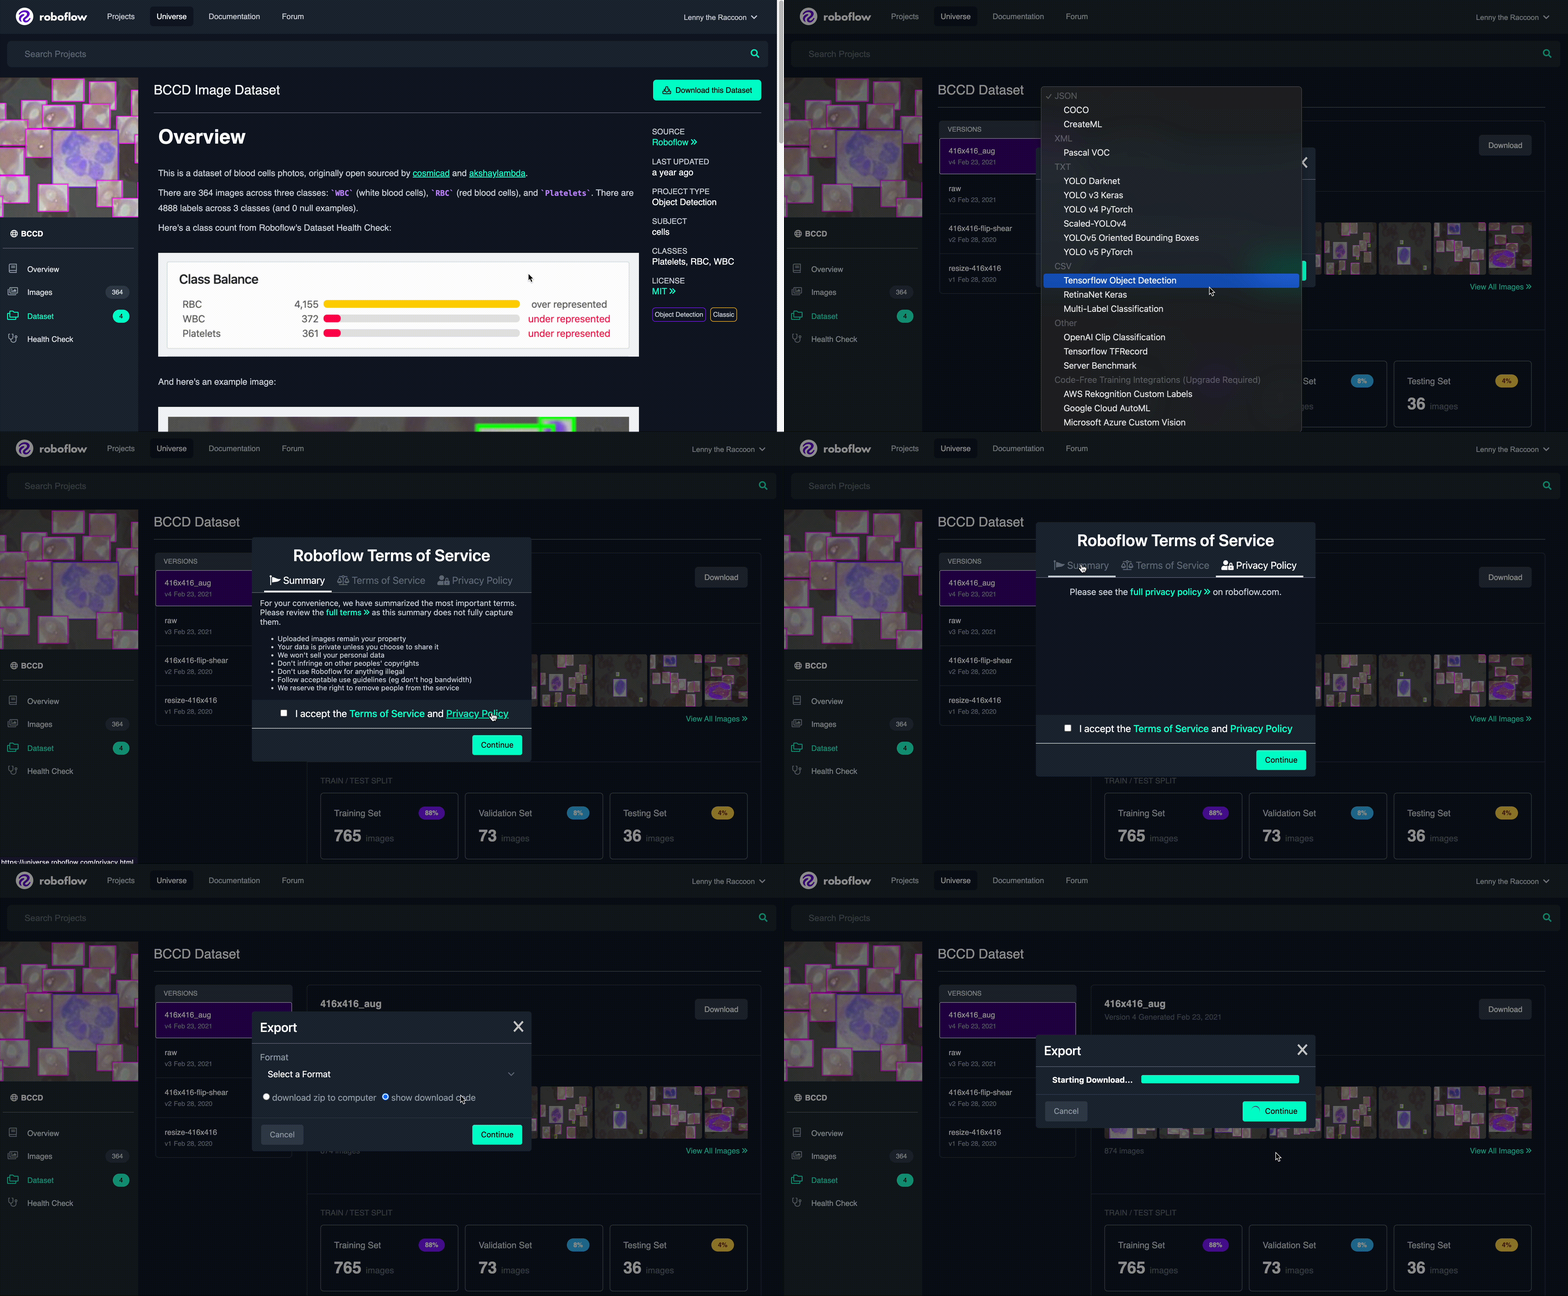
Now, click "Continue." Among the download options, assure "TensorFlow TFRecord" is selected. For the location of the download, select "Show Code Snippet." This will allow us to copy and paste the download code directly into our Colab Notebook!
- Exporting a Dataset (Roboflow Knowledge Base)
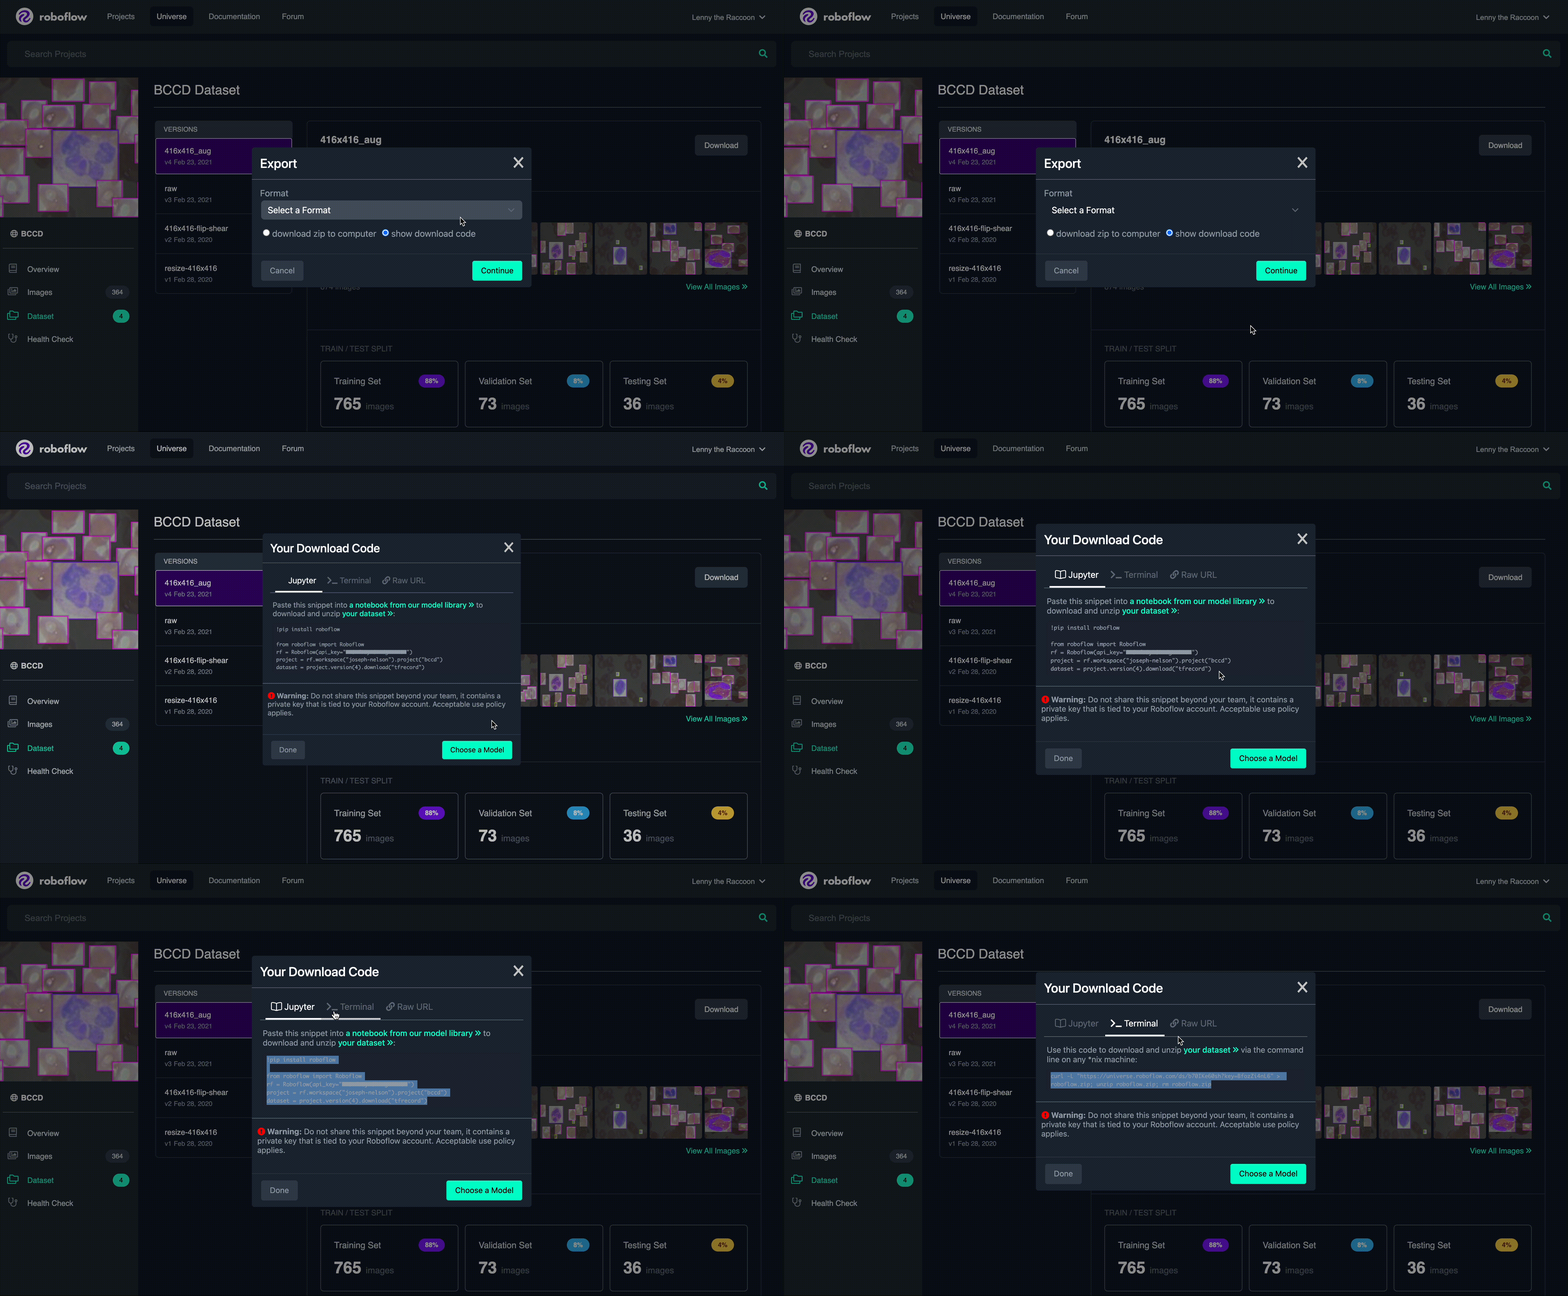
Hang on to this code snippet! We'll need it in a minute. (And don't share it publicly – it contains keys linked to your specific Roboflow account.)
Repeat these steps for your train set and your test set.
And that's it! You have generated TFRecords and a label map. Plus, the ability to train any preprocessing / augmentation steps and check the health of your dataset.
For your custom dataset, Roboflow will help you split it into training, validation, and testing sets at upload time. Read the Getting Started Guide.
Training Our Model
We'll be training a MobileNet Single Shot Detector Version 2. This specific architecture, researched by Google, is optimized for lightweight inference, enabling it to perform well natively on compute-constrained mobile and embedded devices (hence the name!). For a deeper dive into MobileNet, see this paper. To see how version 2 improves on accuracy, see this paper.
Fortunately, this architecture is freely available in the TensorFlow Object detection API.
We'll take advantage of Google Colab for free GPU compute (up to 12 hours). Our Colab Notebook is here. The GitHub repository from which this is based is here.
There are a few things to note about this notebook:
- For the sake of running an initial model, the number of training steps is constrained to 1000. Increase this to improve your results.
- The model configuration file with MobileNet includes two types of data augmentation at training time: random crops, and random horizontal and vertical flips
- The model configuration file default batch size is 12 and the learning rate is 0.0004. Adjust these based on your training results.
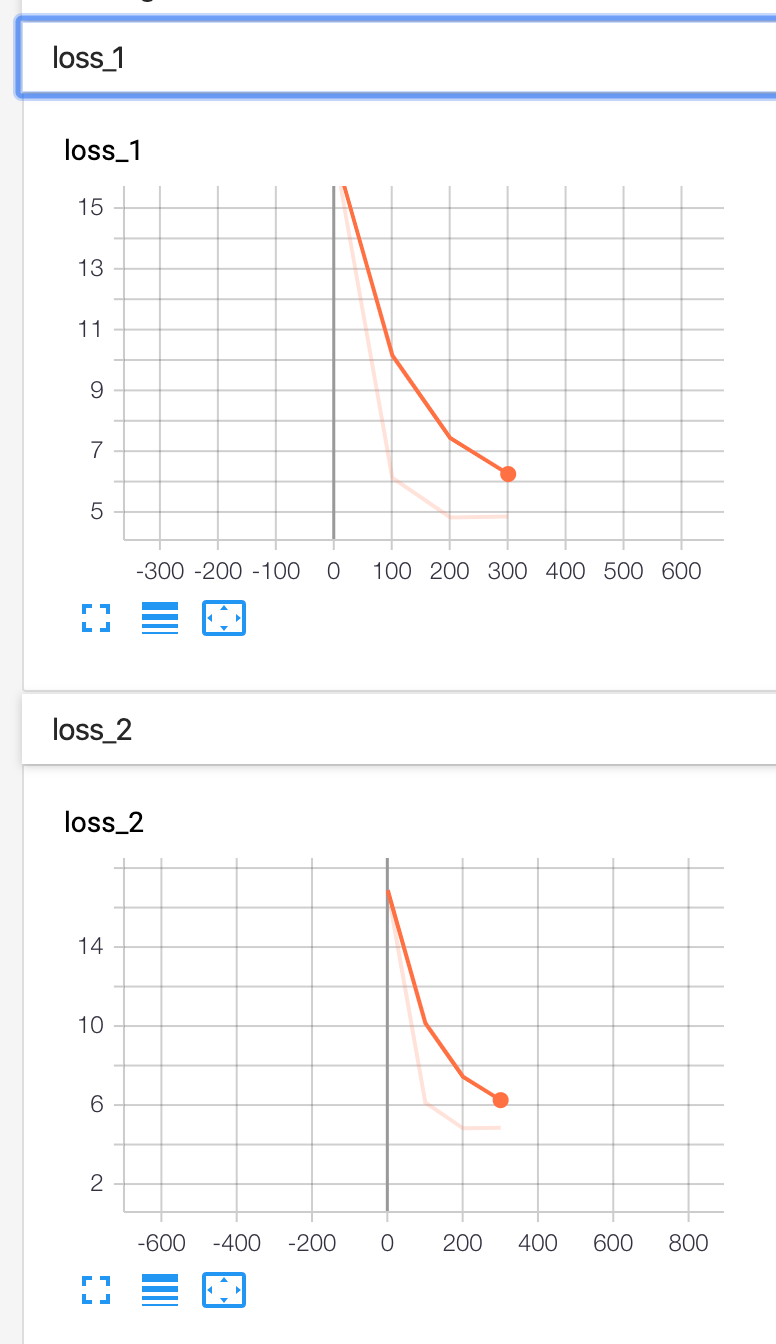
- The notebook includes an optional implementation of TensorBoard, which enables us to monitor the training performance of our model in real-time.
For your custom dataset, you need to load your own TFRecords into the Colab Notebook for the training and testing sets. These cells are clearly commented with # train set - REPLACE THIS LINK and # test set - REPLACE THIS LINK. The Roboflow link you generated above after creating exports is the link that goes here. This URL can be any object detection datasets, not just the BCCD dataset!
Model Inference
As we train our model, its fit is stored in a directory called ./fine_tuned_model. There are steps in our notebook to save this model fit – either locally downloaded to our machine, or via connecting to our Google Drive and saving the model fit there. Saving the fit of our model not only allows us to use it later in production, but we could even resume training from where we left off by loading the most recent model weights!
In this specific notebook, we conduct inference on images that have been saved in a directory called test in the GitHub repository we cloned to the Colab notebook.
Here's an example image (Image_0035.jpg in our GitHub repo) from inference:
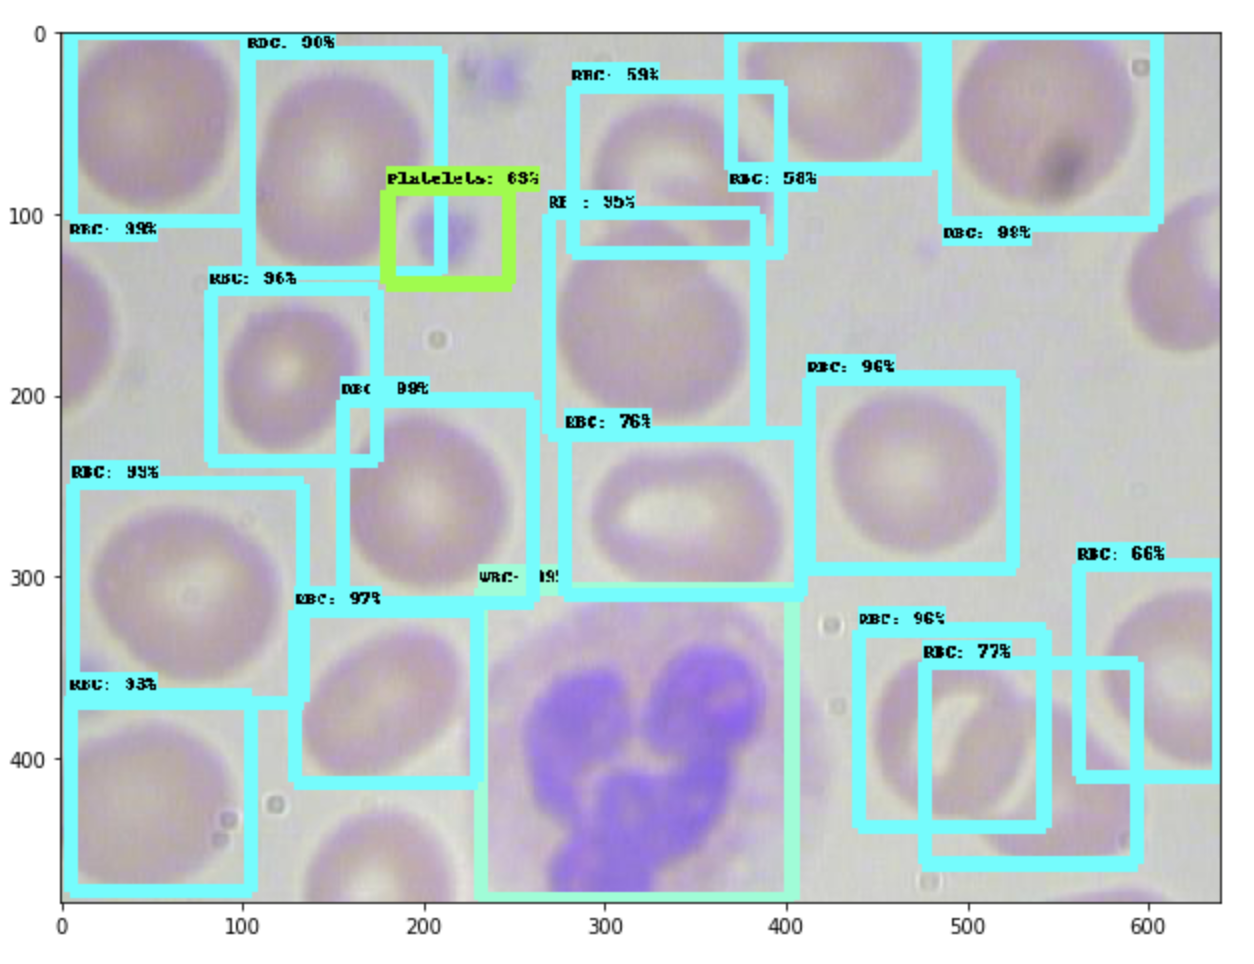
Not bad for training on just 1000 steps!
For your custom dataset, you need to upload your own images into the test folder located at tensorflow-object-detection/test. (Note: this is distinct from tensorflow-object-detection/data/test.) This is also described in the Colab Notebook.
What's Next
You’ve done it! You’ve trained an object detection model to a custom biology dataset.
Now, making use of this model in production begs the question of identifying what your production environment will be. For example, will you be running the model in a mobile app, via a remote server, or even on a Raspberry Pi? How you’ll use your model determines the best way to save and convert its format.
Consider these resources as next steps based on your problem: converting to TFLite (for Android and iPhone), converting to CoreML (for iPhone apps), converting for use on a remote server, or deploying to a Raspberry Pi.
Tell us how you’re using Roboflow / object detection, and we can feature your project, and collaborate on a blog post.
We’re most responsive to your feedback in our Community Forum and our in-app chat, available to any Roboflow user.
More of our available support resources: Roboflow Knowledge Base and Roboflow's Documentation.
Huge thanks to DLology, whom provided the lion's share of the initial notebook.
Cite this Post
Use the following entry to cite this post in your research:
Joseph Nelson. (Feb 9, 2020). Training a TensorFlow MobileNet Object Detection Model with a Custom Dataset. Roboflow Blog: https://blog.roboflow.com/training-a-tensorflow-object-detection-model-with-a-custom-dataset/
