
Aerial imagery from drones and planes presents distinct challenges for computer vision: small objects have few pixels to form features from, large image sizes slow training and inference, and orientation bias can mislead models. This post walks through the full pipeline for building a custom model on aerial data using Roboflow, covering data upload, annotation, preprocessing, augmentation, training, and deployment, with a paddle board detection project as the worked example.
Aerial imagery are images taken from aircrafts like drones, planes, and helicopters. With these images we can train a model to detect objects like fires, buildings, solar panels, rooftops, maritime search and rescue, and more. A good use case example is when maritime search and rescue (SAR) teams search for people in distress and their waterborne vessels at sea. Because aerial detection for the human eye pales in comparison to a highly trained computer vision model, professionals are able to detect what they are looking for faster and with more accuracy.
Though pretrained models using aerial imagery data are difficult to find, datasets for them can be found in places like The Satellite Image Deep Learning open source repository, Google Earth Engine, and Kaggle, and of course, Roboflow Universe. Thus, to detect custom objects in aerial images, it’s common to need to build a custom computer vision model.
Common Problems In Aerial Imagery Data
We’ve already addressed how pretrained models of aerial imagery data are not common which is in itself a common problem for students, researchers, and technical professionals.
Data Size
The size of the data and speed in which it can come in can also make it daunting to tackle annotating, especially in small teams.
Failure Of Small Object Detection
Models commonly fail to detect small objects as well. This is because as the model is learning it’s forming features from the images that we’re passing through it. These features are based on pixels, and because there aren’t that many pixels from our small objects for our model to form features from, it does not get as good of a look at the object that it’s trying to detect, as compared to larger objects. In addition to this, small objects are most likely to have data labeling errors, where their identification may have been omitted.
Inference And Training Time
Large image sizes in aerial imagery require networks to learn from four times as many pixels.
Bias In Orientation
Most cameras store pixels exactly the same whether the camera is oriented in landscape or portrait mode. The device just flips in order to signal to the viewer whether to display the pixels as-is or to rotate them by 90 or 180 degrees when displaying the image.
This can cause issues if the application displaying the images is unaware of the metadata and displays the image without respecting its EXIF orientation.
Training A Custom Model
In this tutorial, we’ll be using the Aerial dataset of floating objects from Kaggle to build our model using Roboflow. Specifically, the images folder found in Part_l. We’ll also be addressing solutions to the most common problems mentioned as we build.
If this is your first time using Roboflow, our Getting Started video serves as a great introduction, and we’ve built out new features to tackle problems addressed in this blog that we will use. Let’s get started!
Uploading Data
Once you download the Aerial dataset of floating objects from Kaggle, you can upload the data from the Part_l folder. As a time hack for V1, let’s upload the last 25 of our 1,000+ images, and hit the “Finish Upload” button. We’ll see why soon!
Annotating
After hitting “Finish Upload”, we are navigated to the annotations page where we have the option to invite teammates to our project.
Solving For Data Size — Part l
Adding teammates to our project will help divide up the work, but don't worry, it won't always be necessary. We will also soon see how a tool called "label assist" will help us annotate more quickly after we train our model and upload more images. For this project, we will just assign the annotation work to ourselves.
Solving For Small Object Annotations
As you can see from the video below, we are able to zoom in to select the small object we want to detect. In this case, a "paddle-board".
Preprocessing
After annotating, we will prepare our images and data for training and compile them into a version by hitting the "Generate new Version" button on the upper right hand side.
Here, we will begin selecting our preprocessing options. As you can see there are two options preselected for us, Auto-Orient and Resize. Resize will downsize our images for smaller file sizes and faster training. Not only do our machine learning models train faster on smaller images, but many deep learning model architectures require our images to be the same size. It’s important to note that resizing can also have adverse effects on small objects, which are perhaps only a few pixels wide, so experimentation with model sizes and resolution are highly encouraged for projects containing small objects.
Because our dataset includes small objects, we will also select tile as a preprocessing option in order to improve accuracy. This will take the image and chop it into sections and make it smaller, so we can infer faster. It also lets our model zoom in.
If you’ve used tiling during training, you will also need to use tiling during inference for more accurate results. This is because we want to maintain the zoomed in perspective so that objects during inferences are of a similar size to what they were during training. We explain in detail with examples in our post on detecting small objects.
These steps are taken to format our images before they are used by model training and inference.
Solving Bias In Orientation
By default, the preprocessing option Auto-Orient is selected for us. This option helps us avoid one of the most common problems with aerial imagery, and bugs in CV overall. Auto-Orient helps us discard EXIF rotations and standardize pixel ordering.
Augmentation
For this project we will use the image level augmentations:
- Blur, of 0.5 px for moving cameras and objects
- Brightness, for camera setting and lighting changes
- Rotation, to help us detect our paddle boards when they or our camera are not perfectly aligned (which they won't be)
- Flip, both horizontal and vertical to to help our model be insensitive to subject orientation
- Crop, for better detection on occluded paddle boards
- Mosaic, as it helps models perform better with smaller object
- Noise, to prevent overfitting
These augmentation are manipulations applied to our images to create different versions in order to expose our model to a wider array of training examples.
Train
We are now ready to train our model!
Solving For Training Time
Since this is our first version of our model, we can either select "Train from Scratch" or from COCO, as we don't have a checkpoint to reference yet. The training time should be much less than 24 hours.
Once we generate a second version, we will be able to train from our V1 checkpoint, and train much faster than if we had selected from scratch.
0:00/1×Training a dataset from scratch with Roboflow
Generate A New Version
After the training of our first version is complete, we can generate a new version of our dataset and upload the remaining images in the Part_l folder.
Solving For Data Size — Part ll
Let's utilize our Label Assist tool to help us annotate more images. If you choose to add the remaining 1,000+ images of the dataset in this new version, it may also be helpful to use the "add teammates" feature mentioned in Part l. After we finish uploading the rest of our images and are ready to begin annotating again, we can hit the "label assist" tool on the right hand side.
We then can select which dataset we'd like to use. Since we still want to identify paddle boards, and this label was used in our "Aerial Data of Floating Objects" dataset we will choose that. Next, we chose which version of the trained models belonging to that dataset we would like to use. Some models may have been better at detecting the object you are trying to annotate in the version you are trying to build.
Since we only have one version so far, we will select V1.
By using label assist most of the paddle boards became auto annotated for us. We can also lower the confidence level of our V1 model to pick up any unannotated paddle boards.
We can also use the drag tool in order to help delete or tighten up any imprecise bounding boxes.
Deploy And Use
Training Results
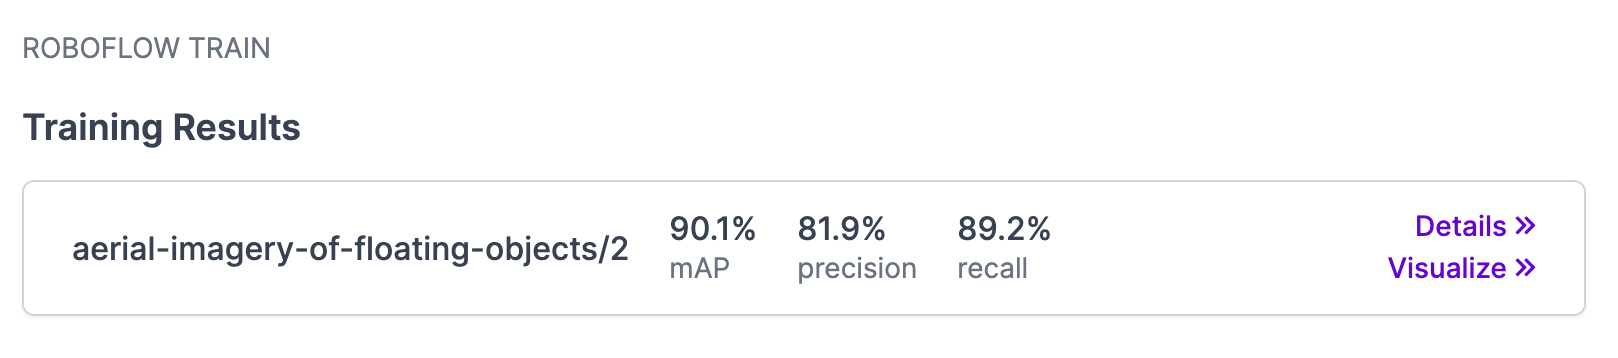
Once we have the training results we desire, we are ready to deploy and use our model!
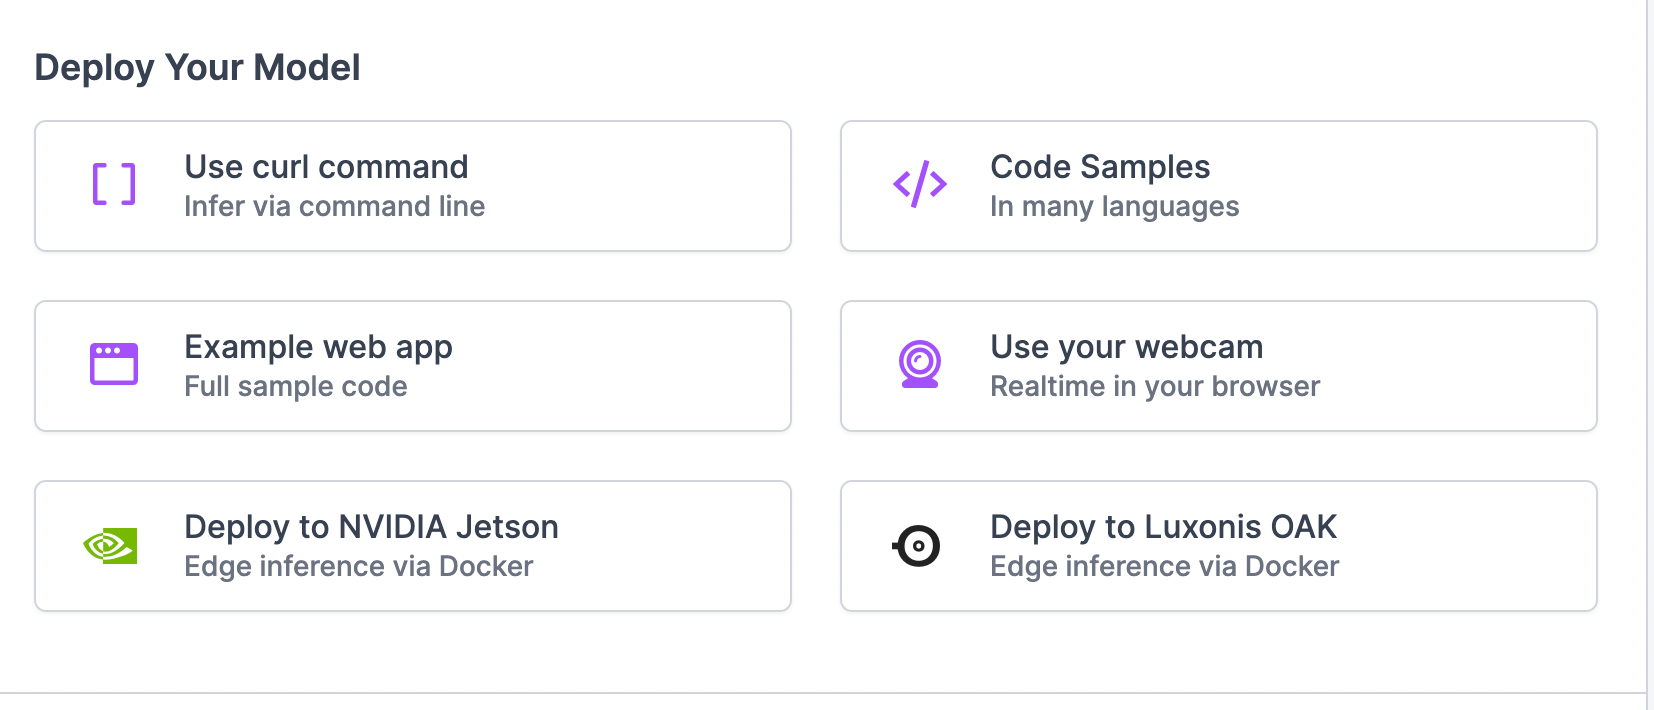
To quickly test our model, we can upload a random picture with the "Example web app" option, and play around with the confidence level to get an idea of how well your model will do in the wild. To use the public model on Roboflow Universe, click here.
Solving For Inference Speed
In our tests, we observed an inference speed of 20FPS at 416x416 resolution on Luxonis OAK, suitable for most real time applications. This speed will vary slightly based on your host machine.
Discuss & Share
You can discuss or ask questions about the aerial imagery project you're working on at discuss.roboflow.com. Feel free to also share in our Show & Tell category!
We also highly encourage our readers to add their datasets and models to Roboflow Universe.
Cite this Post
Use the following entry to cite this post in your research:
Kelly M.. (Feb 7, 2022). How to Train Computer Vision Models on Aerial Imagery. Roboflow Blog: https://blog.roboflow.com/how-to-use-roboflow-with-aerial-imagery/