
This tutorial walks through training a YOLOv7 object detection model on a custom dataset using a Google Colab notebook, covering dependency installation, loading a dataset from Roboflow Universe in YOLOv7 format, running training, evaluating results with detect.py, and deploying the model via API or to edge devices like an NVIDIA Jetson. YOLOv7, built with PyTorch by WongKinYiu and AlexeyAB, achieved state-of-the-art real-time detection performance on MS COCO at the time of release, running between 36 and 161 FPS on a V100 GPU depending on model size.
Hot on the heels of MT-YOLOv6, a new YOLO dropped this week (and this one is a doozy).
YOLOv7 was created by WongKinYiu and AlexeyAB, the creators of YOLOv4 Darknet (and the official canonical maintainers of the YOLO lineage according to pjreddie, the original inventor and maintainer of the YOLO architecture). You can read the YOLOv7 paper or take a look at our quick 5 minute breakdown of what's new in Yolov7.
The model itself is impressive. Built with PyTorch, it boasts state-of-the-art performance on MS COCO for real-time object detection models (defined as running 5 FPS or faster on a V100 GPU). The various sizes of the model run at between 36 and 161 frames per second (with a batch size of one), which is extremely impressive given the high accuracy.
Optional video tutorial to follow step-by-step
Training a Custom YOLOv7 Model
But performance on COCO isn't all that useful in production; its 80 classes are of marginal utility for solving real-world problems. For this tutorial, we will grab one of the 90,000 open-source datasets available on Roboflow Universe to train a YOLOv7 model on Google Colab in just a few minutes.
The steps to train a YOLOv7 object detection model on custom data are:
- Install YOLOv7 dependencies
- Load custom dataset from Roboflow in YOLOv7 format
- Run YOLOv7 training
- Evaluate YOLOv7 performance
- Run YOLOv7 inference on test images
- (Optional) Deployment and active learning
We walk through each of these in our YOLOv7 Colab notebook.
The YOLOv7 Colab Notebook
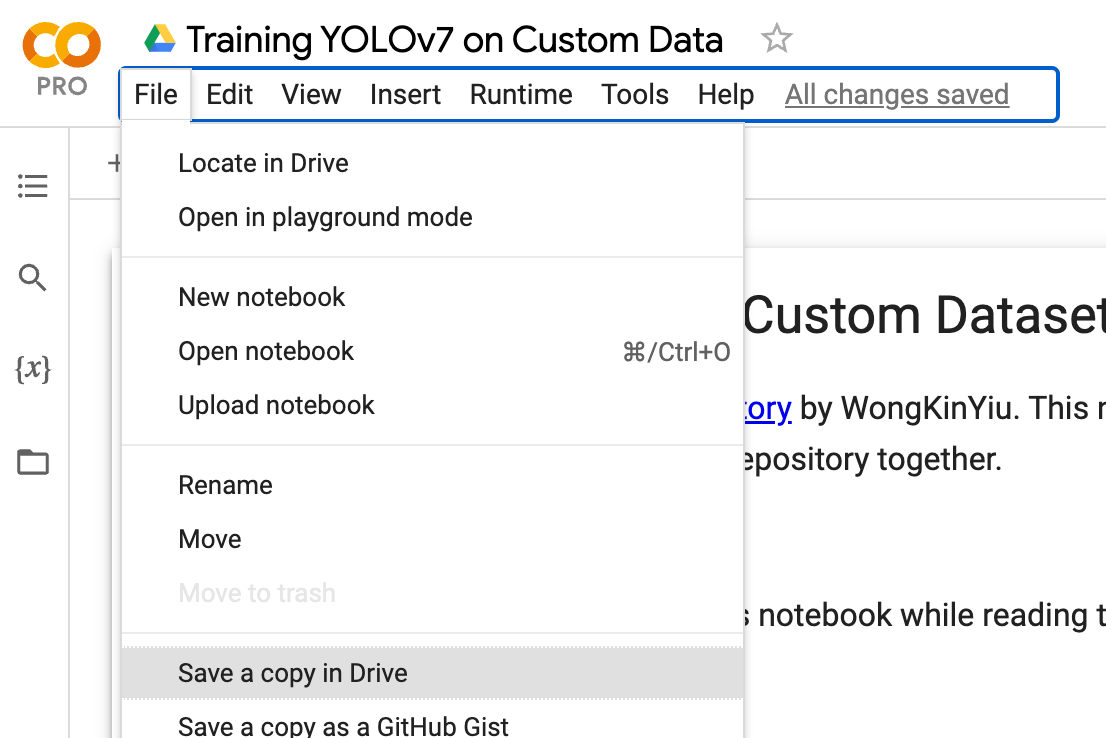
Start with our YOLOv7 Colab notebook and select File > Save a Copy in Drive to fork our notebook to your own Google Drive so you can save your changes.
Preparing a Dataset to train Yolov7
If you already have images of your own, follow the Roboflow Quick Start Guide to get them annotated (or converted) into the YOLOv7 format.
Roboflow is the easiest way to collect images, annotate, create datasets, and train computer vision models. It's free for students/hobbyists working on public projects with up to 10,000 images (and there are paid tiers for private business projects).
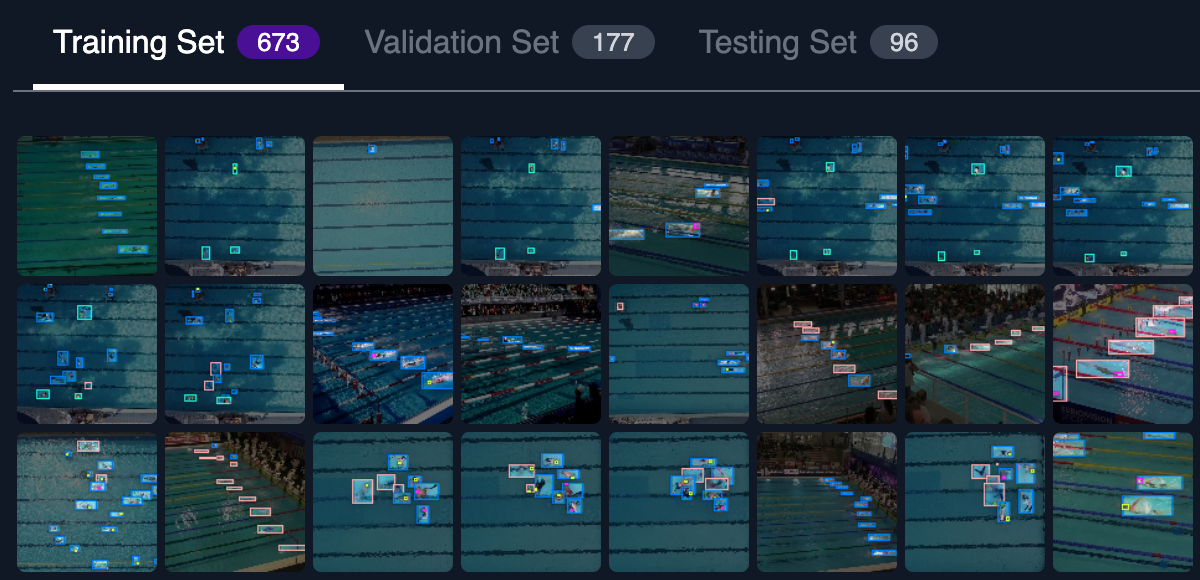
If you don't yet have images, head over to Roboflow Universe and search for a project that strikes your fancy. I found a swimmer dataset that I decided to use for my testing.
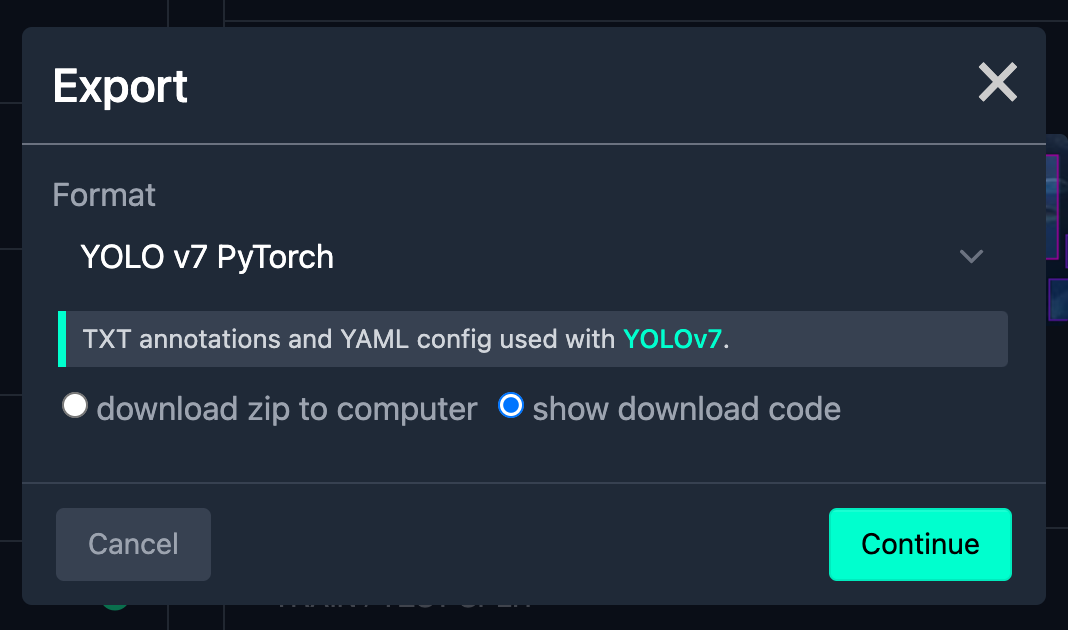
To download the dataset, go to the Dataset tab and click Download, then select the YOLOv7 PyTorch format and show download code.
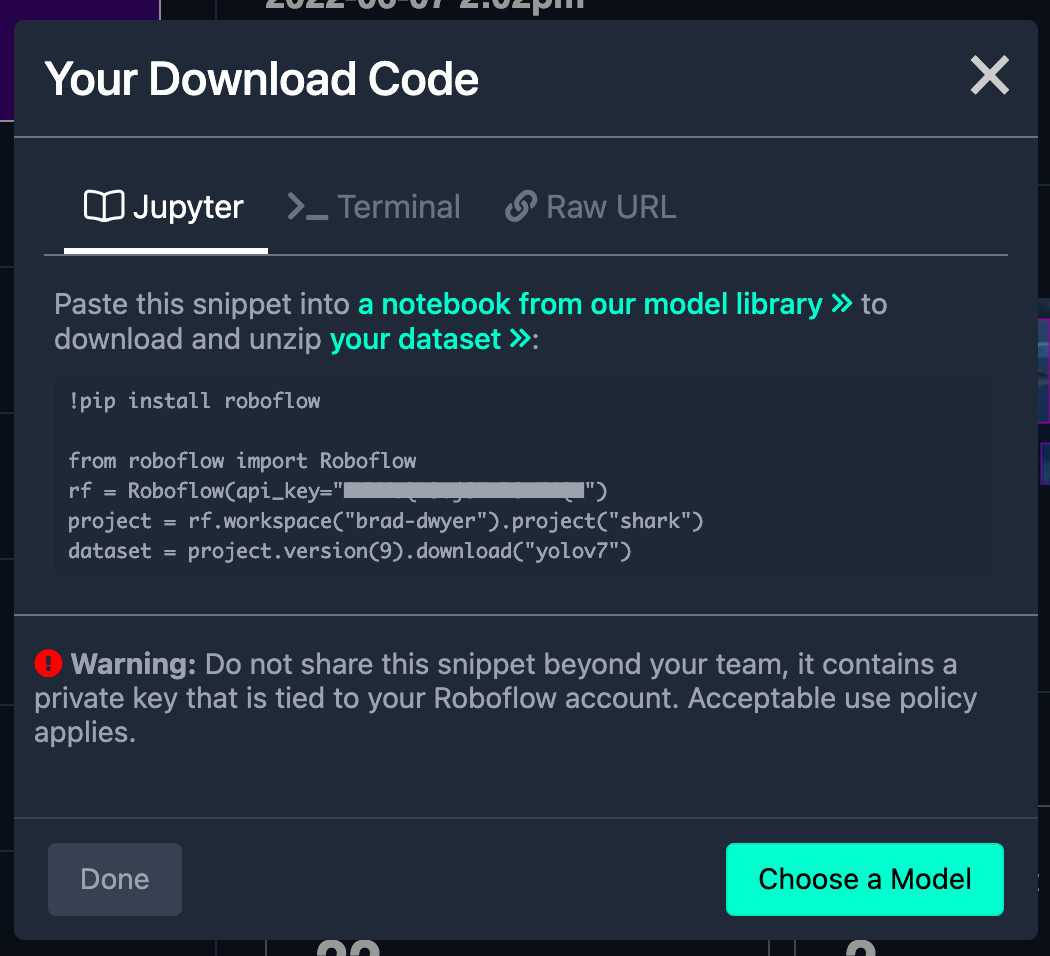
This will give you a python snippet to copy/paste into your Colab notebook:
Training the Yolov7 with Custom Data
After pasting the dataset download snippet into your YOLOv7 Colab notebook, you are ready to begin the training process.
You can customize your model settings if desired using the following options:
--weights, initial weights path (default value: 'yolo7.pt')--cfg, model.yaml path (default value: '')--data, data.yaml path (default value: 'data/coco.yaml')--hyp, hyperparameters path (default value: 'data/hyp.scratch.p5.yaml')--epochs, the number of times to cycle through your training data (default value: 300)--batch-size, total batch size for all GPUs (default value: 16)--img-size, image sizes (default value: [640, 640])--rect, whether to use the non-square training option--resume, resume most recent training (default value: False)--nosave, only save final checkpoint--notest, only test final epoch--noautoanchor, disable auto-anchor check--evolve, evolve hyperparameters--bucket, gsutil bucket (default value: '')--cache-images, cache images for faster training--image-weights, use weighted image selection for training--device, cuda device, i.e. 0 or 0,1,2,3 or cpu (default value: '')--multi-scale, vary img-size +/- 50%%--single-cls, train multi-class data as single-class--adam, use torch.optim.Adam() optimizer--sync-bn, use SyncBatchNorm, only available in DDP mode--local_rank, DDP parameter, do not modify (default value: -1)--workers, maximum number of dataloader workers (default value: 8)--project, save to project/name (default value: 'runs/train')--entity, W&B entity (default value: None)--name, save to project/name (default value: 'exp')--exist-ok, existing project/name ok, do not increment--quad, quad dataloader--linear-lr, linear LR--label-smoothing, Label smoothing epsilon (default value: 0.0)--upload_dataset, Upload dataset as W&B artifact table--bbox_interval, Set bounding-box image logging interval for W&B (default value: -1)--save_period, Log model after every "save_period" epoch (default value: -1)--artifact_alias, version of dataset artifact to be used (default value: "latest")
Once you've edited your settings in the train.py cell, go ahead and run the cells. Your model will begin training and run for several minutes, or hours (depending on how big your dataset is, which training options you chose, and which GPU you were allocated in the Colab lottery).
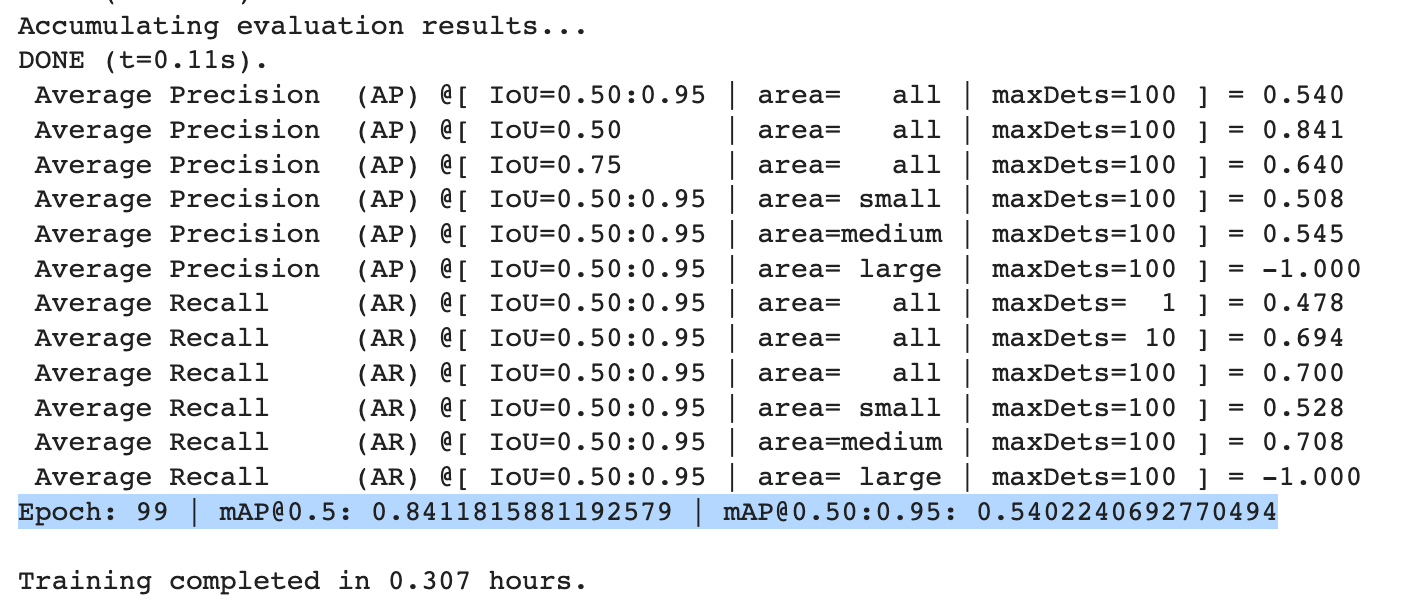
Evaluating How Yolov7 Performs with Your Data
Then you can run detect.py on your test set to visualize how your model performs on images it has never seen before.
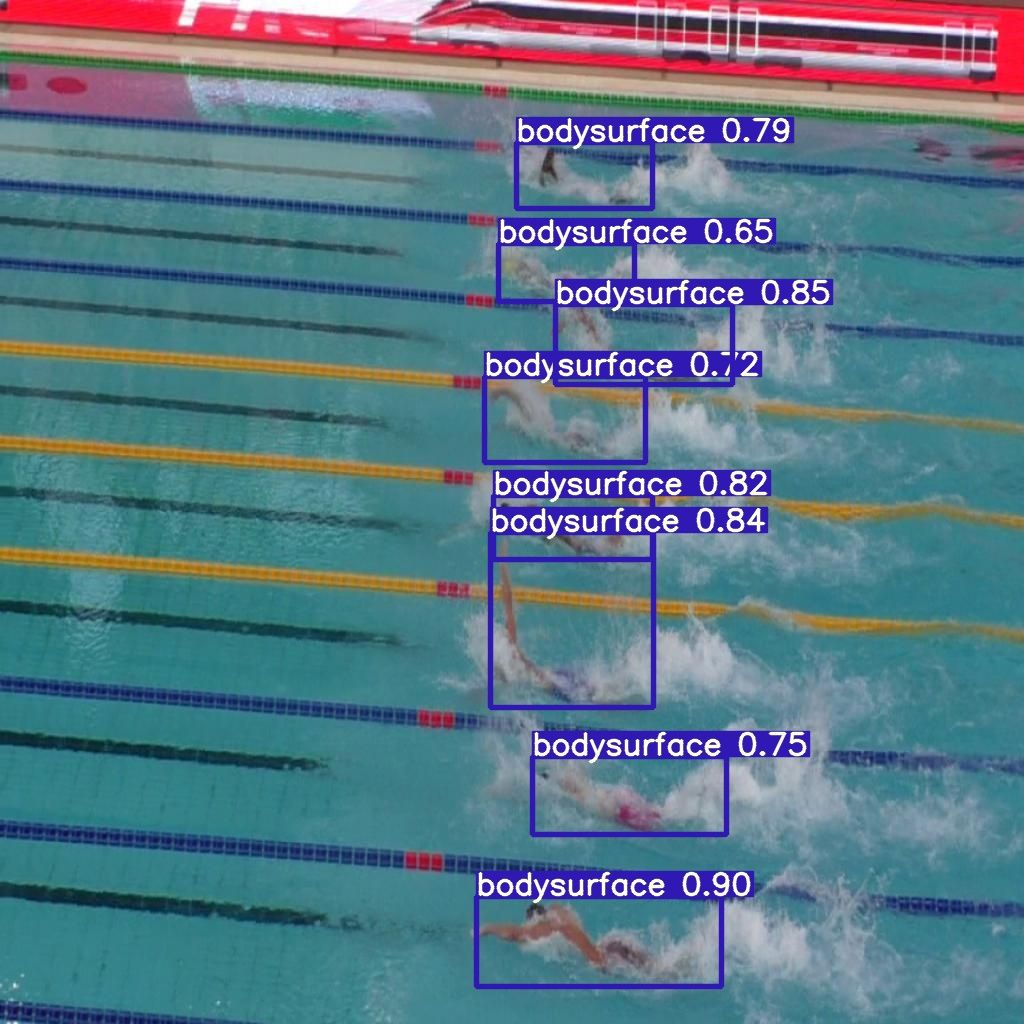
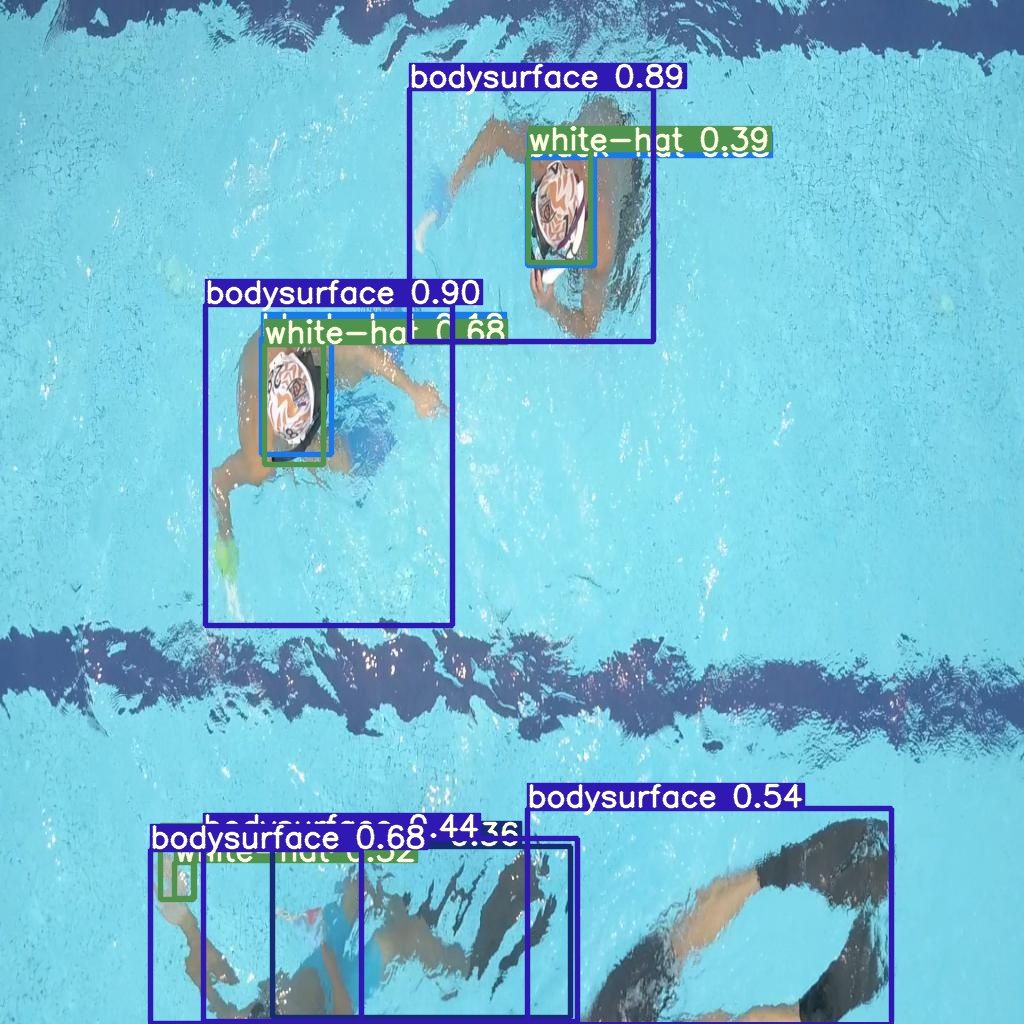
Example predictions on images from the dataset's test set.
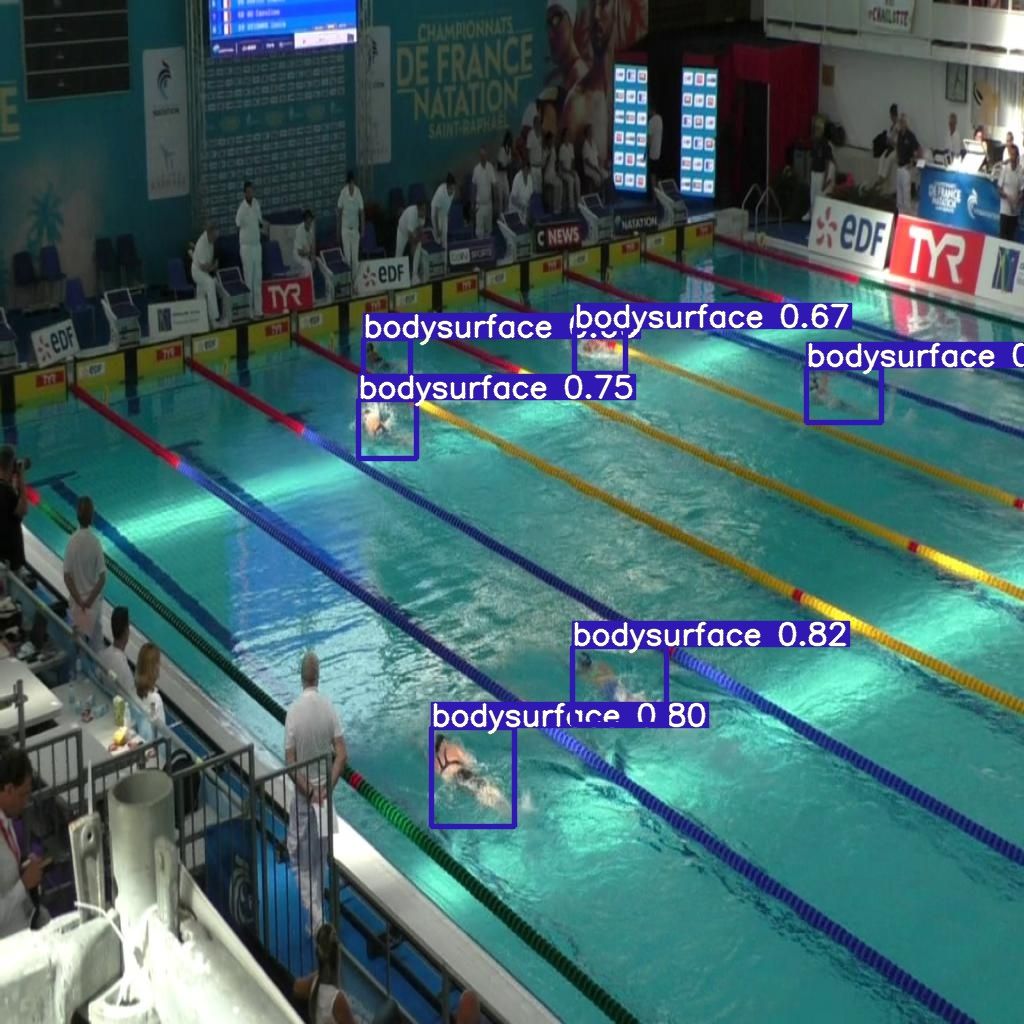
For an added bonus, you can use a program like yt-dlc to grab a video from YouTube, drop it in your Colab, and see how the model does in the wild on examples farther afield from what it was trained on.
Here's my model running on a World Championship swim meet:
0:00/1×Using the model to make predictions on a video from YouTube.
Deploying Yolov7 via API or to the Edge
Now it's time to deploy the first version of your model and start making predictions. Then identify edge cases where it's failing and sample real-world images to label them for the next version of your dataset to improve your model.
Alternatively, try using Roboflow's seamless Deployment options to deploy a model to an infinitely scalable API or to an edge device like an NVIDIA Jetson or mobile app.
Do you need to identify the specific location of items in a video? If so, check out our YOLOv7 Instance Segmentation tutorial. In the tutorial, we'll guide you through the process of preparing and training your own instance segmentation model using YOLOv7.
Cite this Post
Use the following entry to cite this post in your research:
Brad Dwyer. (Jul 13, 2022). How to Train a YOLOv7 Model on a Custom Dataset. Roboflow Blog: https://blog.roboflow.com/yolov7-custom-dataset-training-tutorial/