This guide will take you the long distance from unlabeled images to a working computer vision model deployed and inferencing live at 15FPS on the affordable and scalable Luxonis OpenCV AI Kit (OAK) device.
The best part of this tutorial is you can get started today before your OAK arrives, training your custom model, so you are ready to deploy upon receipt!
About the Luxonis OpenCV AI Kit
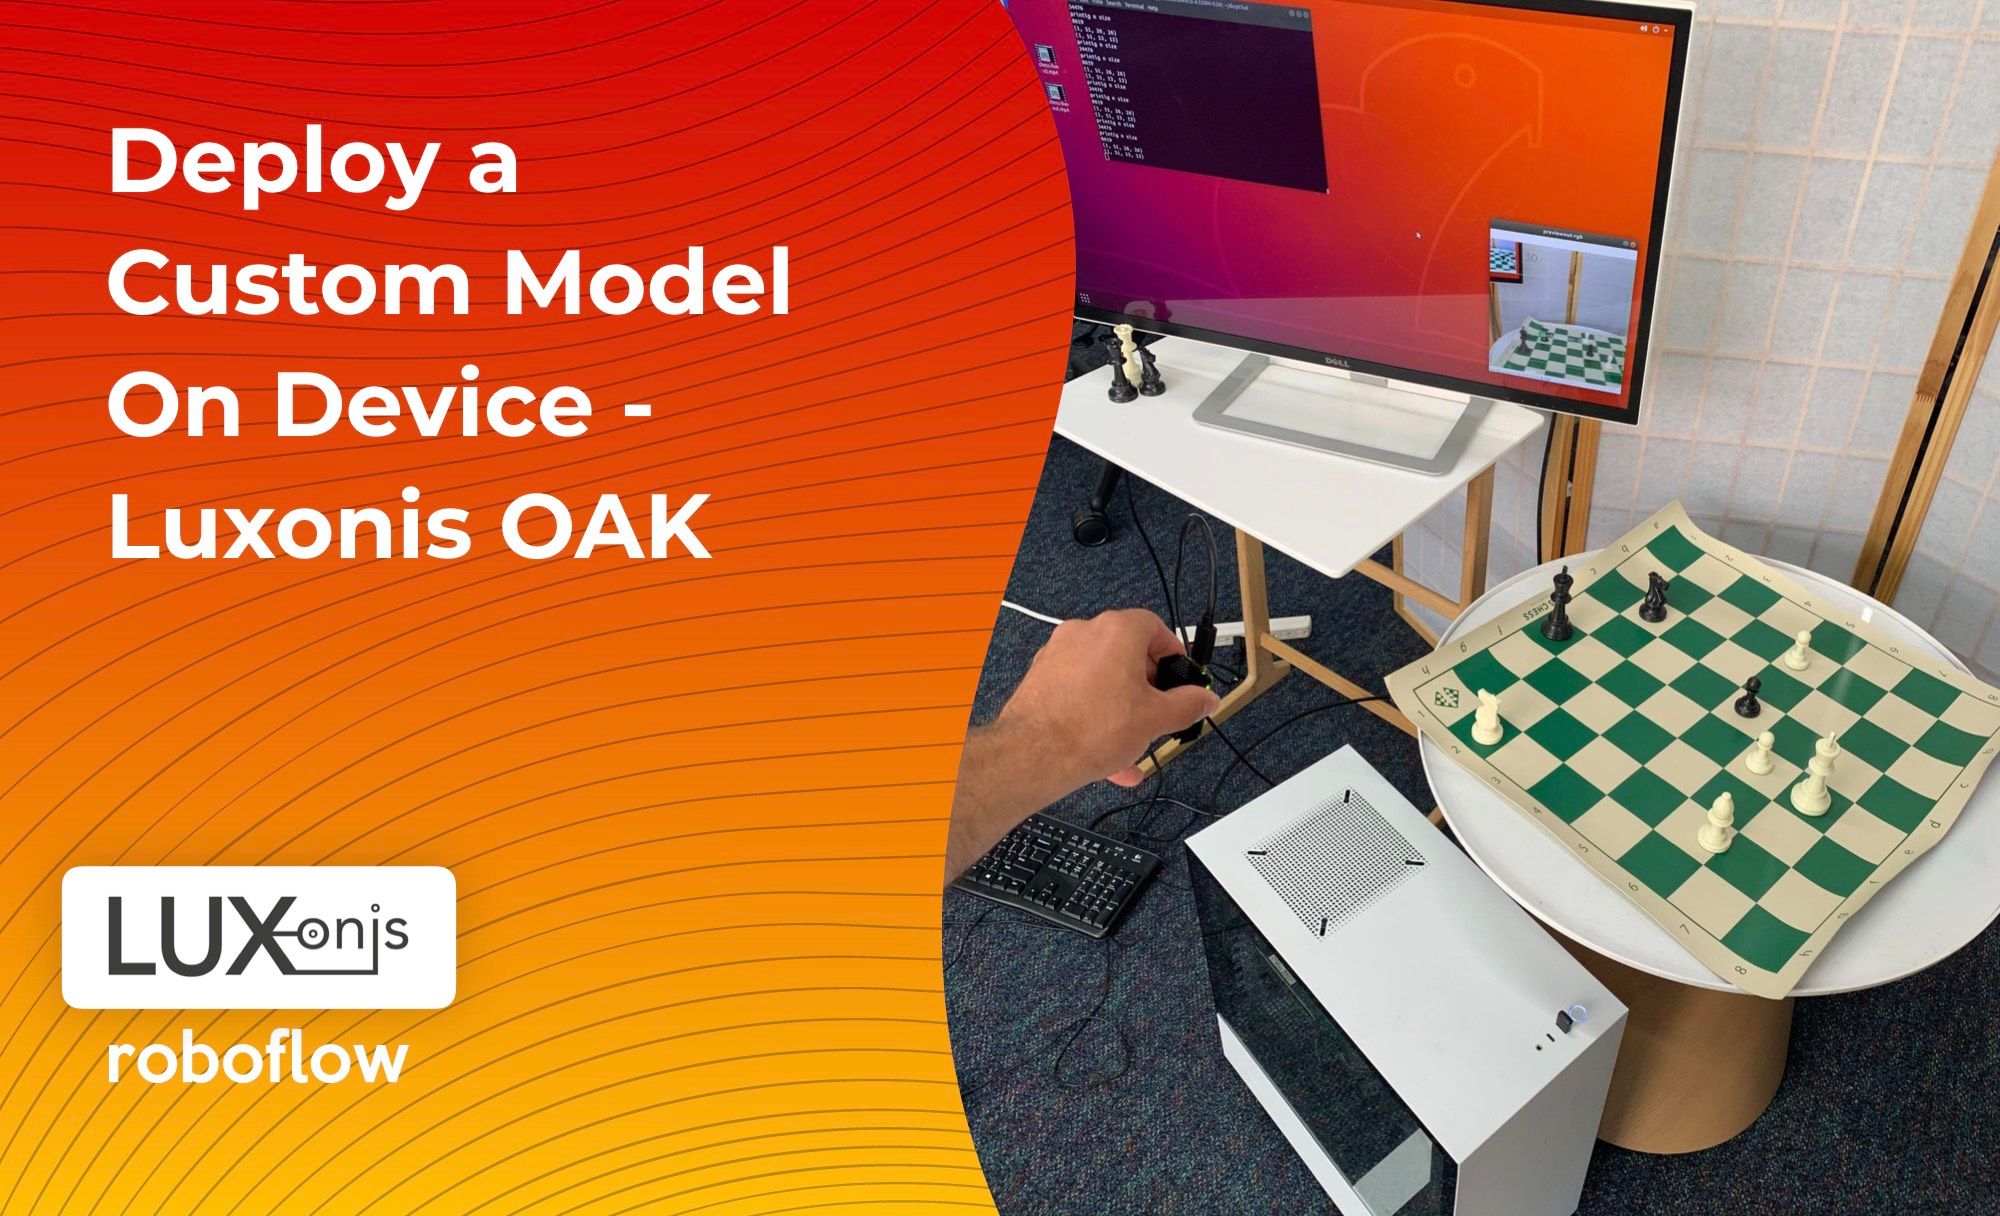
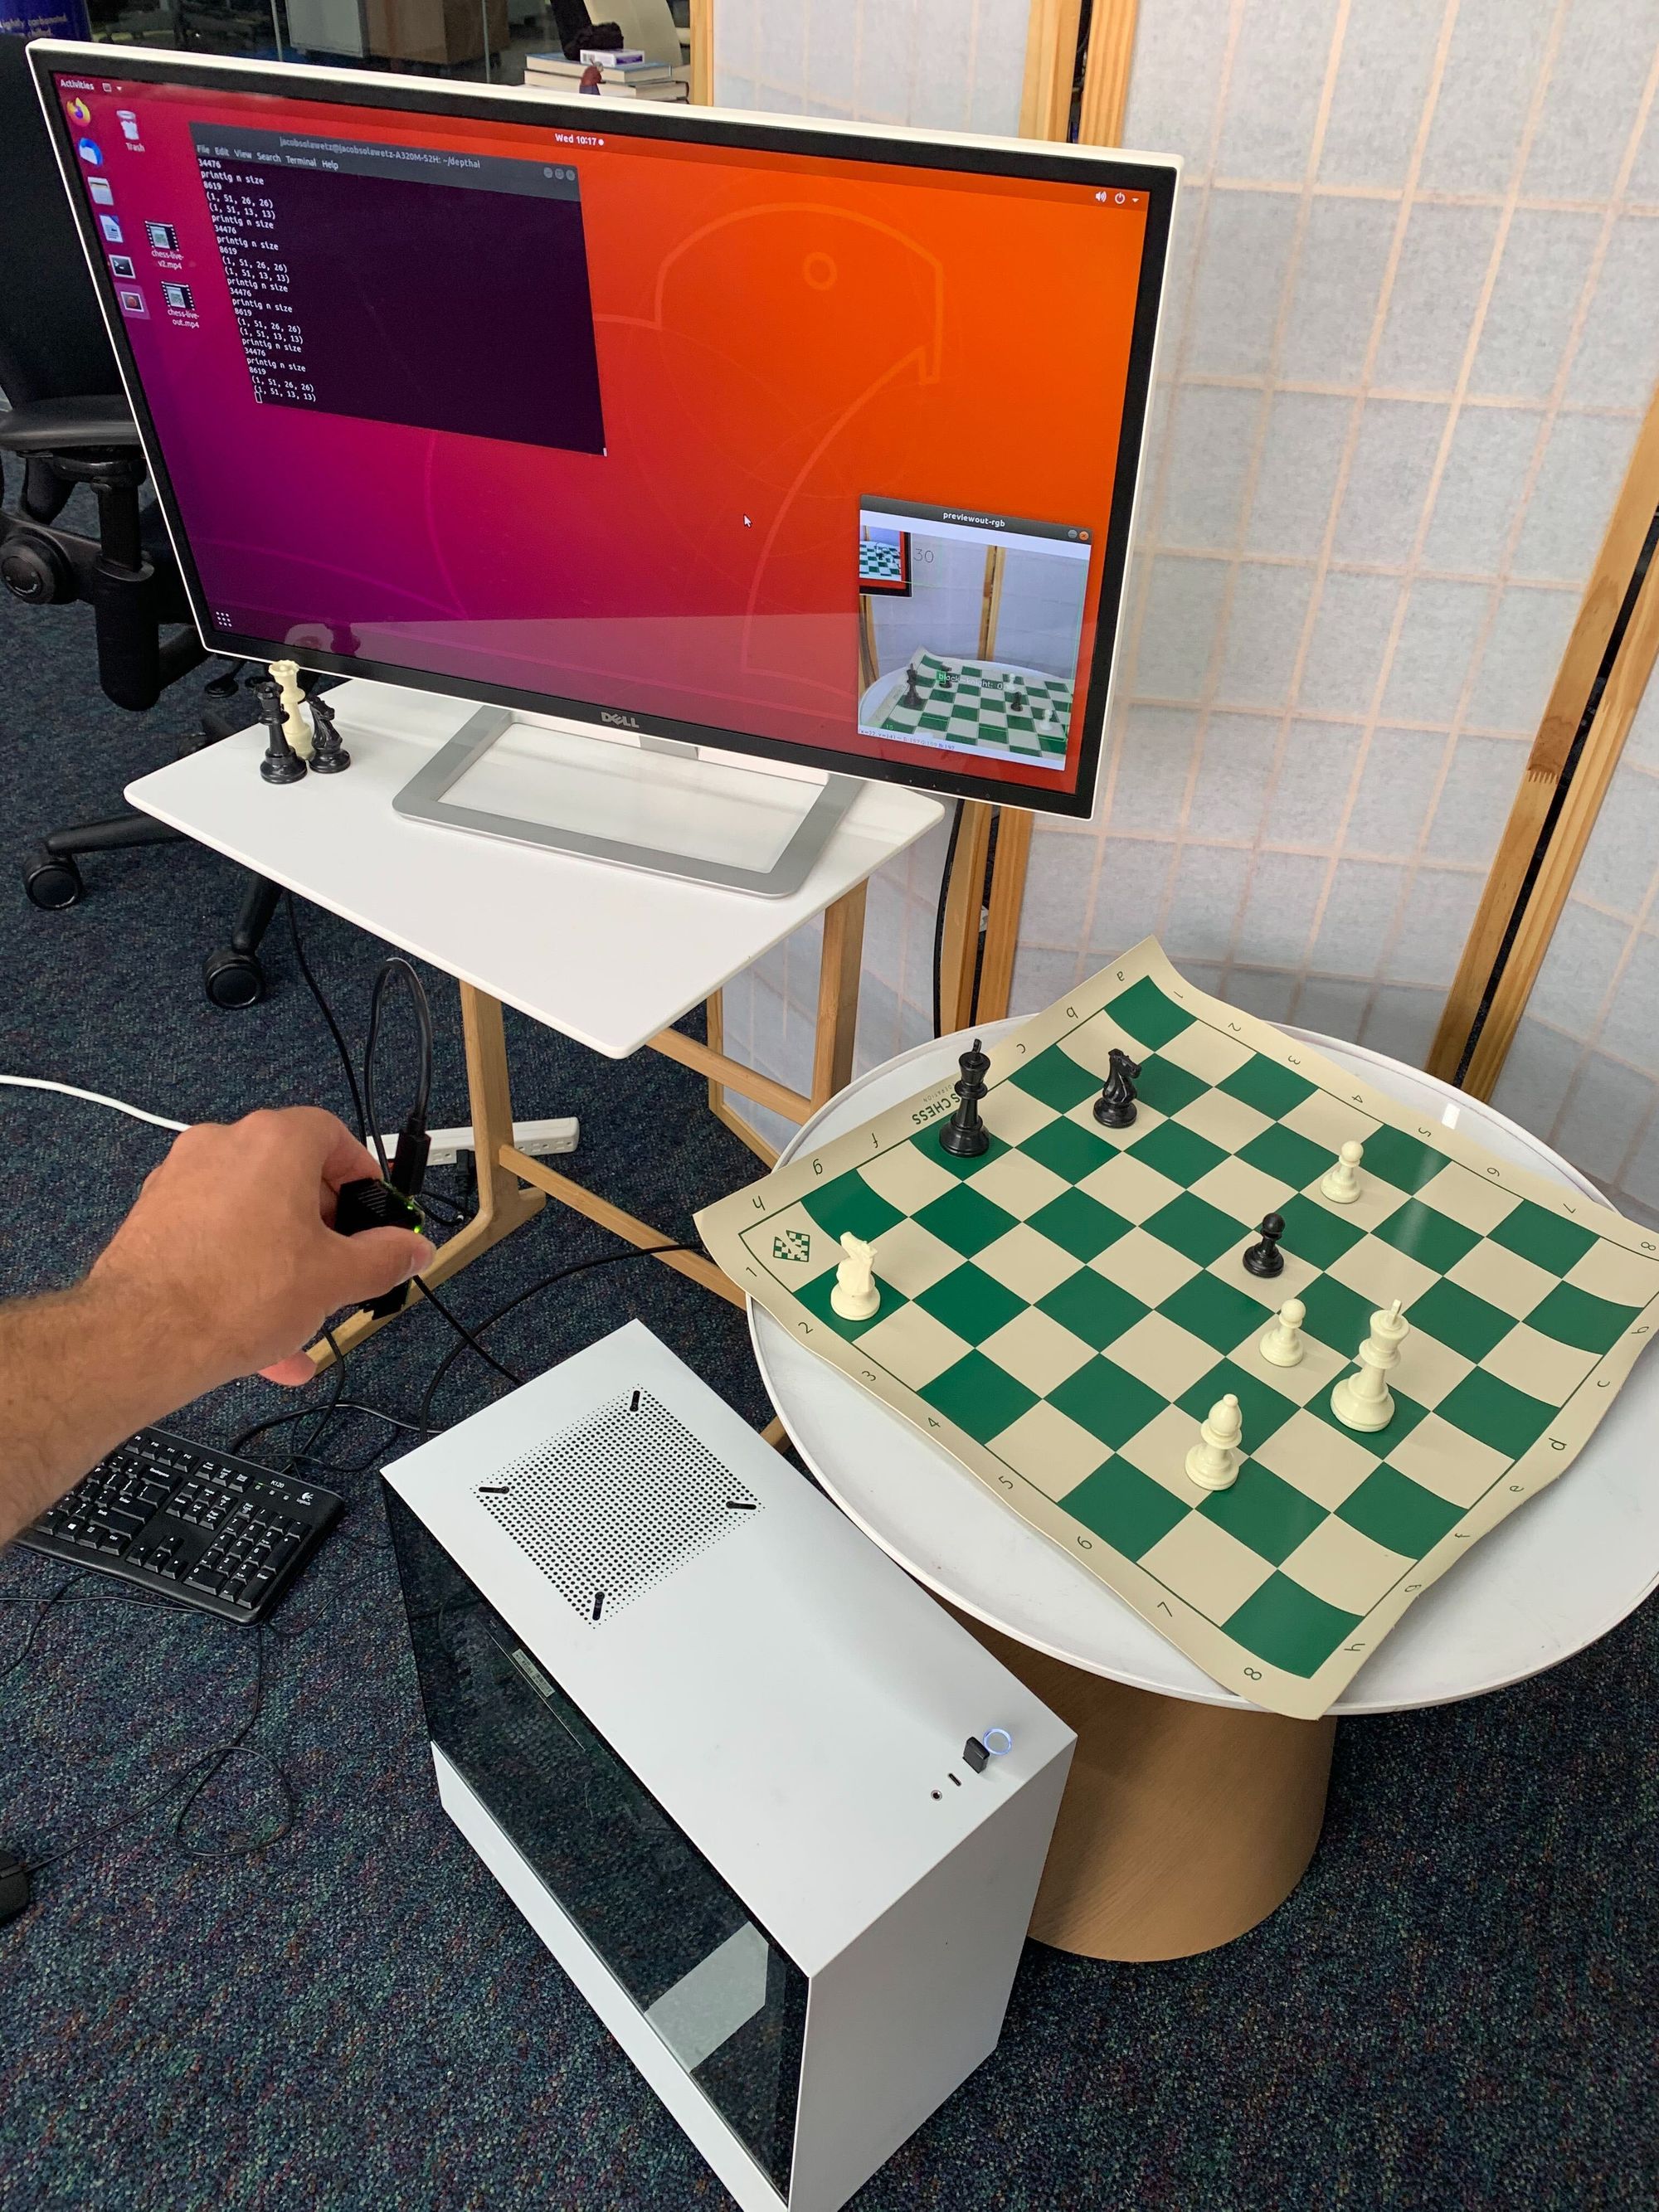
The OpenCV AI Kit (OAK), crafted by the company Luxonis, has gathered significant momentum over the course of its kickstarter and the hype is certainly shared here at Roboflow. Yesterday, we unwrapped the OAK-1 and today, in one single day, we have a custom object detector running and inferencing live in 4K on a device that easily sits in the palm of your hand. Here is a photo of the whole setup.
The OAK is known for using depth as an additional input to computer vision models. The OAK comes with a 4K camera and a Myriad X Vision Processing Unit (VPU) where all of the neural network operations will occur. The OAK is small and processes quickly, making it an idea choice for deploying computer vision models at scale.
Roadmap of the Tutorial
Let's take a quick overview of the roadmap of this tutorial, so you know where we are heading.

In the length of a single blog, we will be deploying a custom object detection model to the OAK by:
- Gathering a dataset of images
- Labeling a dataset of images with detection objects of interest
- Importing our dataset to Roboflow for preprocessing and augmentations
- Exporting our dataset to Darknet format
- Train a custom model with Roboflow Train and Deploy with the roboflowoak Python package
- Training a custom YOLOv3-tiny object detection model in Darknet
- Converting our Darknet model to OpenVino
- Installing the DepthAI API on host machine
- Deploying our OpenVino model on the OAK device
If you opt for the custom model training option, rather than Roboflow Train, there are a few extra steps involved. You can leverage Google Colab free:
- Public Chess Dataset
- Roboflow Organize (Computer Vision Dataset Management Pipeline)
- Darknet repository
- Colab Notebook Training Darknet for OAK Deploy
- Setting up the OpenVino conversion API
More tools you'll need to complete the project:
- OAK-1 device - $79
- Host machine (Ours is running Ubuntu 18.04)
It is important to remember that each of these pieces is replaceable, but if you decide to switch a piece out, you need to be sure that the new piece fits with the prior and the next.
Building a Dataset
In order to teach your model to detect your custom objects, you need to first gather training data to supervise the model.
If you already have a labeled object detection dataset, you can skip this section.
If you just want to get a feel for the technology presented here and want to follow along with the guide, we will be doing chess. The chess dataset is hosted publicly on Roboflow.
Gathering Images
Our model has the capacity to detect any object in the world, so do not limit your imagination. However, in order to get a performant model, you should limit the complexity of the domain that your model needs to learn. A lot of that narrowing can happen on during the selection and structuring of your vision task.
We recommend gathering at least 50 images of your detection scene to get started. You can always scale it up to improve model performance later.
Try searching Roboflow Universe for images, too! The search bar is akin to "Google Image Search for computer vision datasets."
 Trevor Lynn
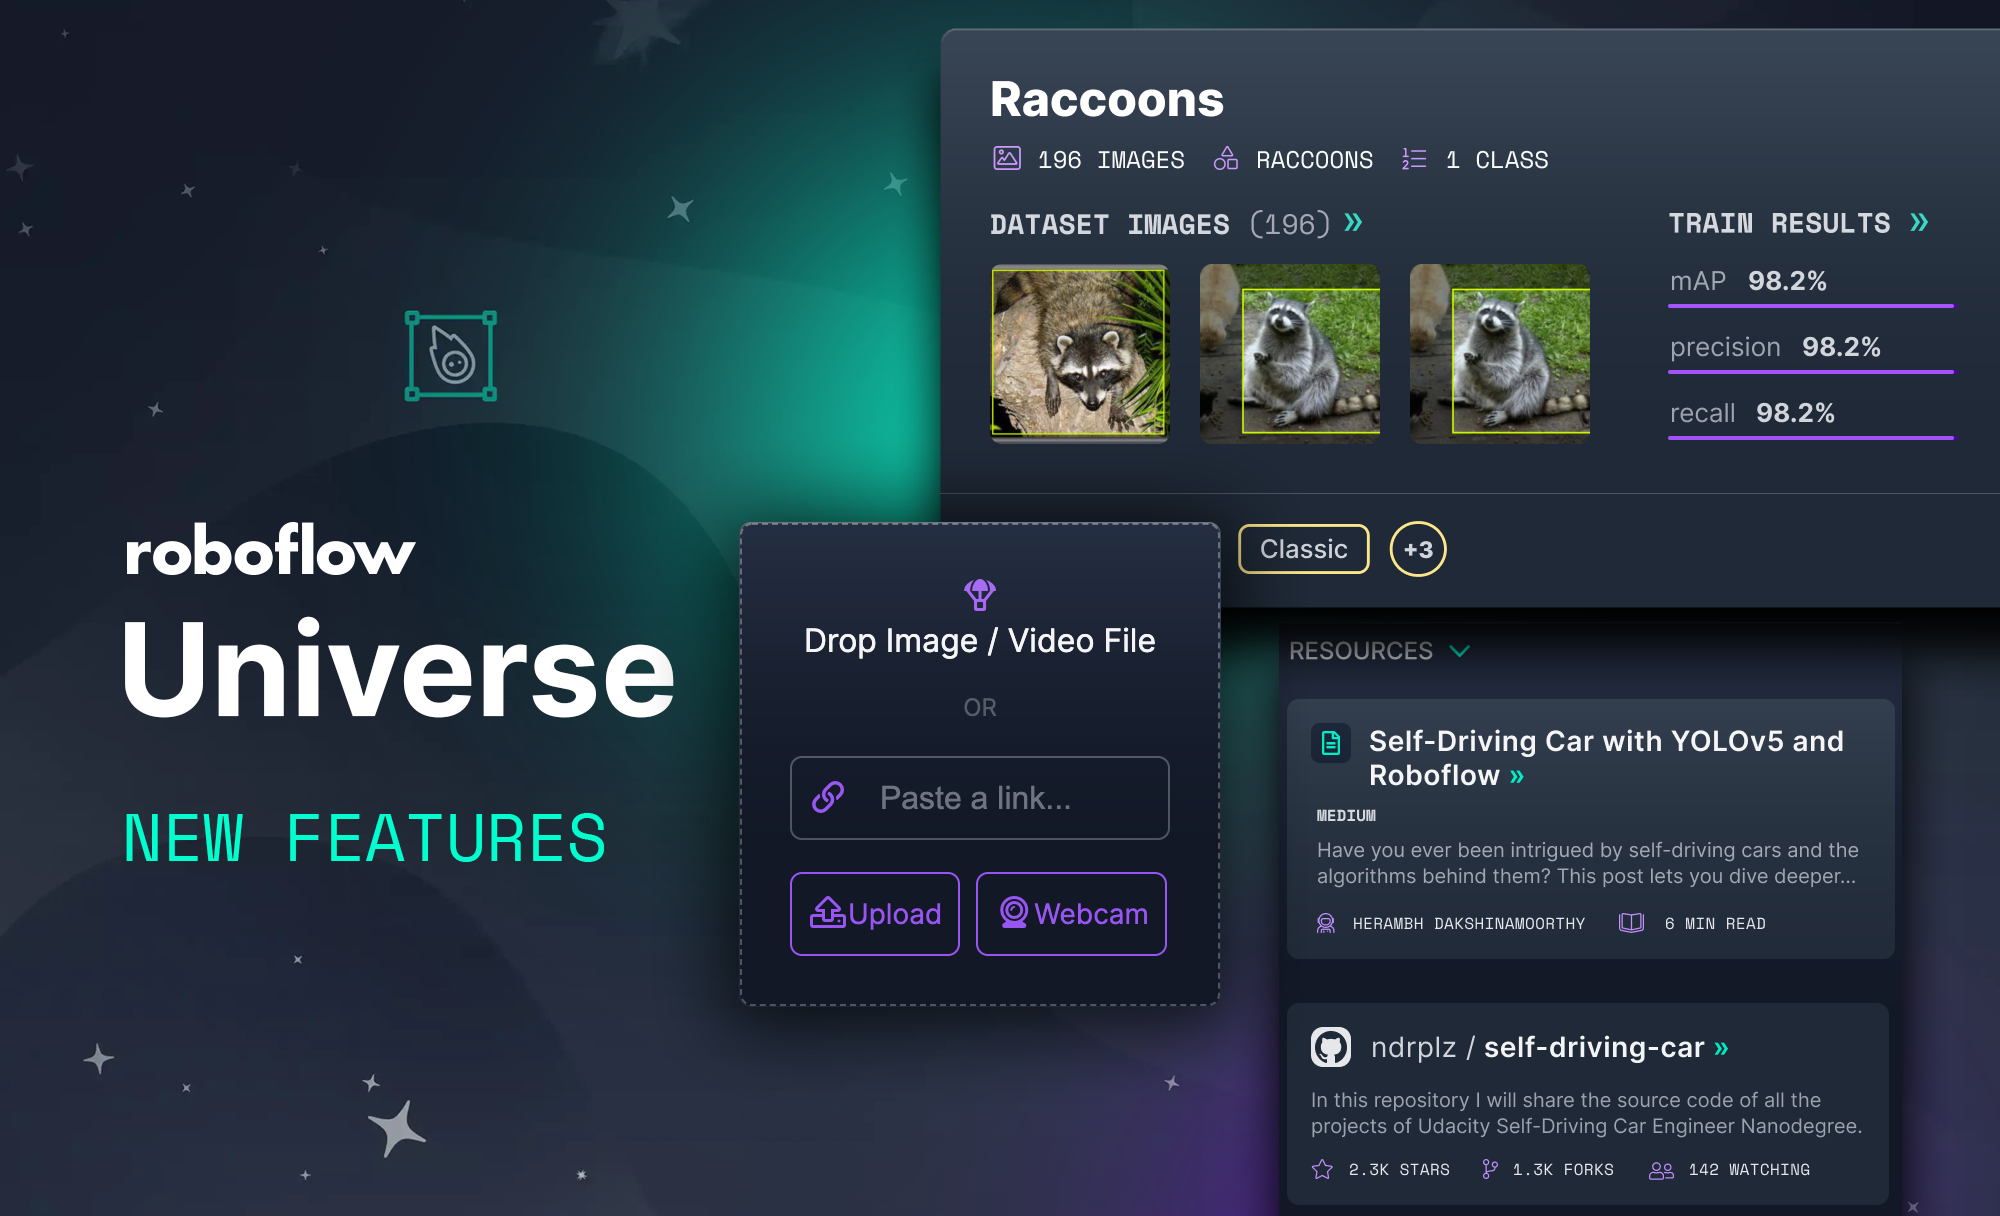
Labeling Images
Once you have gathered a training dataset of images, you need to label those images with bounding boxes to teach your model to locate and tag objects in the scene.
Here are great guides we've written for labeling object detection datasets in a variety of free, open-source tools:
- CVAT - Annotation for Object Detection
- VoTT Annotation Tool for Object Detection
- LabelImg for Labeling Computer Vision Data
- LabelMe - Object Detection Annotation
Additionally, you can opt to use our native annotation option, Roboflow Annotate.
Leverage Roboflow for a Preprocessing and Augmentations
Once you have your images labeled, you can drag and drop your dataset into Roboflow.
First, create a free account. Then, you can drag the files in your dataset export into Roboflow. If your dataset came from another place, never fear, Roboflow supports over 30 annotation formats.
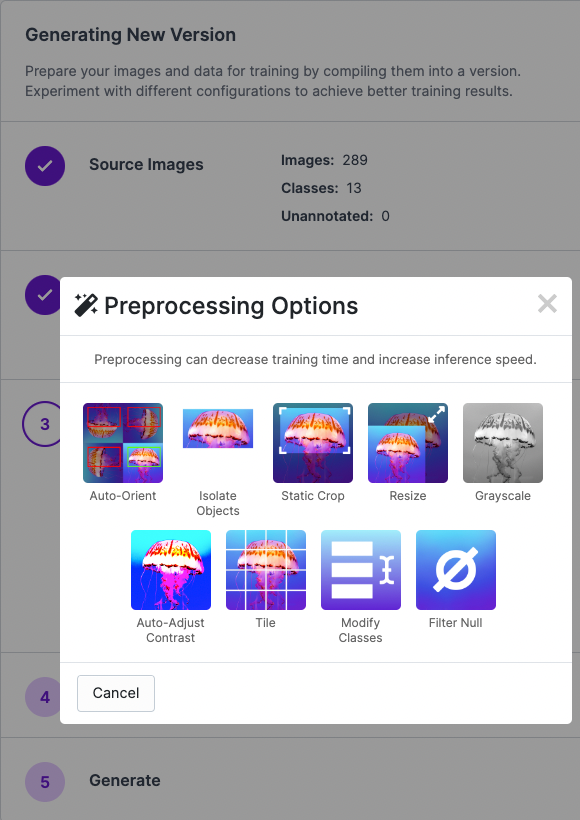
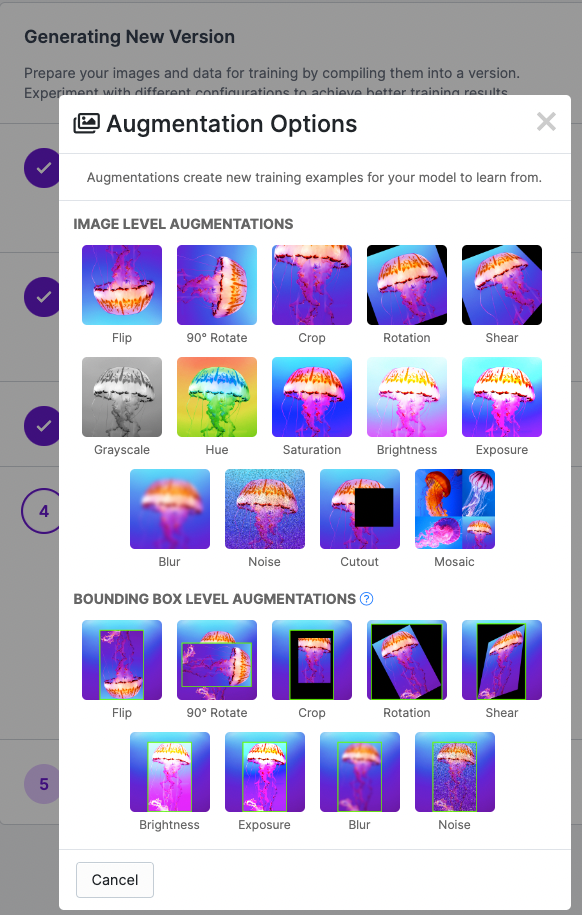
Once your data is in Roboflow you will be able to choose preprocessing and augmentation options. Preprocessing will align your images to be the size and shape that your model will need in training and in inference. Augmentation will create additional images from your base dataset to allow you to increase your model's performance and spend less time gathering and annotating images.
Deploying with the roboflowoak Python package
After training your custom model with Roboflow Train, you're ready to get set up for deployment!
Don't yet have an OAK device? Head over to the Luxonis & Roboflow OAK Store to purchase them with a 10% discount.
Setting up DepthAI in your Python environment
We will need to set up DepthAI and OpenCV - In your Terminal, enter:
python3 -m pip install depthai opencv-python
Installing the Roboflow OAK Python pip Package
python3 -m pip install roboflowoak==0.0.5
If you're using Anaconda, you will first need to install pip
# enter the line below in your terminal within your chosen python
# environment
conda install pip
# upon completion of installation, install the Roboflow OAK Python
# pip package
pip install roboflowoak==0.0.5
If you installed python with conda, don't forget to activate the python environment you installed the package to if you haven't already.
# change replace-with-env-name to the environment you installed
#roboflowoak to
# example: environment name is roboflowoak --
# change replace-with-env-name to roboflowoak
conda activate replace-with-env-name
Python Script for Running Inference with your Model
- Copy/paste the script below into VSCode, XCode, PyCharm, Spyder (or another code editor)
- Update the values for model/project [name], model version, api_key, and device_name within the "rf" object. Locating Your Project Information.
- Save the python file to a directory - be sure to note the directory name and file name as we'll need these later for the deployment to work.
- If you are deploying to an OAK device without Depth capabilities, set
depth=Falsewhen instantiating (creating) therfobject. OAK's with Depth have a "D" attached to the model name, i.e OAK-D and OAK-D-Lite. And be sure to comment outmax_depth = np.amax(depth)andcv2.imshow("depth", depth/max_depth)
from roboflowoak import RoboflowOak
import cv2
import time
import numpy as np
if __name__ == '__main__':
# instantiating an object (rf) with the RoboflowOak module
rf = RoboflowOak(model="YOUR-MODEL-ID", confidence=0.05,
overlap=0.5, version="YOUR-MODEL-VERSION-#",
api_key="YOUR-PRIVATE_API_KEY", rgb=True, depth=True,
device=None, device_name="CHOOSE-A-DEVICE-NAME", blocking=True)
while True:
t0 = time.time()
result, frame, raw_frame, depth = rf.detect()
predictions = result["predictions"]
#{
# predictions:
# [ {
# x: (middle),
# y:(middle),
# width: ,
# height: ,
# depth: ###->,
# confidence: ,
# class: ,
# mask: { }
# }
# ]
#}
#frame - frame after preprocs, with predictions
#raw_frame - original frame from your OAK
#depth - depth map for raw_frame, center-rectified
# to the center camera
# To access specific values within "predictions" use:
# p.json()[a] for p in predictions
# set "a" to the index you are attempting to access
# Example: accessing the "y"-value:
# p.json()['y'] for p in predictions
t = time.time()-t0
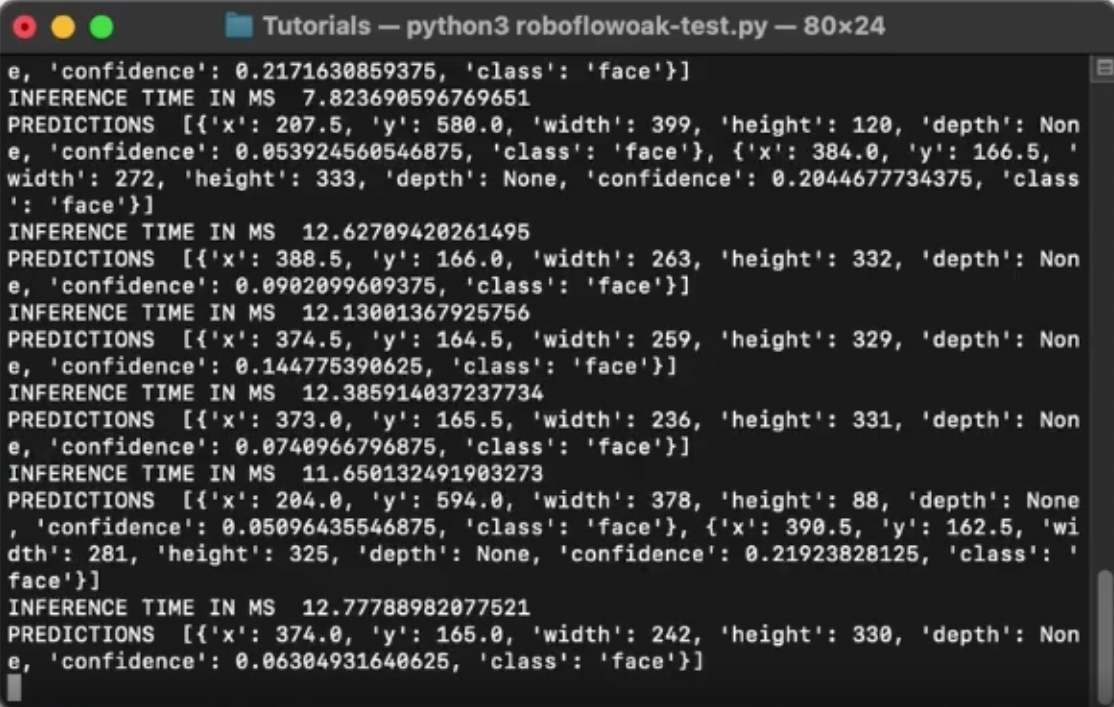
print("INFERENCE TIME IN MS ", 1/t)
print("PREDICTIONS ", [p.json() for p in predictions])
# setting parameters for depth calculation
# comment out the following 2 lines out if you're using an OAK
# without Depth
max_depth = np.amax(depth)
cv2.imshow("depth", depth/max_depth)
# displaying the video feed as successive frames
cv2.imshow("frame", frame)
# how to close the OAK inference window/stop inference:
# CTRL+q or CTRL+c
if cv2.waitKey(1) == ord('q'):
break
Remember: Do not reveal your private API Key to anyone. You can revoke your API key to receive a new one if it is compromised.

Running Inference: Deployment
- On your host device, re-open your terminal and change to the directory (within your terminal) in which you saved your Python script (file).
- Connect your OAK device to the host system with a USB-C to USB-C or USB-C to USB-A cable (or with an ethernet cord if you're using an OAK PoE device).
- Enter the code below (after replacing the placeholder text with the path to your Python script)
python3 [YOUR-PYTHON-FILE].py
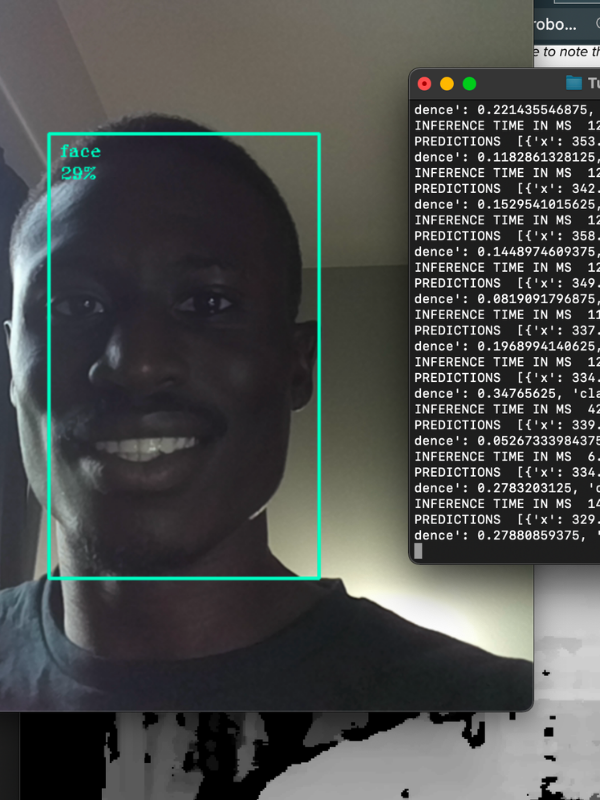
Voilà! It works!
Where do we go from here? - Model Improvements
You may notice low confidence or false detections when you first begin using your model. Use Roboflow's Python package for help in implementing active learning to programmatically sample new images and increase the size of your dataset and improve your model. This will help you to quickly reduce the occurrence of false detections and improve the confidence level of detections in a more seamless process.
- More on Active Learning: Roboflow's Python Package for Computer Vision
Training a Custom Model with the Roboflow Model Library
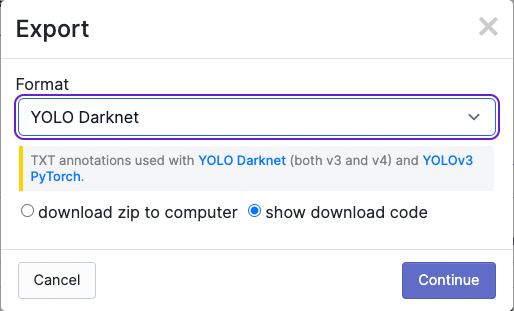
Once you've chosen your preprocessing and augmentation settings hit Generate and then on the right you will see an option to Export Your Dataset and Get Link. We will export to YOLO Darknet format.
You will receive a curl link (or you can instead use the Python package code snippet). Keep it handy for the next step as we begin to train our custom object detector.
Training a Custom Object Detector in Darknet
Darknet is a deep learning library where some of the best object detectors in the game have been designed and implemented. One of these is YOLOv3-tiny, which we will be using today. Why not use YOLOv4 or YOLOv5? The short answer is they are not yet easily compatible with OpenVino, which we will need to run inference on the OAK device.
Go ahead and jump to this Colab Notebook to Train YOLOv3-tiny and Deploy to OAK. Save a copy in drive so you can edit your own version.
This notebook and guide are heavily based on my guide on how to train YOLOv4-tiny in Darknet, so head over there if you need more details along the way.
Cloning and Installing Darknet
Ok, so the best part about this notebook is that I have hard-coded the helper repository hashes for you so you don't have to worry about all the new progress that is being made in Darknet breaking your code. Let's go!
We clone Darknet, edit the Makefile to point towards the GPU and cuDNN. And then we make Darknet. You will know that your install is successful if you see a line starting with this printout at the end.
g++ -std=c++11 -Iinclude/ -I3rdparty/stb/include -DOPENCV `pkg-config --cflags opencv` -DGPU -I/usr/local/cuda/include/ -DCUDNN -Wall -Wfatal-errors -Wno-unused-rImporting our Dataset From Roboflow
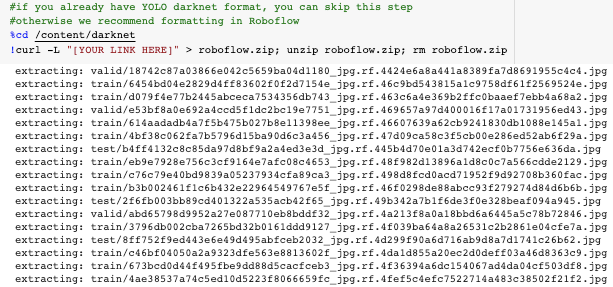
In the steps above you acquired a curl link from Roboflow. It is time to copy and paste that link in the notebook. If you jumped past that section, you can get the import curl link from the public chess dataset.
When the curl downloads you will see your dataset coming into the notebook
Next, there is some python code to route that dataset to the correct location. You can run those cells without too much inspection.
Writing a Custom Training Configuration File
Next, we write a custom training configuration file for our custom dataset. We take the base YOLOv3-tiny configuration file and make some edits from there.
max_batches will determine how long your training job runs for. This is recommended to be set at 2000 * num_classes but you can feel free to edit from there. If you are getting a GPU out of memory error at train time, increase the number of subdivisions at the top of the file.
Additionally, the network configuration needs to dynamically adjust based on the num_classes. We have written that to automatically configure in the notebook for you so you should not have to worry on that step.
writing config for a custom YOLOv4 detector detecting number of classes: 12Go ahead and take a look at the configuration file with %cat cfg/custom-yolov3-tiny-detector.cfg and make sure everything looks alright.
Start Darknet Custom Training Job
Next, we will start training the network with our custom dataset.
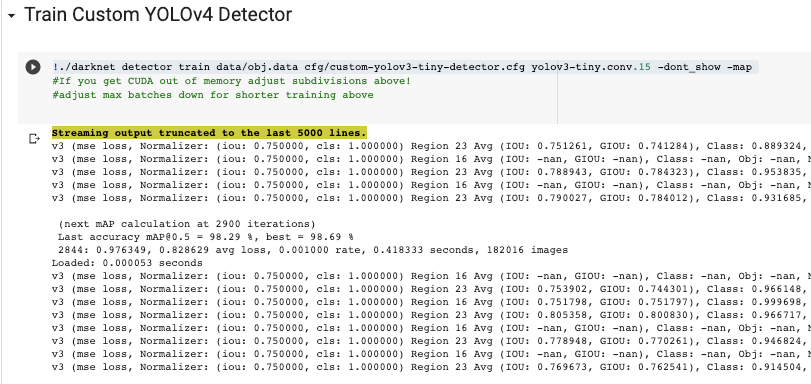
The detector will make a pass over the dataset, breaking it into batches. It will automatically tweak its parameters to best fit your data. Watch for the mean average precision metric to rise. If you are curious, here's a guide to mean average precision (mAP) in machine learning.
Infer With Custom Weights
The training job will save the best weights for your detector based on the validation set's mAP metric. We can take those weights and use them for inference on a test image. This is an important step along the way. You want to make sure your detector is in good shape before you go through the work to deploy it onto your OAK device.
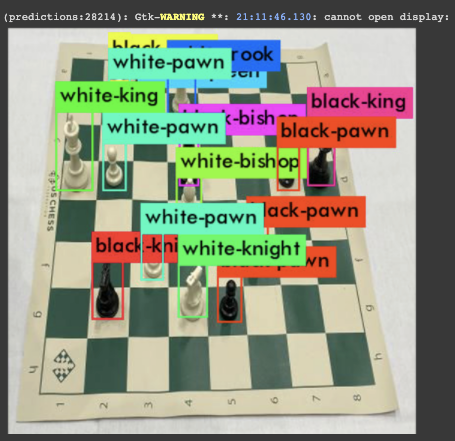
We can see here that our model has done a good job of learning to tag chess pieces on a chess board. It is ready to move forward!
Convert Custom Darknet Model to OpenVino
We are continuing in the Train YOLOv3-tiny and Deploy to OAK Colab notebook.
Darknet is a useful framework for training and research, but it is not optimized to run on the Myriad X VPU hardware that is present on the Luxonis OAK-1. So, we need to translate our Darknet model to Intel's OpenVino runtime model framework. To do so, we will first convert to TensorFlow .pb and then on to OpenVino.
Again, the commit hashes are saved so this should run smoothly for you as you apply it to your own custom model.
These steps rely on OpenVino's documentation on converting YOLO models to OpenVino.
Convert model to .pb
To convert our model to .pb we leverage the repo from mystic123. To convert, we need to point the conversion script to our weights file and the list of class names, obj.names.
Install OpenVino
Next up we install OpenVino in our notebook. This can take up to 10 minutes ⏰.
Convert .pb to OpenVino .blob
Next, we write yolo_v3_tiny.json to define some special parameters for the OpenVino conversion. Then we execute a script to convert our model to .xml and .bin. After that we post the location of those files to the OpenVino API and get back a .blob version of our model. The .blob is what we will need to take with us to the OAK for deployment. In the notebook with .tar the file and download.
Deploy Custom OpenVino YOLOv3-tiny Model to OAK Device
Now that you have your YOLOv3-tiny custom model in .blob format, it is time to put it on device!
In order to use the OAK-1, you will need to have a host system that can accept USB input. DepthAI (the deployment software environment) says that it hosts Ubuntu, Raspbian, and macOS. Windows is currently in Beta. The safest OS to go with is Ubuntu, which we utilize in this tutorial. You may need to get a new host device to with Ubuntu or Raspbian to support your OAK-1. Luxonis also offers detection options that come on a Raspberry Pi, but the OAK-1 and OAK-D are not these offerings.
Once our host device is set up, we need only plug in the OAK to the USB port to begin.
Now let's set up the software libraries to run our custom model on the OAK device.
Installing DepthAI
DepthAI is Luxonis's software library for running computer vision models. We need to install it to get our model running. The installation documents are available on DepthAI's installation guides.
Open up the terminal. In Ubuntu, run these commands to install python, DepthAI, DepthAI python requirements, and point your system to the OAK device.
sudo apt install git python3-pip python3-opencv libcurl4 libatlas-base-dev libhdf5-dev libhdf5-serial-dev libatlas-base-dev libjasper-dev libqtgui4 libqt4-test
echo 'SUBSYSTEM=="usb", ATTRS{idVendor}=="03e7", MODE="0666"' | sudo tee /etc/udev/rules.d/80-movidius.rules
sudo udevadm control --reload-rules && sudo udevadm trigger
git clone https://github.com/luxonis/depthai.git
cd depthai
python3 -m pip install -r requirements.txt
To ensure your model is running, run:
python3 test.py
This should start up a model with the default COCO (common objects in context) weights. This model can detect 80 common objects. Time to specialize it to our custom objects!
Running YOLOv3-tiny on DepthAI
The available models are present in the DepthAI folder under resources/nn/. The model we are interested in replicating is in resources/nn/tiny-yolo. Right now, there is a simple mask/no-mask detector in there. Kick it off with:
python3 test.py -cnn tiny-yolo
Try on your mask and see if it detects it!
Running a custom YOLOv3-tiny on DepthAI
Now we want to customize the YOLOv3-tiny model with our own weights. Make a copy of the resources/nn/tiny-yolo folder to resources/nn/tiny-yolo-copy so we can revert to it if need be. In the resources/nn/tiny-yolo folder you will see two files, a .blob file and a .json file.
Start by overwriting the .blob file with your own custom .blob file downloaded from the notebook.
Next, overwrite the .json file with your class names.
Now, major hack alert! The depthai/depthai_helpers/tiny_yolo_v3_handler.py file has hard coded three classes in there. Change this file to have your select number of classes. Furthermore, we need to edit the neural net output size to accept additional classes, if your custom dataset has them. We do this by increasing the second output shapes for both outputs in the decode_tiny_yolo method and increasing the second output shapes for both outputs in the tiny-yolo.json file. For the chess dataset, with 12 classes, we needed to increase this number from 24 to 51. You can find this number by raising and lowering the number until you don't get an error. We will be updating this portion of the tutorial as a more flexible solution is encoded.
And there you have it! Once you have customized tiny-yolo.blob, tiny-yolo.json, and tiny_yolo_v3_handler.py run:
python3 test.py -cnn tiny-yolo
and you will see the OAK-1 device detecting live at 15FPS on your custom objects.

From here, you may need to adjusttiny_yolo_v3_handler.py slightly to process detections as you see fit. Perhaps you want to post them directly to a cloud bucket or send notifications via an application. The rest is up to you 🚀
Conclusion
Congratulations! In this tutorial, you have learned how to go from unlabeled images to a trained custom computer vision model running live at 15FPS on the Luxonis OAK-1 device. This is an extremely powerful feat considering the cost and scalability of this hardware.
As always, happy detecting.